Who can access this feature?
- This feature is supported on any team or plan. You can create projects both for teams or for private use.
- Only Super Admins, Admins, and members of teams can make changes to projects.
Overview
How to create a new Cloud project step by step?
Step 1. Select the project type
Click the New button on the project homepage, and choose to set it as a Private or Team project.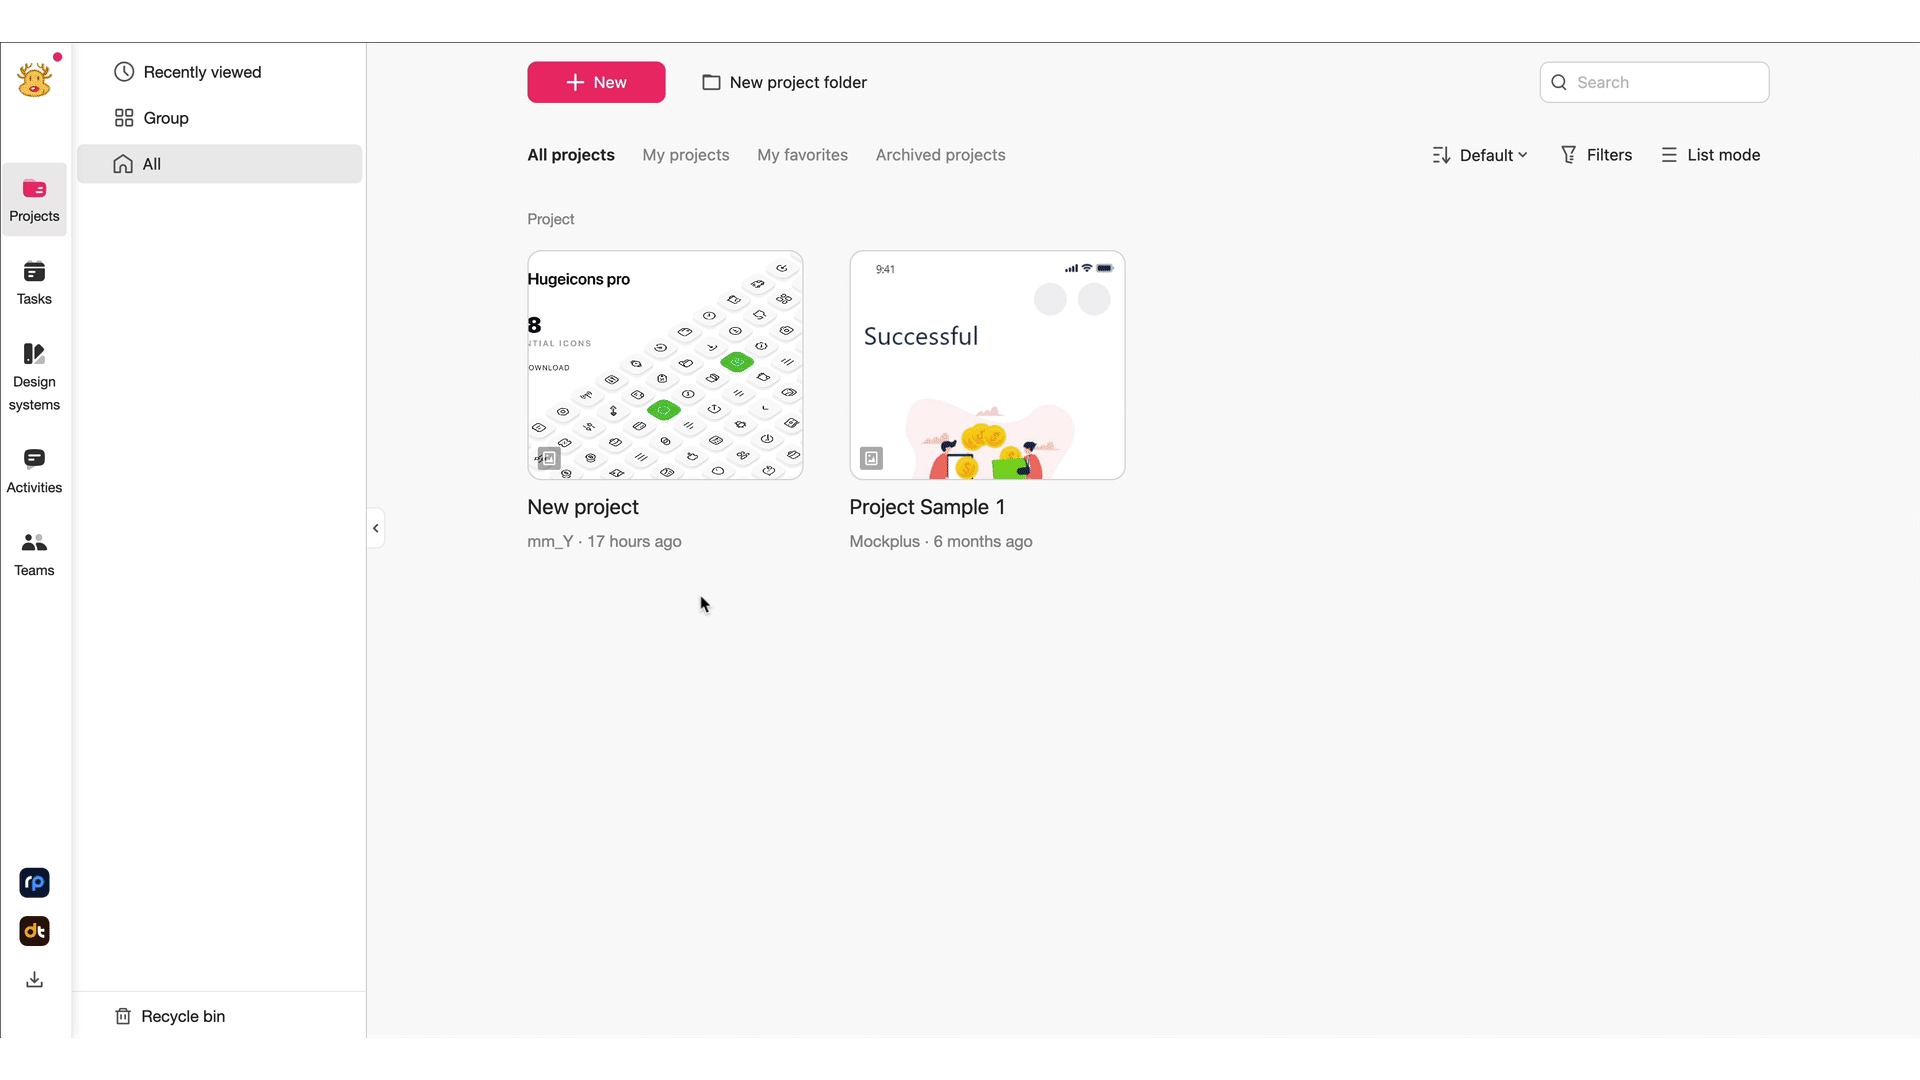 Private project: this project is only available to project members.
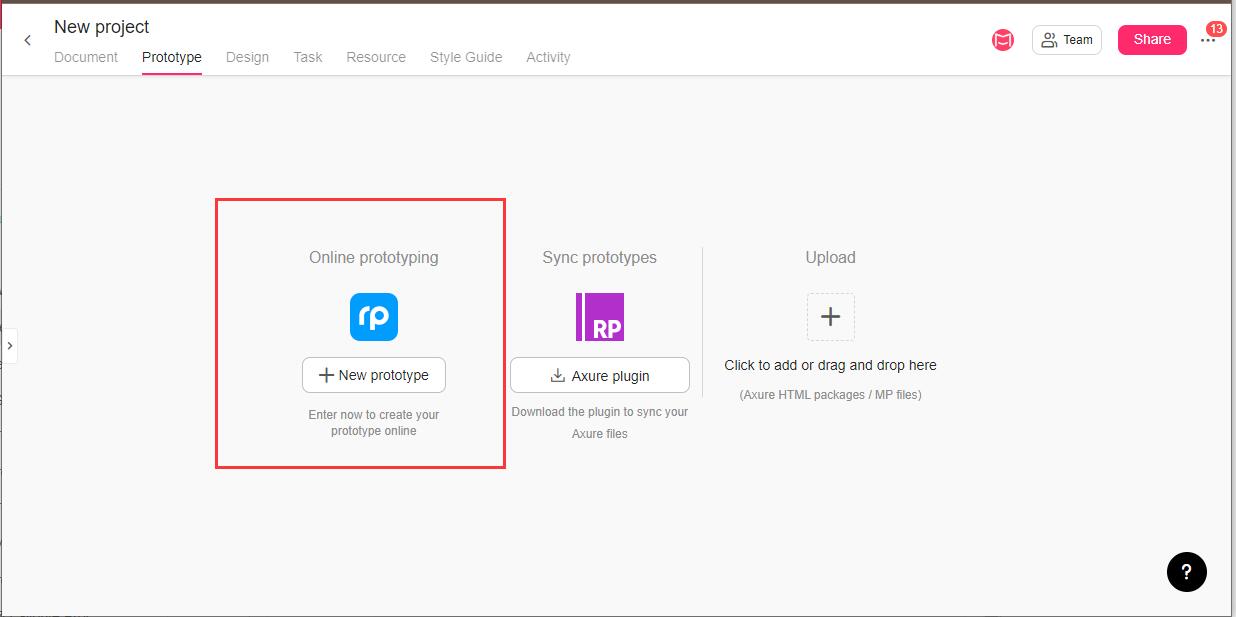
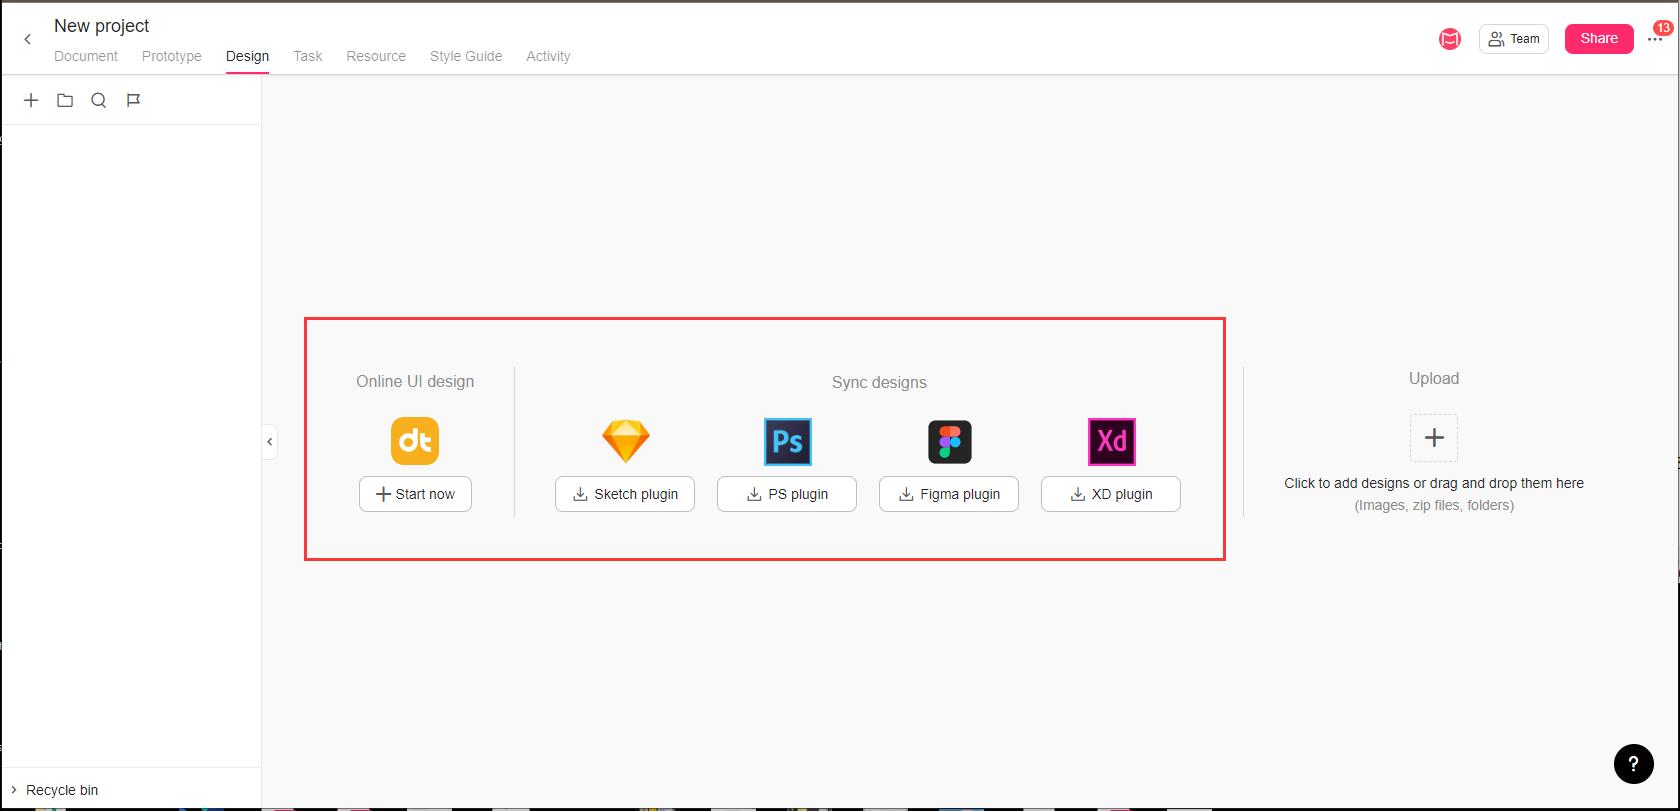
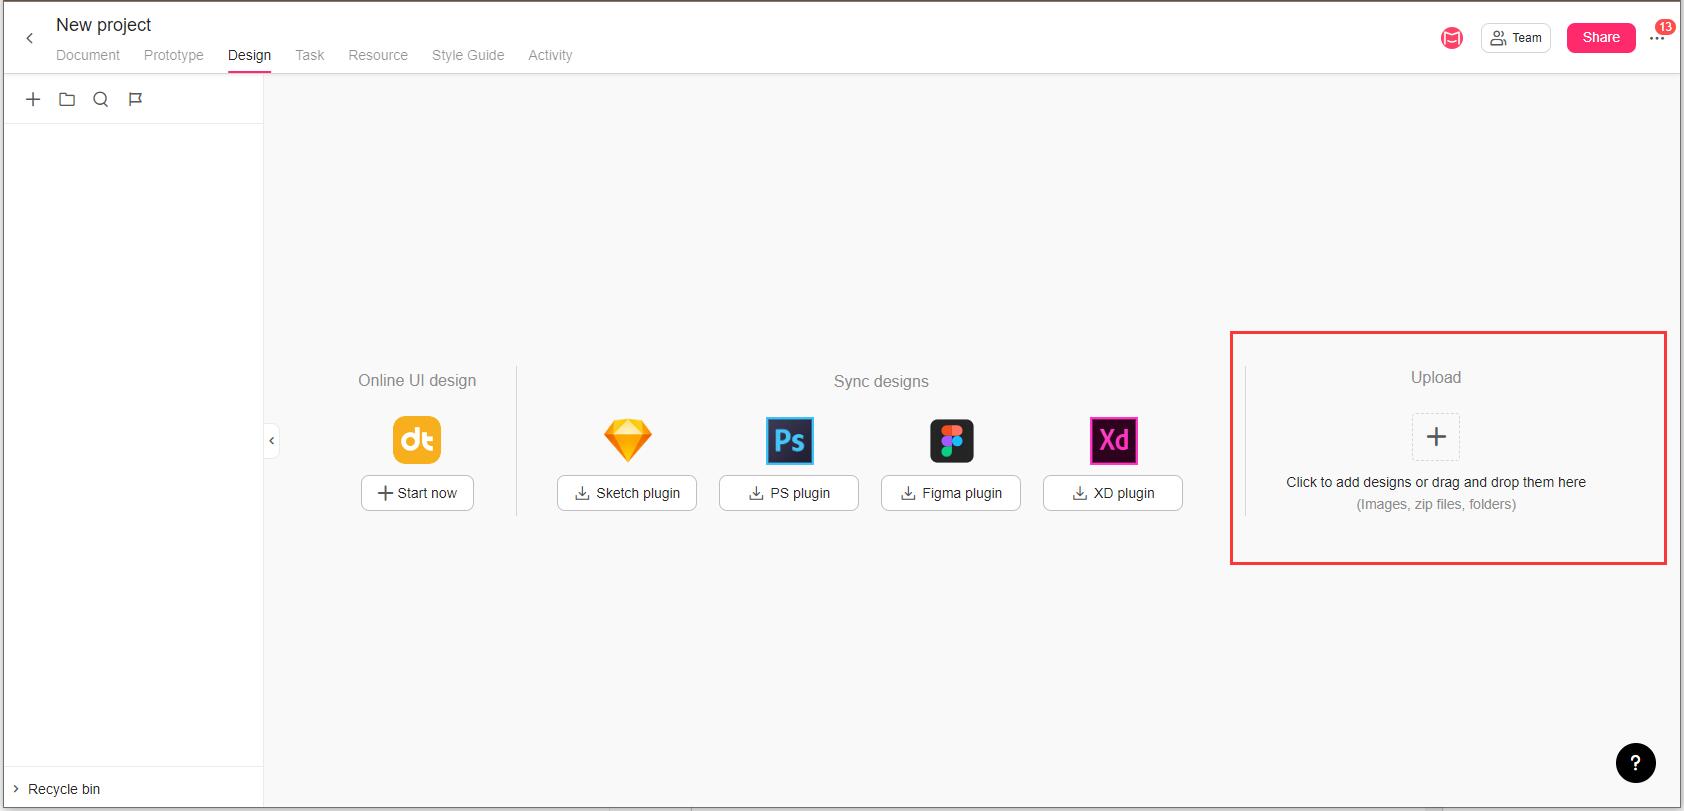
Step 2. Choose the handoff type
And then, select whether you want to start with a Prototype handoff or Design handoff project.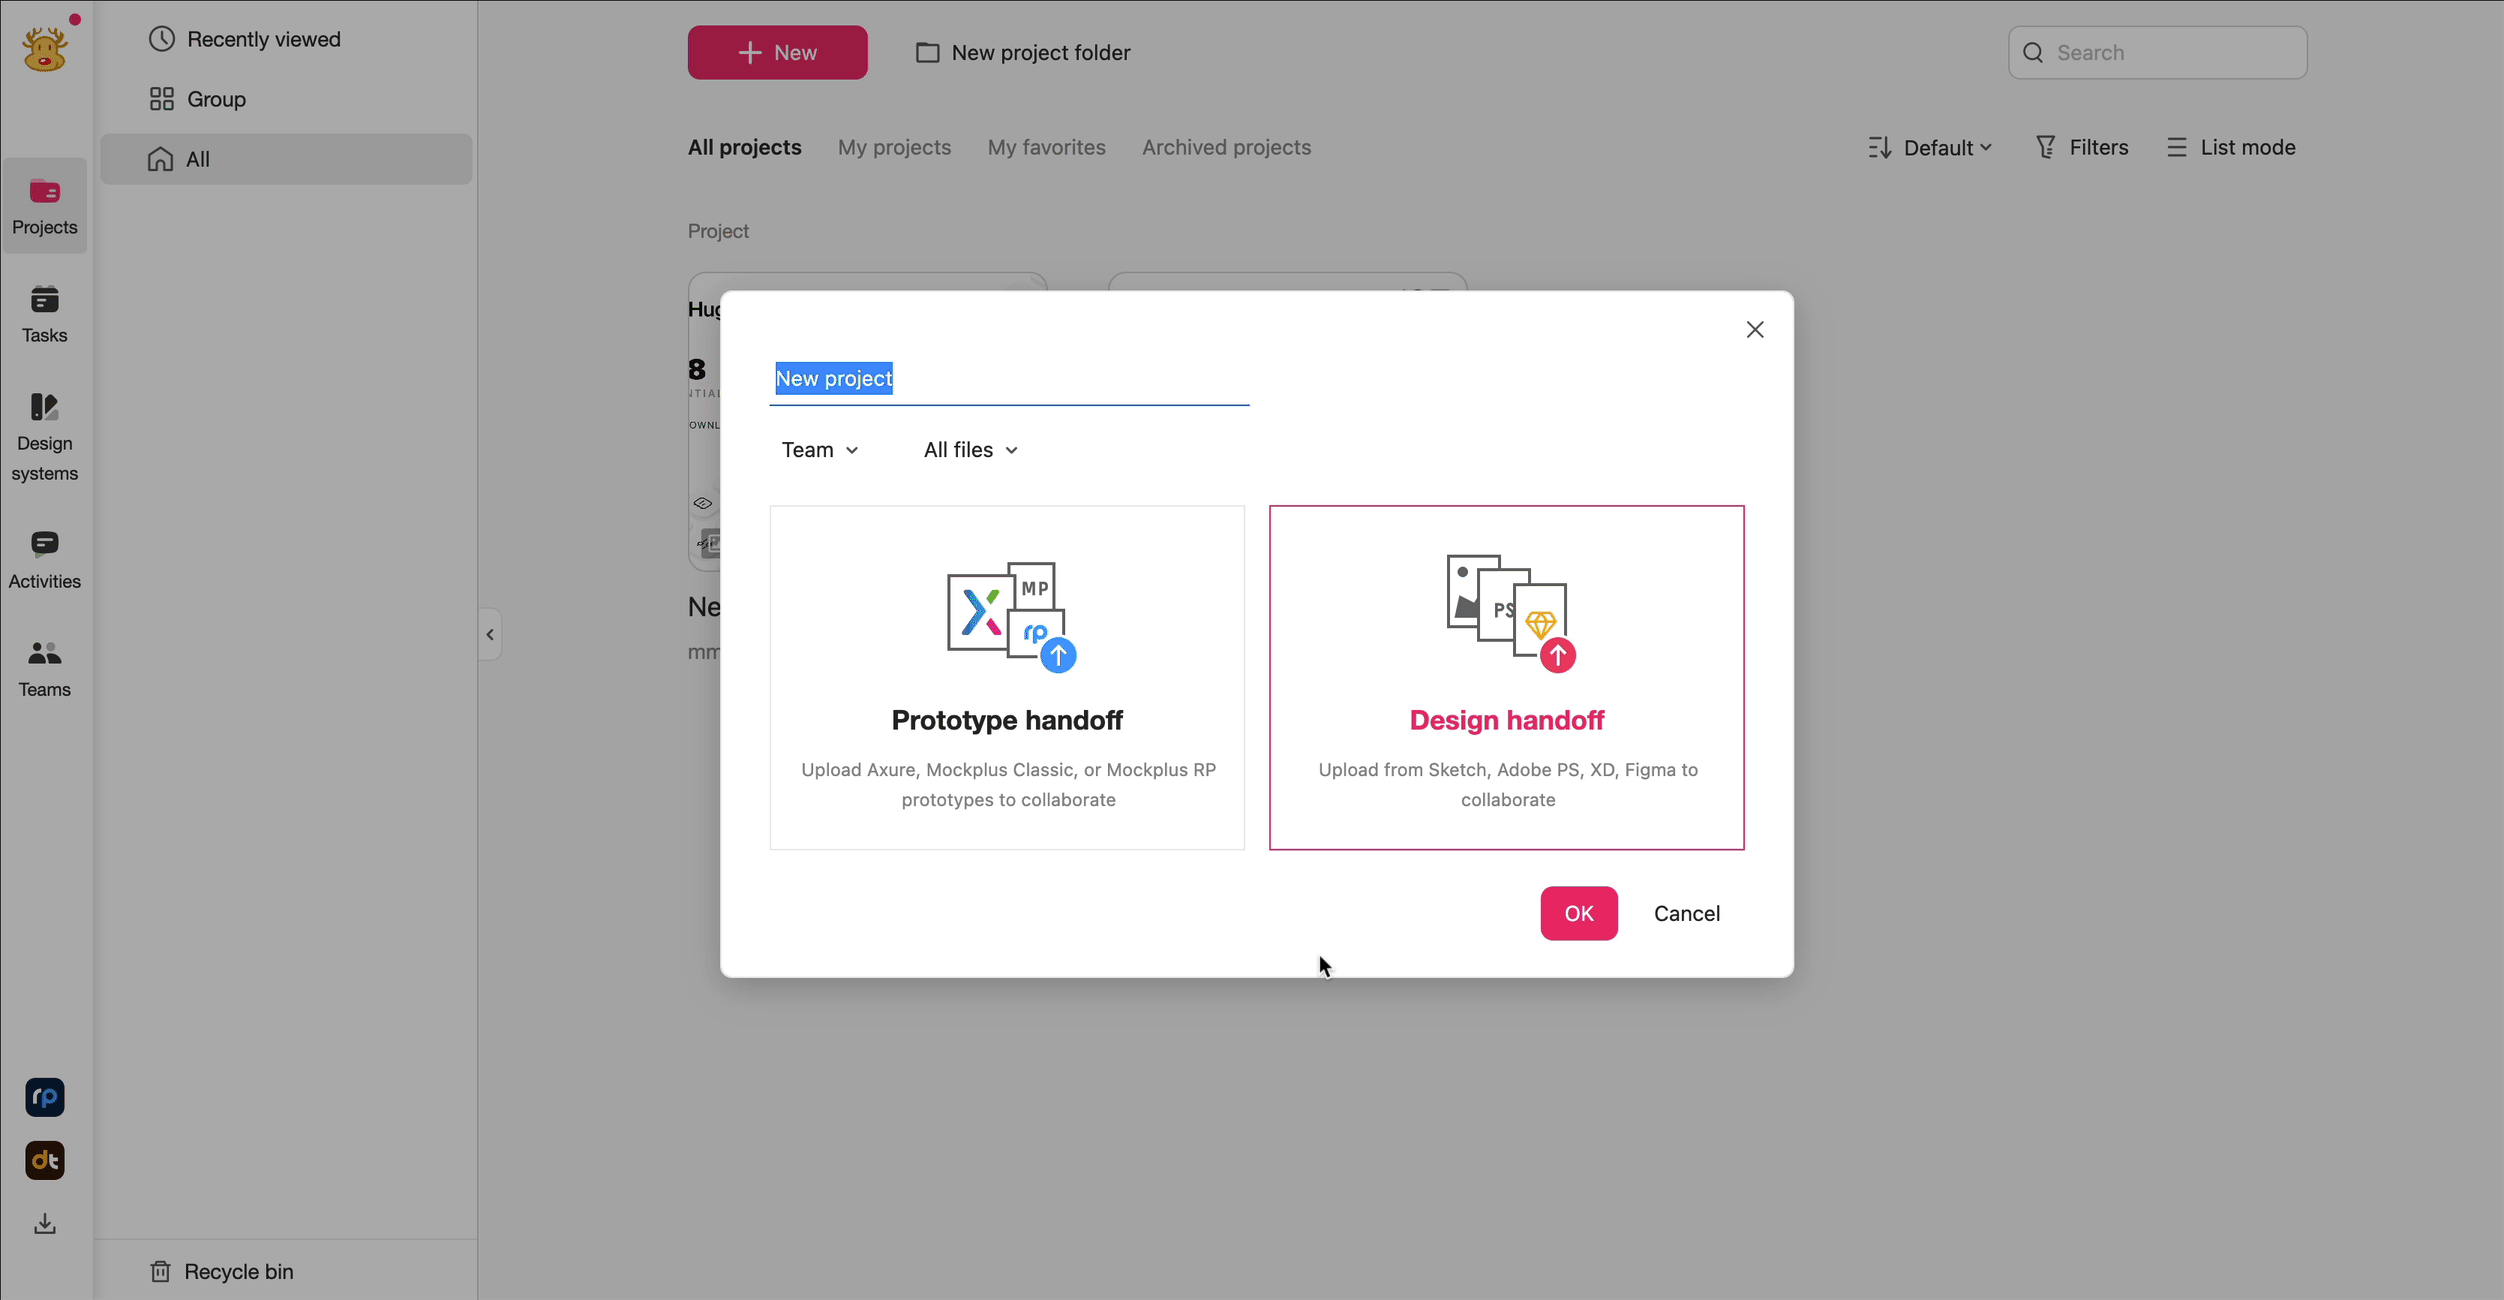
A: If it is an Axure file, download the Axure plugin to import it or click to directly upload your Axure HTML packages. ( Read more to import prototype files from Axure.)
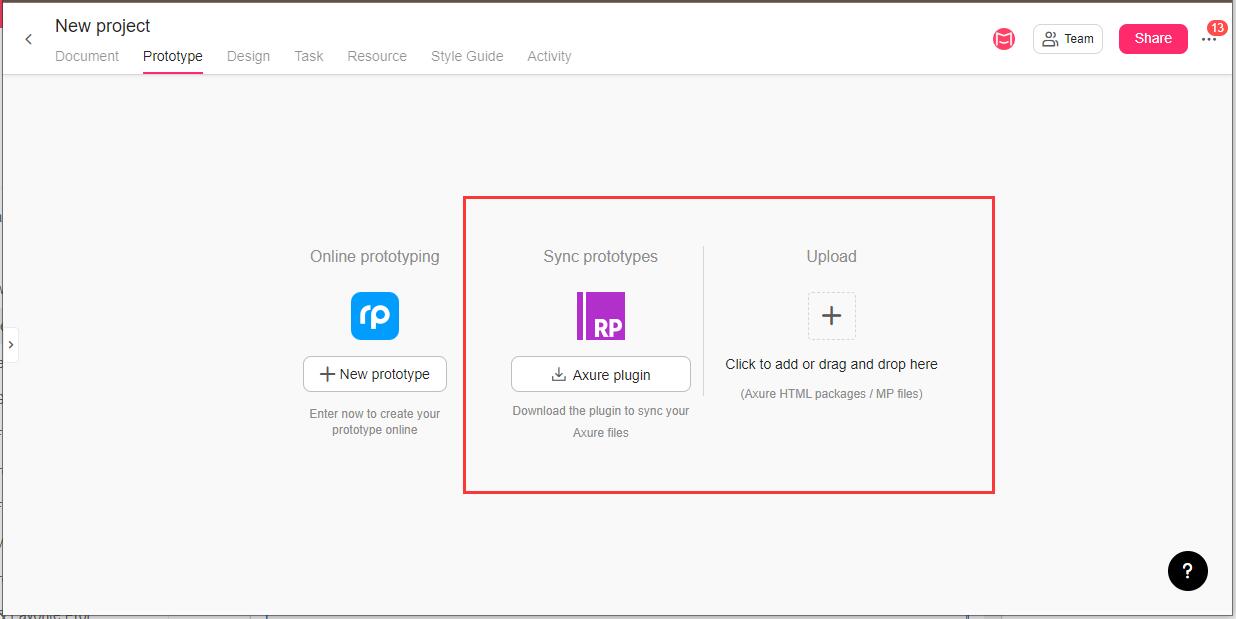
B: If it is a Mockplus RP file, simply navigate to Mockplus RP and publish your prototype into Mockplus Cloud.
Mockplus RP online prototyping
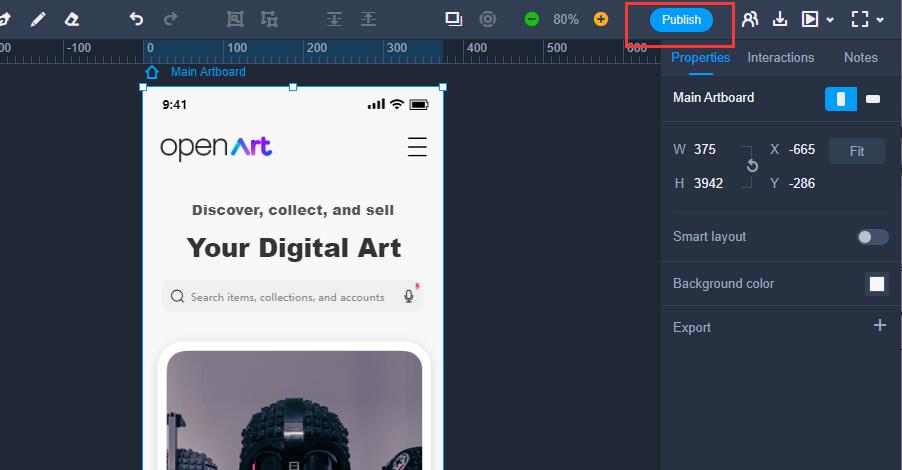
In addition to importing files from popular design tools like Figma, Axure, Sketch, and more, Mockplus offers a unique rapid online prototyping tool - Mockplus RP - which helps to create, test, and iterate web or app prototype ideas in just minutes.
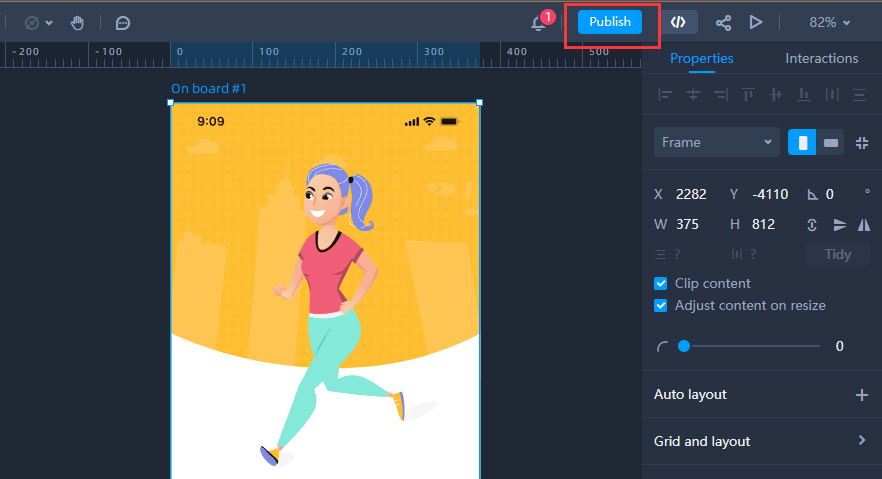
With Mockplus RP, users can easily bring their web or app ideas to life using simple drag-and-drop actions. Once the prototype is ready, a single click on "Publish" will send it to Mockplus Cloud for instant sharing, review, feedback, and developer handoff.
Mockplus DT UI design
Mockplus also offers a professional UI design tool - Mockplus DT - that enables your entire team to co-work on the same UI design project in real-time.
All the core features you can get in Figma are available in Mockplus DT, making it easy to streamline your entire product design and development process.
With Mockplus DT, you can also publish your completed UI projects to Mockplus Cloud for quick review, feedback, and seamless handoff.