


Pop-ups and content switching are among the most frequently utilized microinteractions in prototype design. Both of them can effectively guide users through prototypes and improve their overall satisfaction.
As a powerful and easy-to-use prototyping tool, Mockplus RP offers many easy ways to create those interactions and effects, such as using the content panel component to create a carousel.
To offer more advanced features and better user experience, Mockplus RP never stops and updates frequently.
Today, let's introduce a new killer component - the Dynamic Panel, perfect for making content switching. It works pretty much like the content panel but is much easier to use. I bet you'll love it. Ok, let's get started.
Why should I use the Dynamic Panel?
As we all know, content switching is a versatile technique that can be used in prototypes to achieve different effects, including creating carousels or changing the content of a specific area. Usually this involves preparing and placing all the relevant information, such as images, texts or other content elements on the canvas, and then adding interactions and animation to the prototype to enable content switching.
As you gather and place various elements on the canvas, the prototype can be pretty cluttered and also make it hard and unclear to add interactions. This is where the Dynamic Panel shows its magic. It offers a container to place and manage all the relevant content elements for content switching. Say goodbye to the cluttered and crowded canvas.
Moreover, you can also directly add interaction and animation to the container to enable content switching. It's super clear and easy.
How to use the Dynamic Panel?
Can't wait to try this amazing component? Let me show you how to use it step by step.
Create a Dynamic Panel
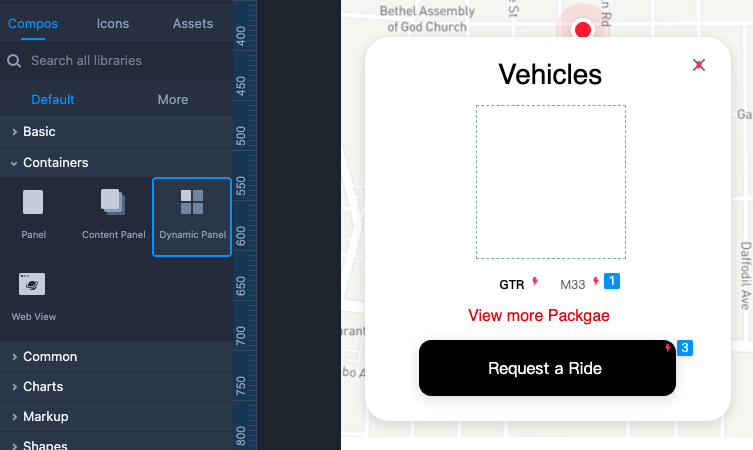
Find the Dynamic Panel in the container of the default component library, and then add it to your design by dragging it onto the workspace.
Edit the content
Double-click the dynamic panel and you will enter its editor interface.
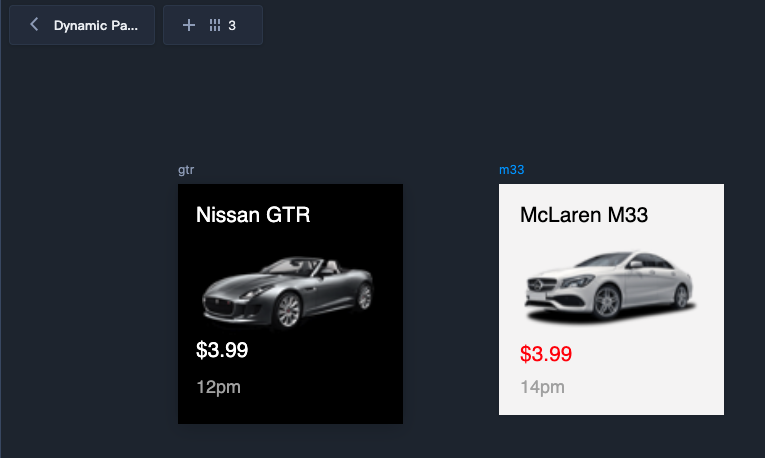
Click on the "Add" button in the top left corner to create multiple boards for the dynamic panel, and place different content on each board.
As you can see, all the boards you added have the same dimensions. And changing the dimensions of any individual board will also result in synchronized changes across all the boards. This is because, in most cases, the content within the dynamic panel is uniform in size to ensure an optimal display effect. This helps prevent situations where the container is excessively long or content is incompletely displayed.
But in some cases, when you do need to present content of different sizes, you can simply add a panel to the boards to create a scrolling area.
The dynamic panel also supports multiple nested layers. It means you can continue to add dynamic panels within a dynamic panel to achieve more complex hierarchy of content.
Also, when a dynamic panel contains multiple nested layers, you can navigate the hierarchical structure and identify the current layer from the breadcrumbin in the top left corner.

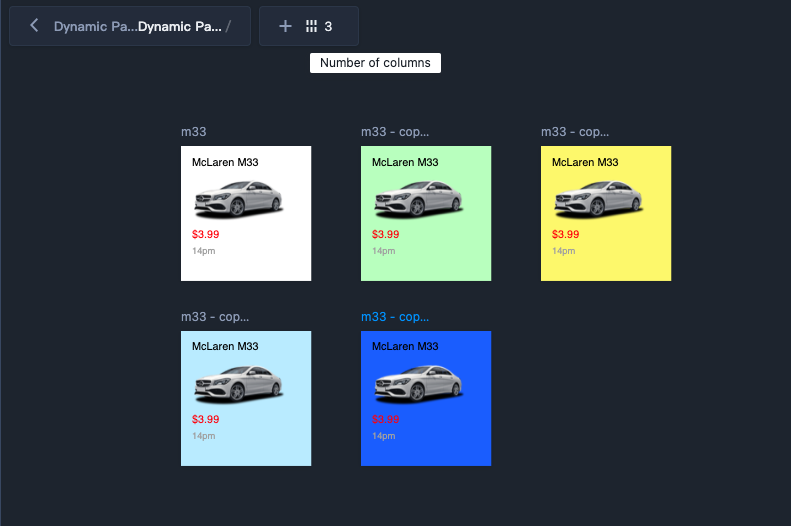
When there are multiple boards, you can also change the number of columns to better display and manage them.
Manage the content
Next, let's get to know how to manage all the content.
First, you should know the order of all the boards within a dynamic panel is corresponding to its display order during the presentation. To change the order of boards, you can select a board and quickly adjust its order by dragging. Alternatively, you can use the options in the top right corner of the board, including "Move to Front," "Move up," and "Move down" to change its order.
When you no longer need some content, you can select the board and use the delete key to remove it.
Add interactions
Once the content is all set, it's time to add interactions to the dynamic panel and enable the content switching.
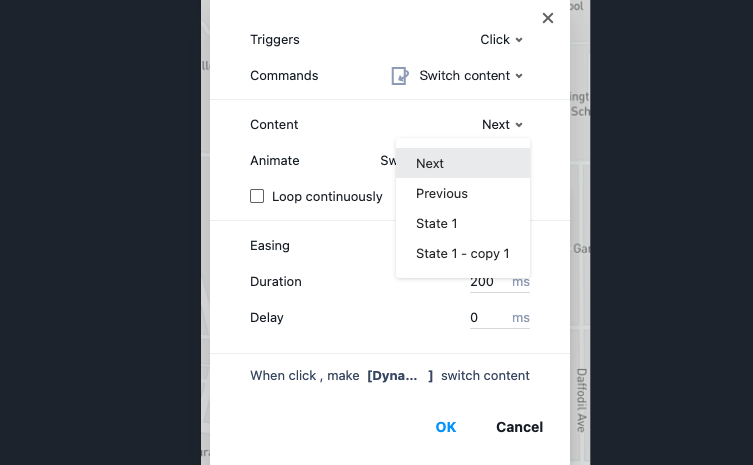
First, you should select the dynamic panel as the target for the interaction, then add a trigger, command, duration or delay time to further define your interaction. Here we are making content switching, so we need to set the command as Switch Content. You can also freely set the specific board to switch to each time or simply choose "Next" or "Previous" to show content sequentially following the order of all the boards.
Dynamic Pannel VS Content Pannel
For those familiar with Mockplus RP, you may notice that dynamic panels and content panels seem to serve similar purposes. So, what are the differences between Dynamic Panels and Content Panels?
In essence, both dynamic panels and content panels are used to create content switching, but the key difference lies in how they manage all the content.
To create content switching using content panels, you have to place content on sub-artboards, which can make it more complex for managing or creating new content. For instance, what you often encounter and find unfavorable is that when you copy content, its sub-artboard is not included. On the other hand, the boards within a dynamic panel are directly linked with the content on it, allowing you to copy content and its boards together easily and also synchronously modify the dimensions of all content.
While the content panel is still provided alongside the dynamic panel, mainly due to its earlier release and the familiarity of some users with it, as well as the fact that users still have existing projects that utilize it, in most cases, we highly recommend you to use dynamic panels for content switching.
That's all for today's overview of the dynamic panel. If you have any questions about the dynamic panel or any other feedback while using Mockplus RP, please don't hesitate to contact us.