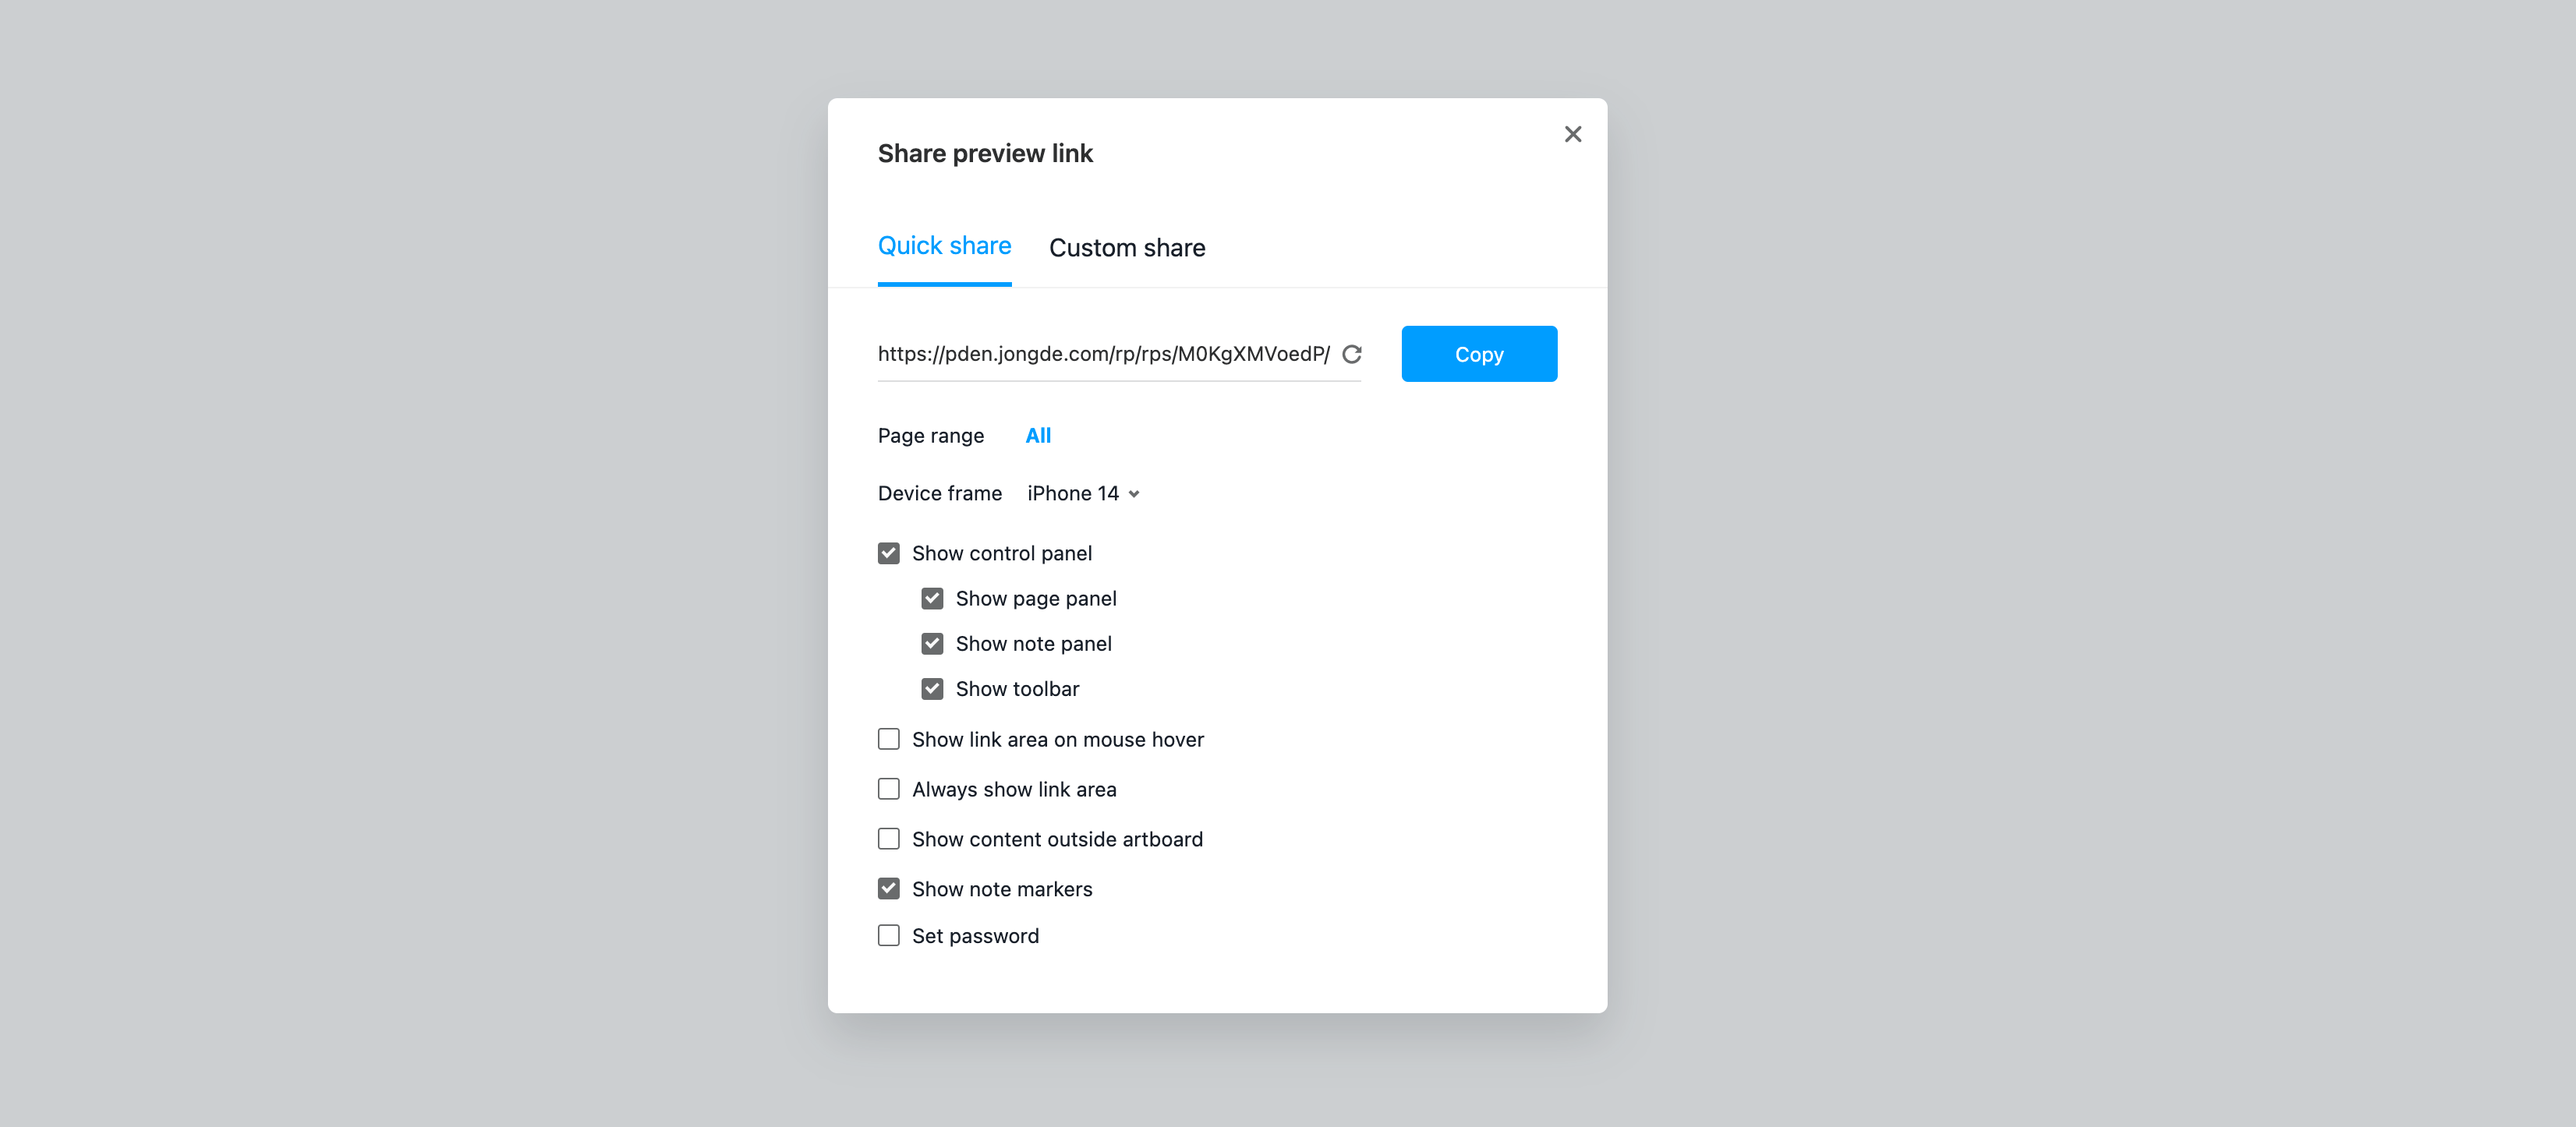
In Preview mode, you can change the settings on the navigation bar.
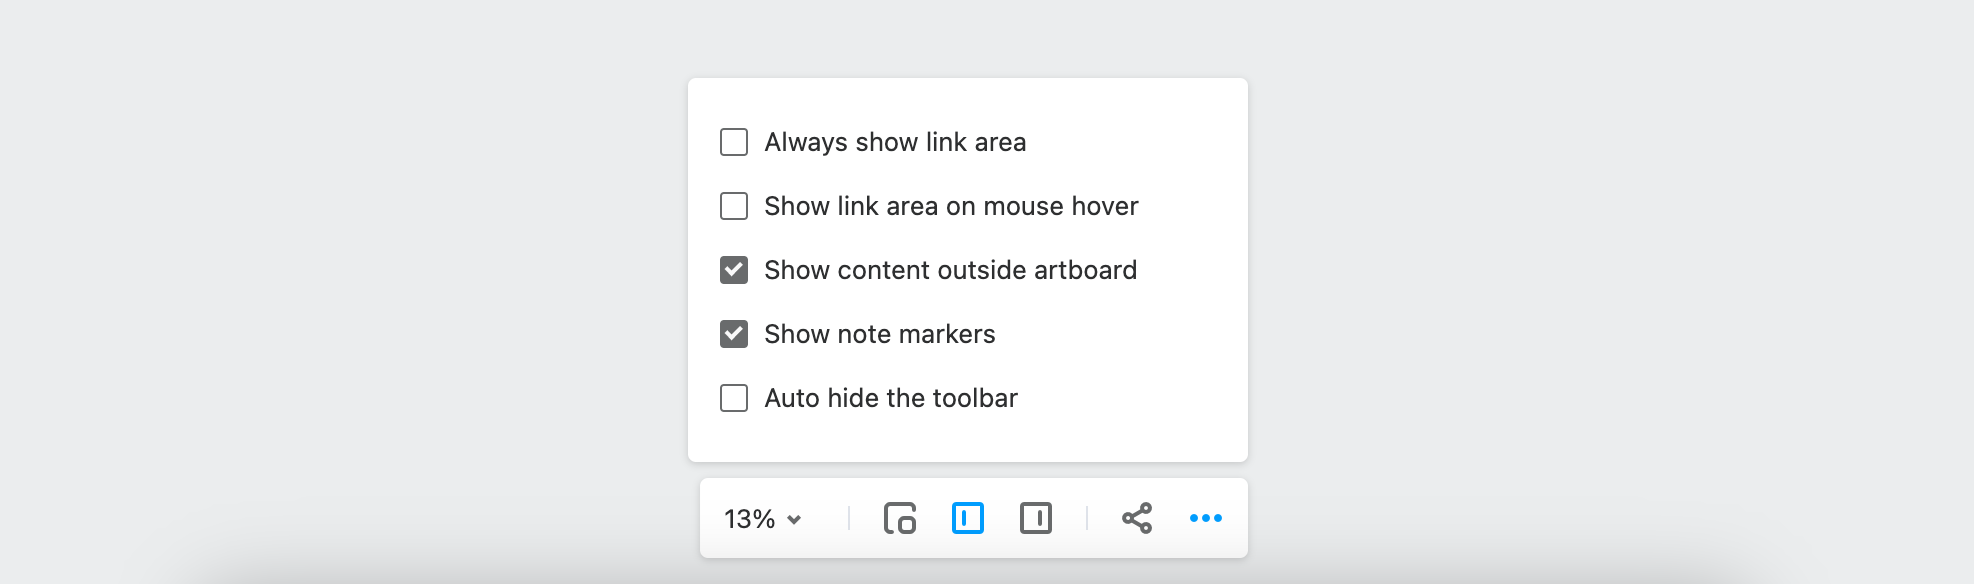
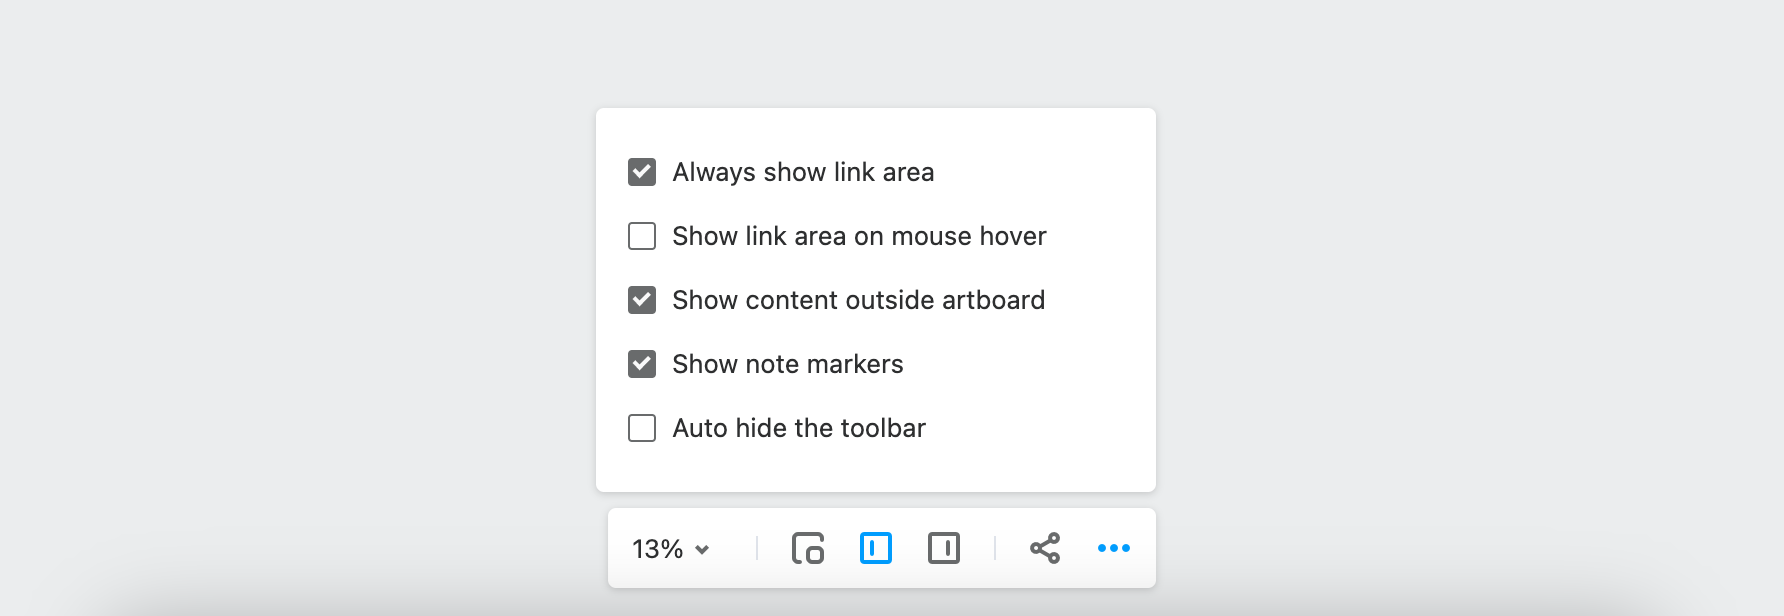
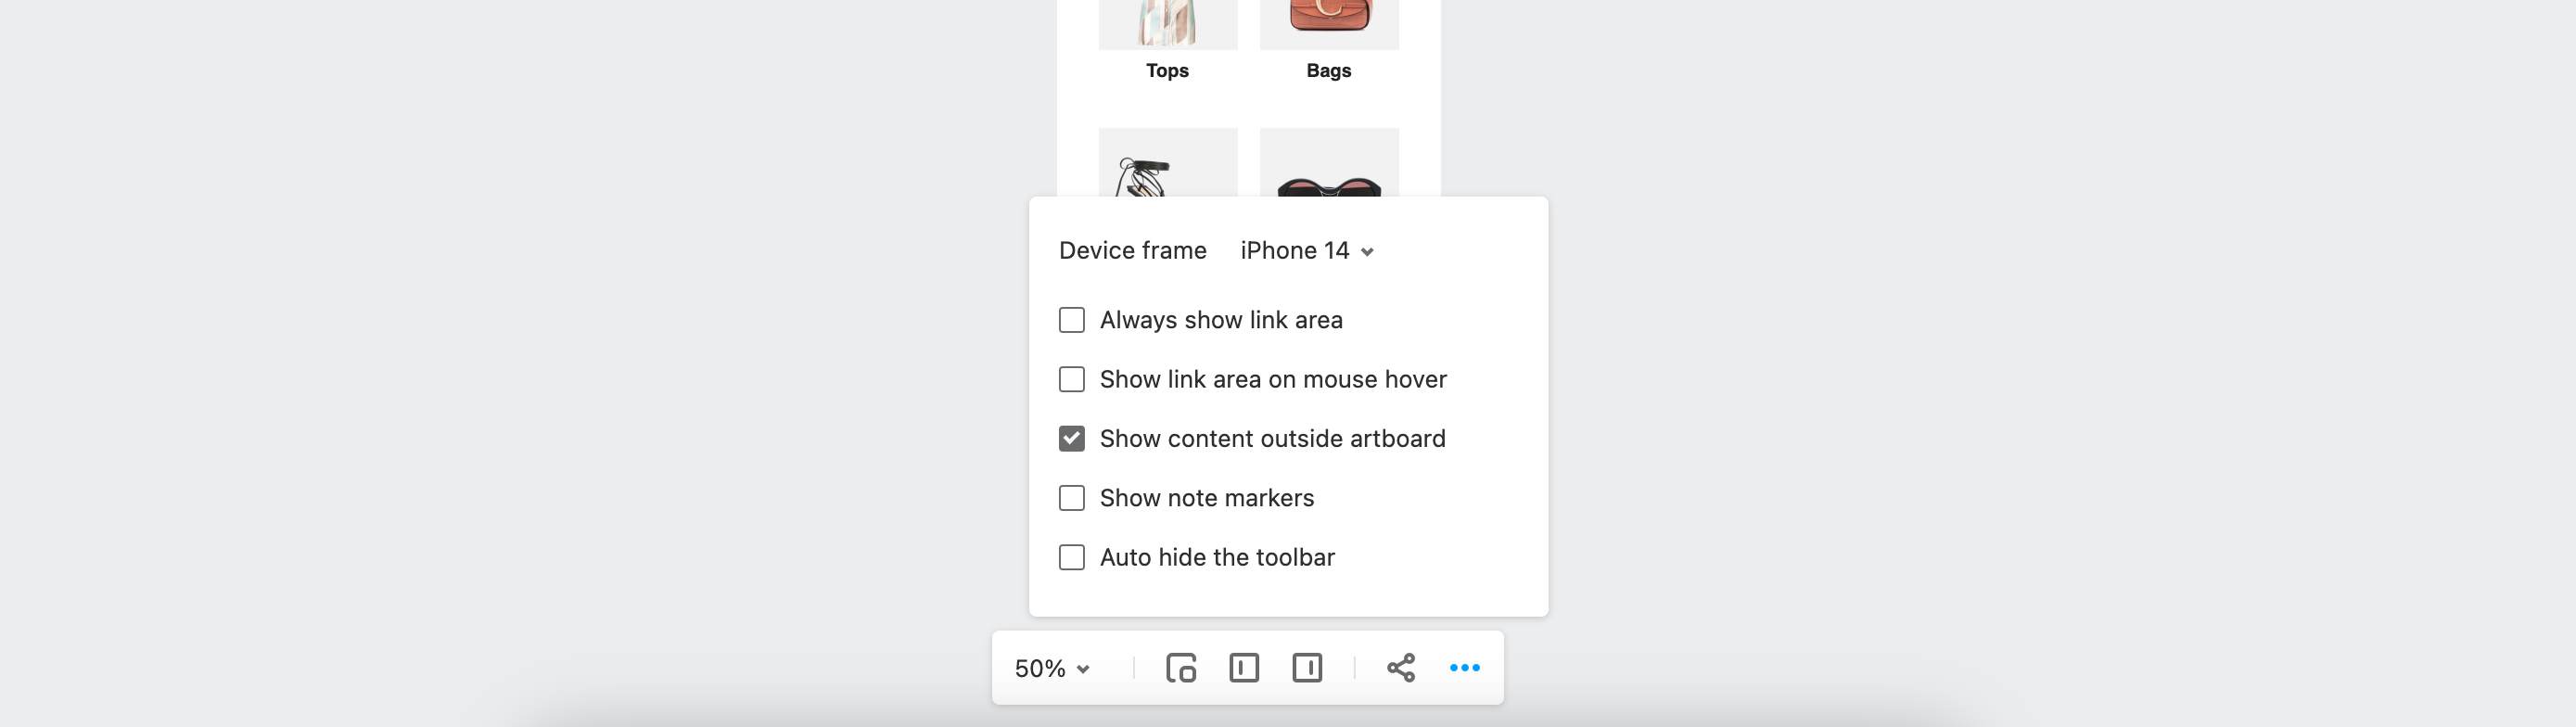
Show Link Area
The “link area” is where you can trigger interactions. There are two options available for locating the link area during a presentation:
You can check "Always show link area" so that it will always be highlighted.
You can check "Show link area on mouse hover" so that the link area will only be highlighted when the mouse hovers over that component.
Fit to screen
If you select "Fit to screen," the size of the preview area will adjust automatically to fit the screen size of your PC or mobile device, ensuring that everything will be displayed properly.

Device Frame
You can choose “Device Frame” to adjust the device frames of your prototype to make it easier to test how it will behave on different devices (iPhone X, iPhone, Android, Pad). But note that this option is only available for mobile and tablet projects.
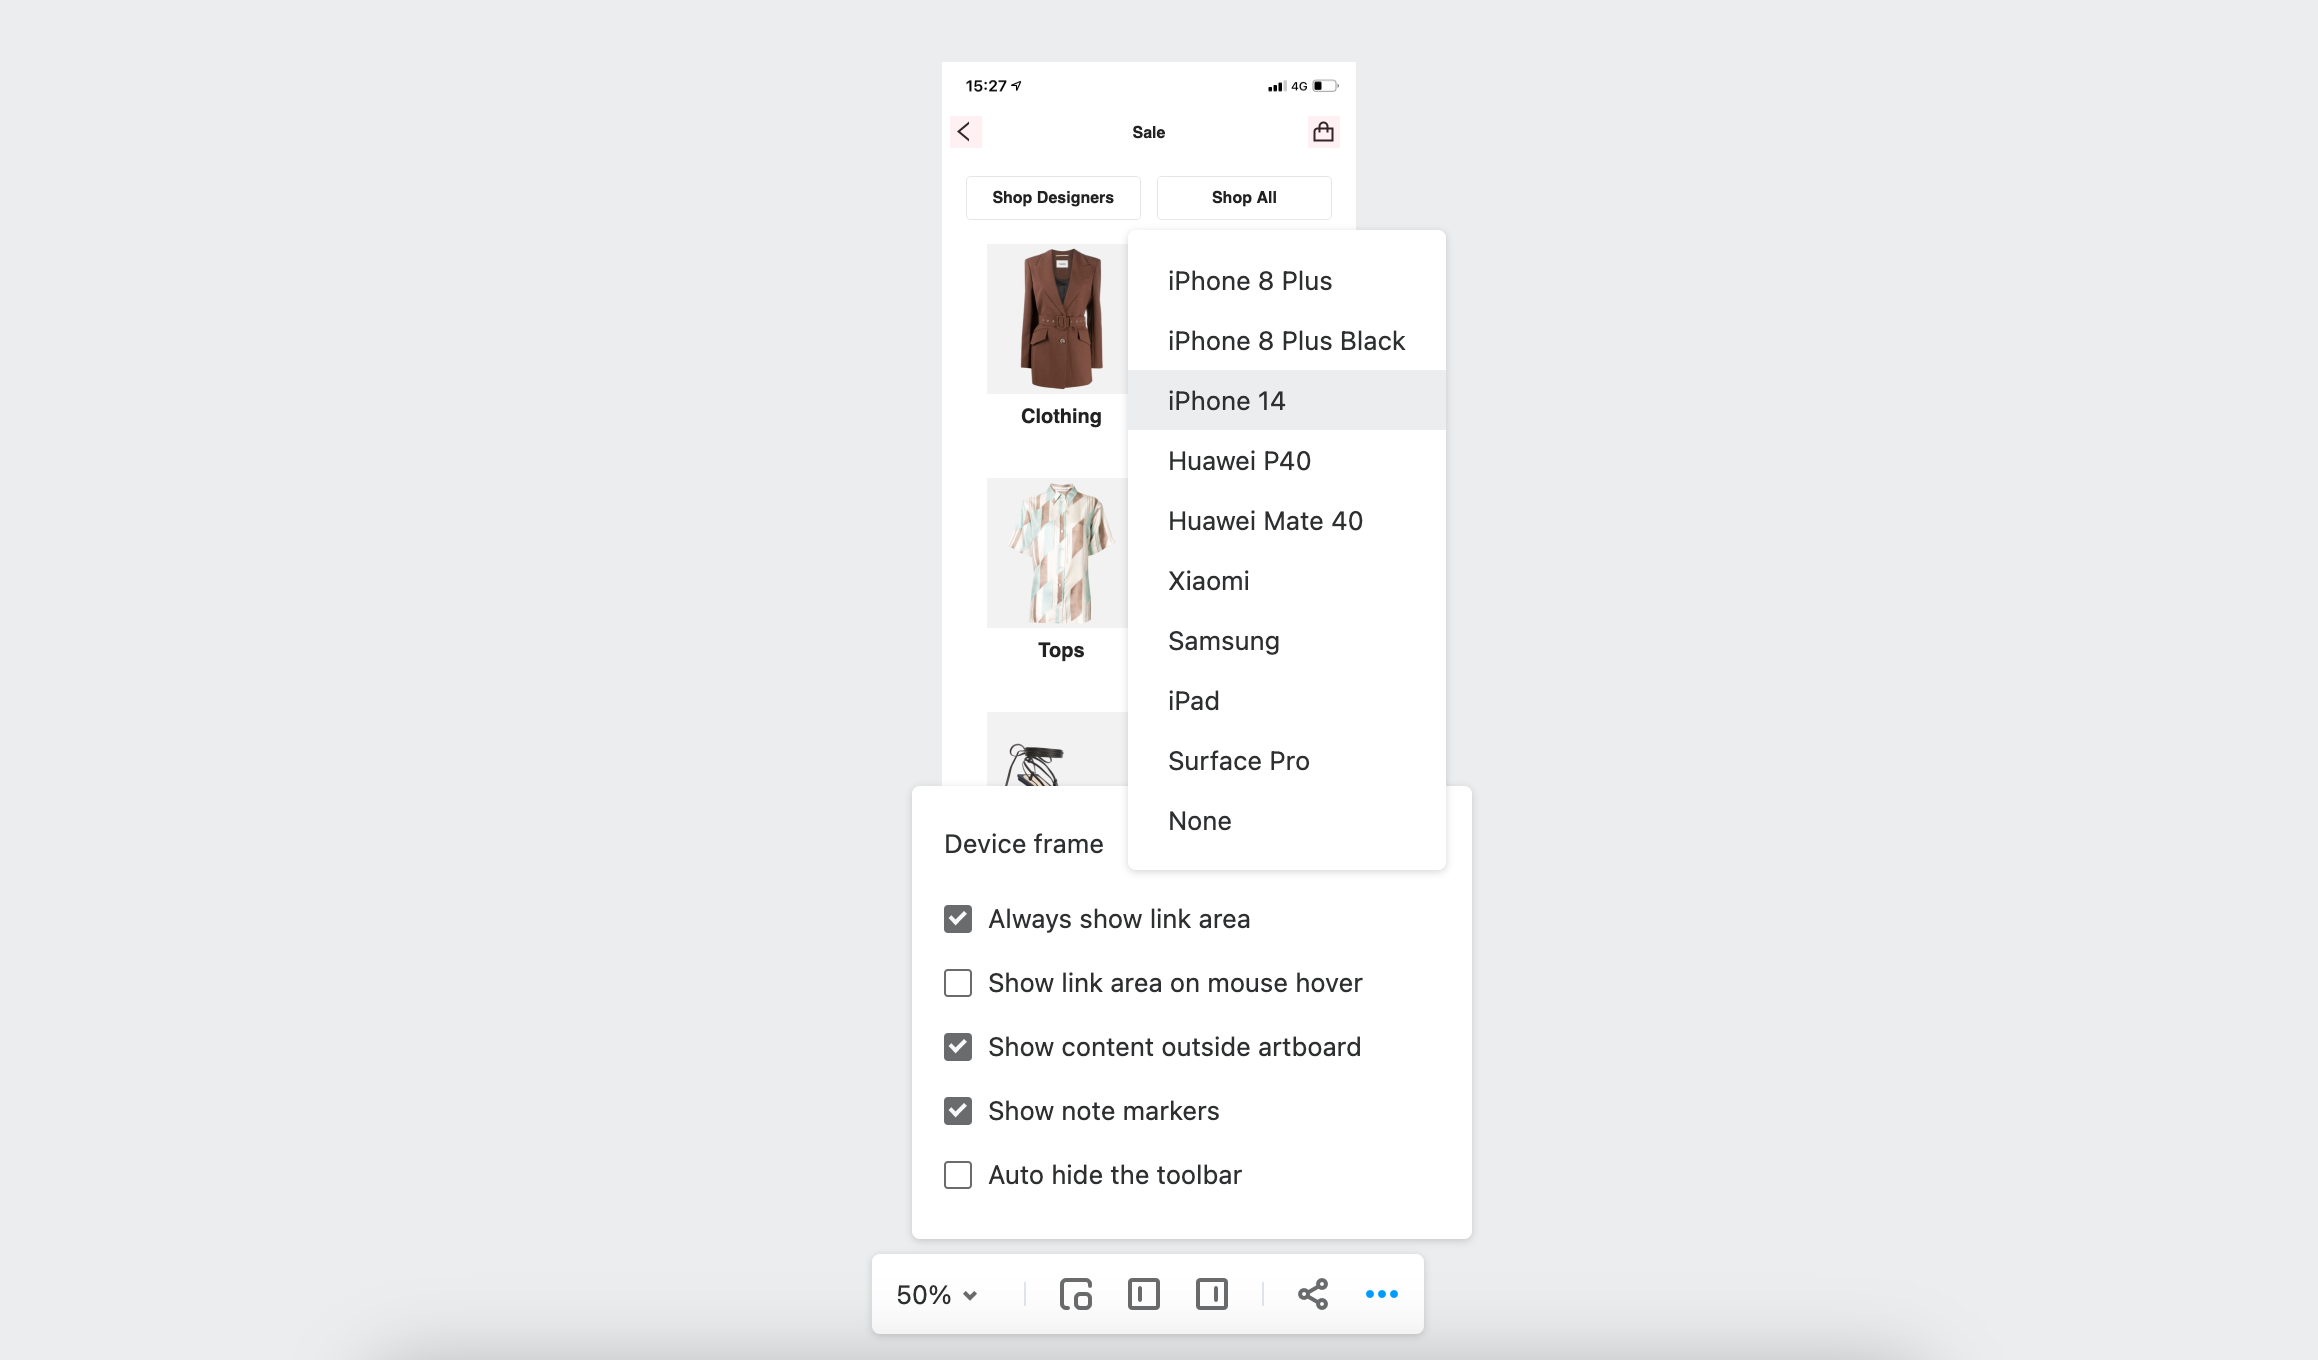
Show Content Outside Artboard
When "Show content outside artboard" is checked, all the content outside the artboard becomes visible when previewing. You can use this function if you want to attach text description or commentary to your prototype and see it in Preview mode. You can write the description outside the artboard and then combine it with the prototype in the editing mode.
Note that when you enter this mode, the artboard will become tiled. For mobile projects, the device frame will be removed to ensure that you can link the description and the related design together.
Encrypted Links
When generating a link to your prototype, check "Set Password" and set the password to restrict access to your prototype. Having this done, click "Copy" and the newly generated link will be copied to the clipboard together with the password.