Create Private or Team projects
Set different project access permissions
Share projects via a link
Manage projects using project folders
Move projects and project folders
Delete and restore projects and project folders
Invite and manage project members
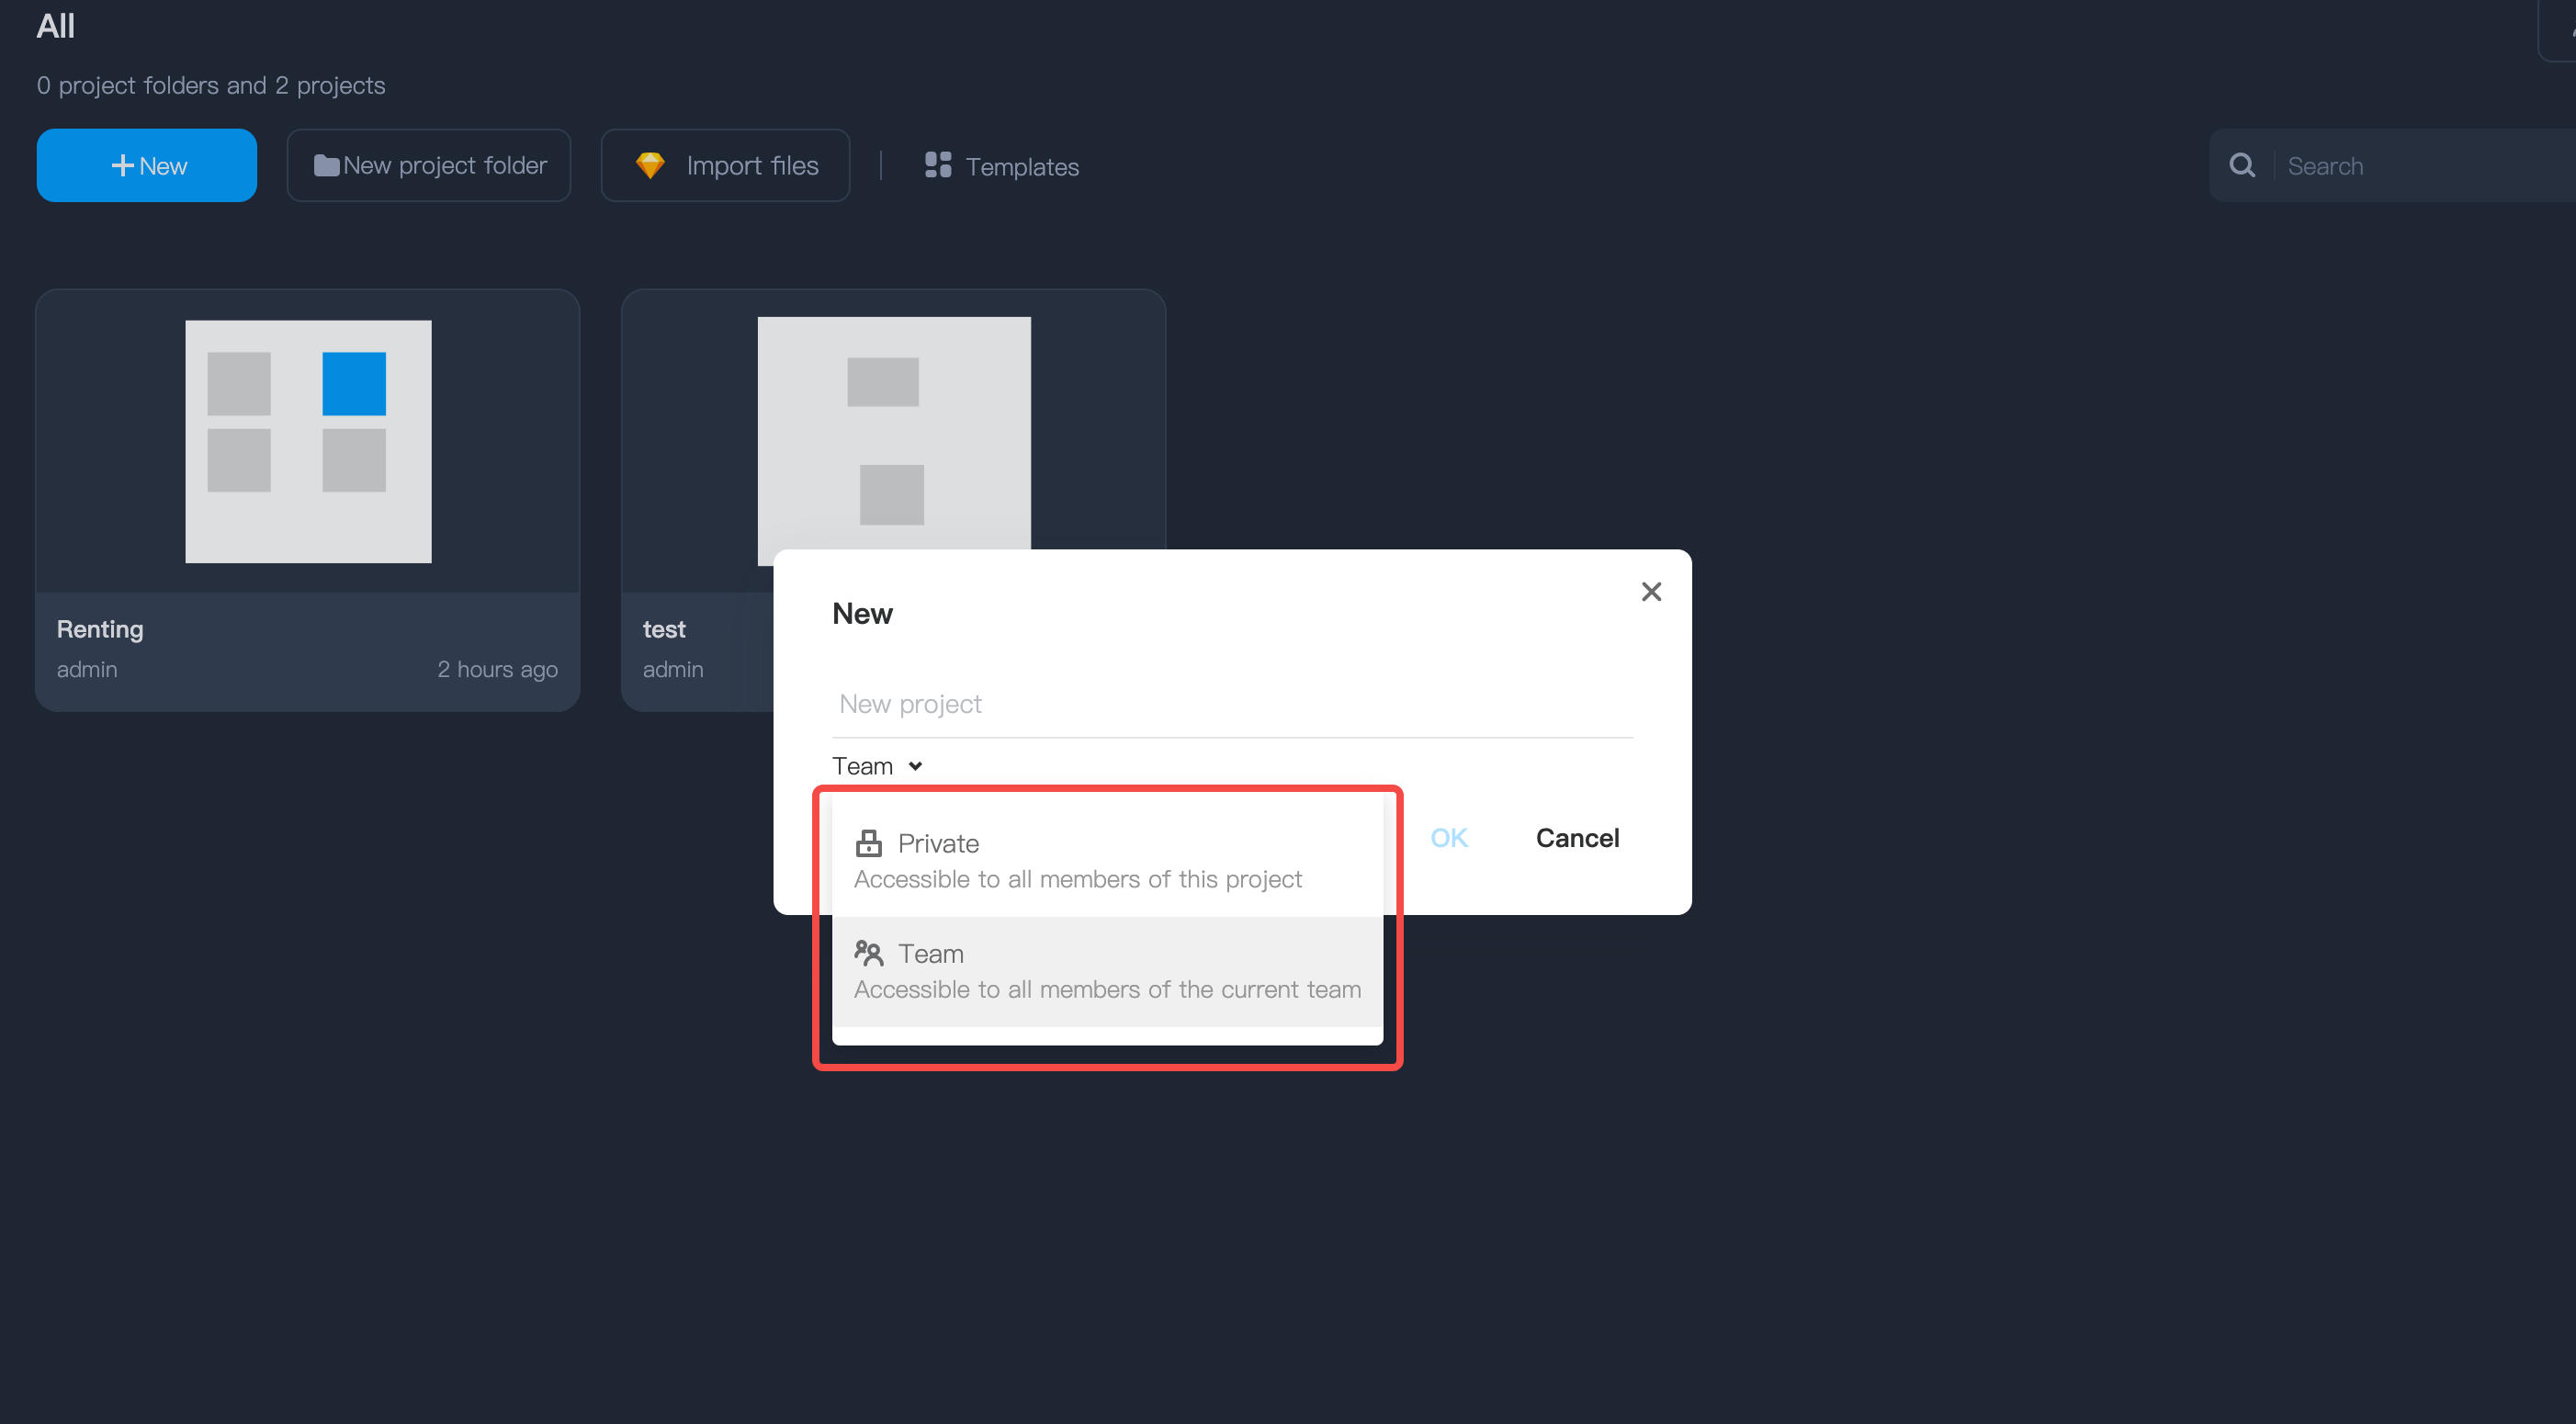
How to create projects?
Click on the "New" button in the top left corner
Name your project and choose a "Private" or "Team" project type
Click “OK” to confirm the creation
How to choose the right project Type?
When creating a new project, ensure to select the right project type.Private projects: Only visible and accessible to the project members.
Team projects: Visible and accessible to all members of the team where the project is located.
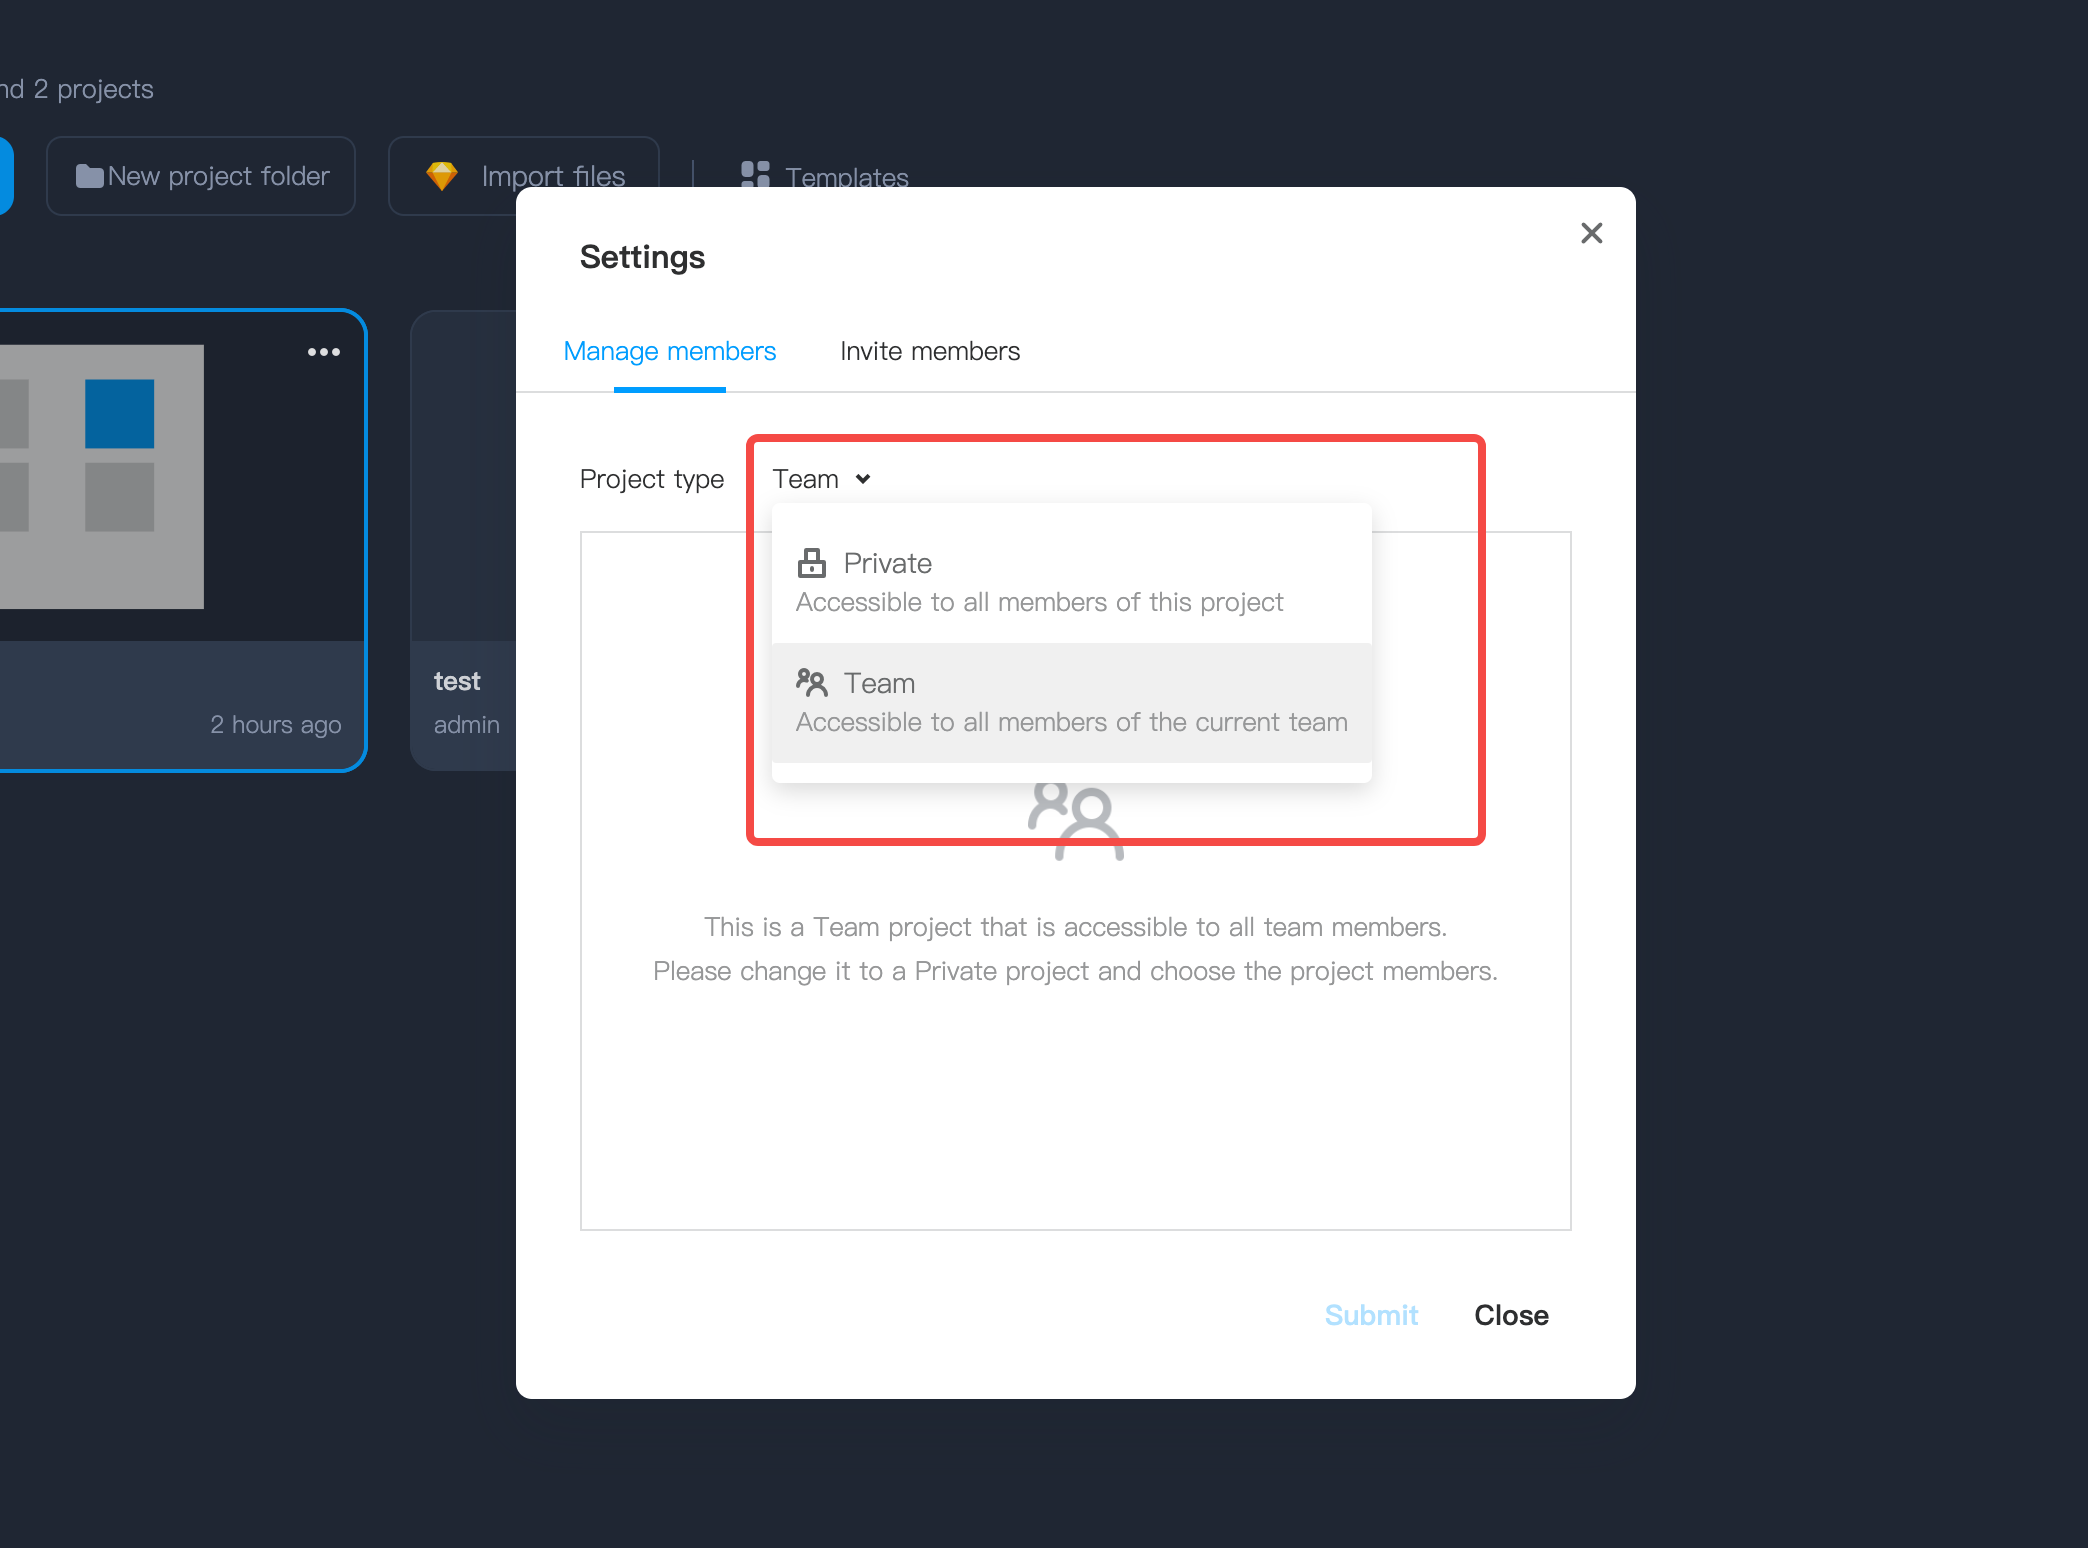
How to set access permissions for private projects?
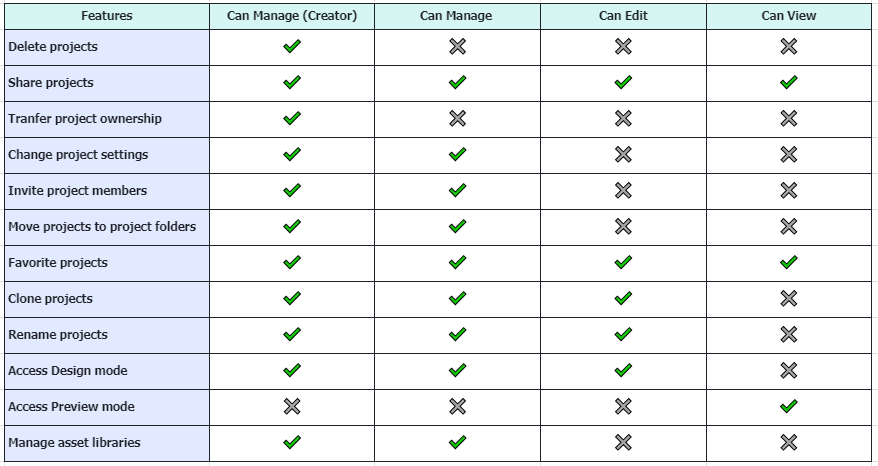
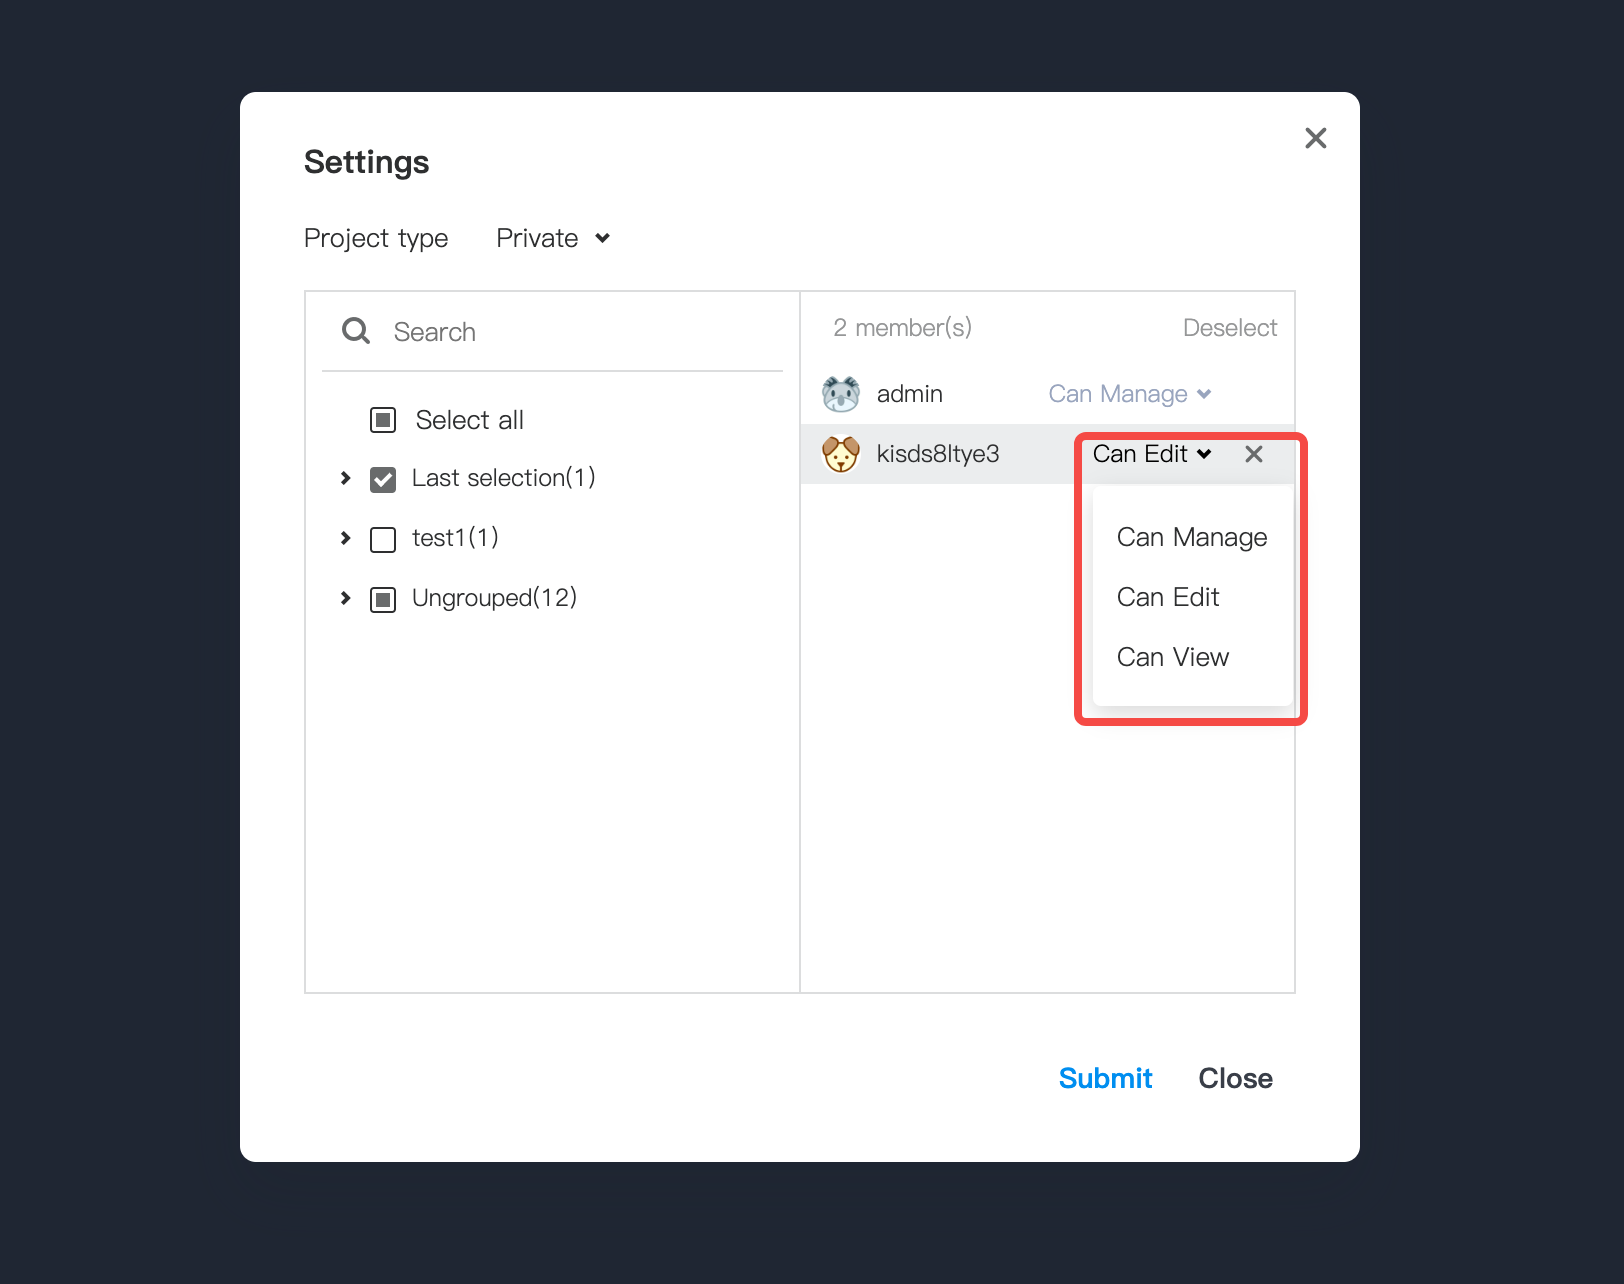
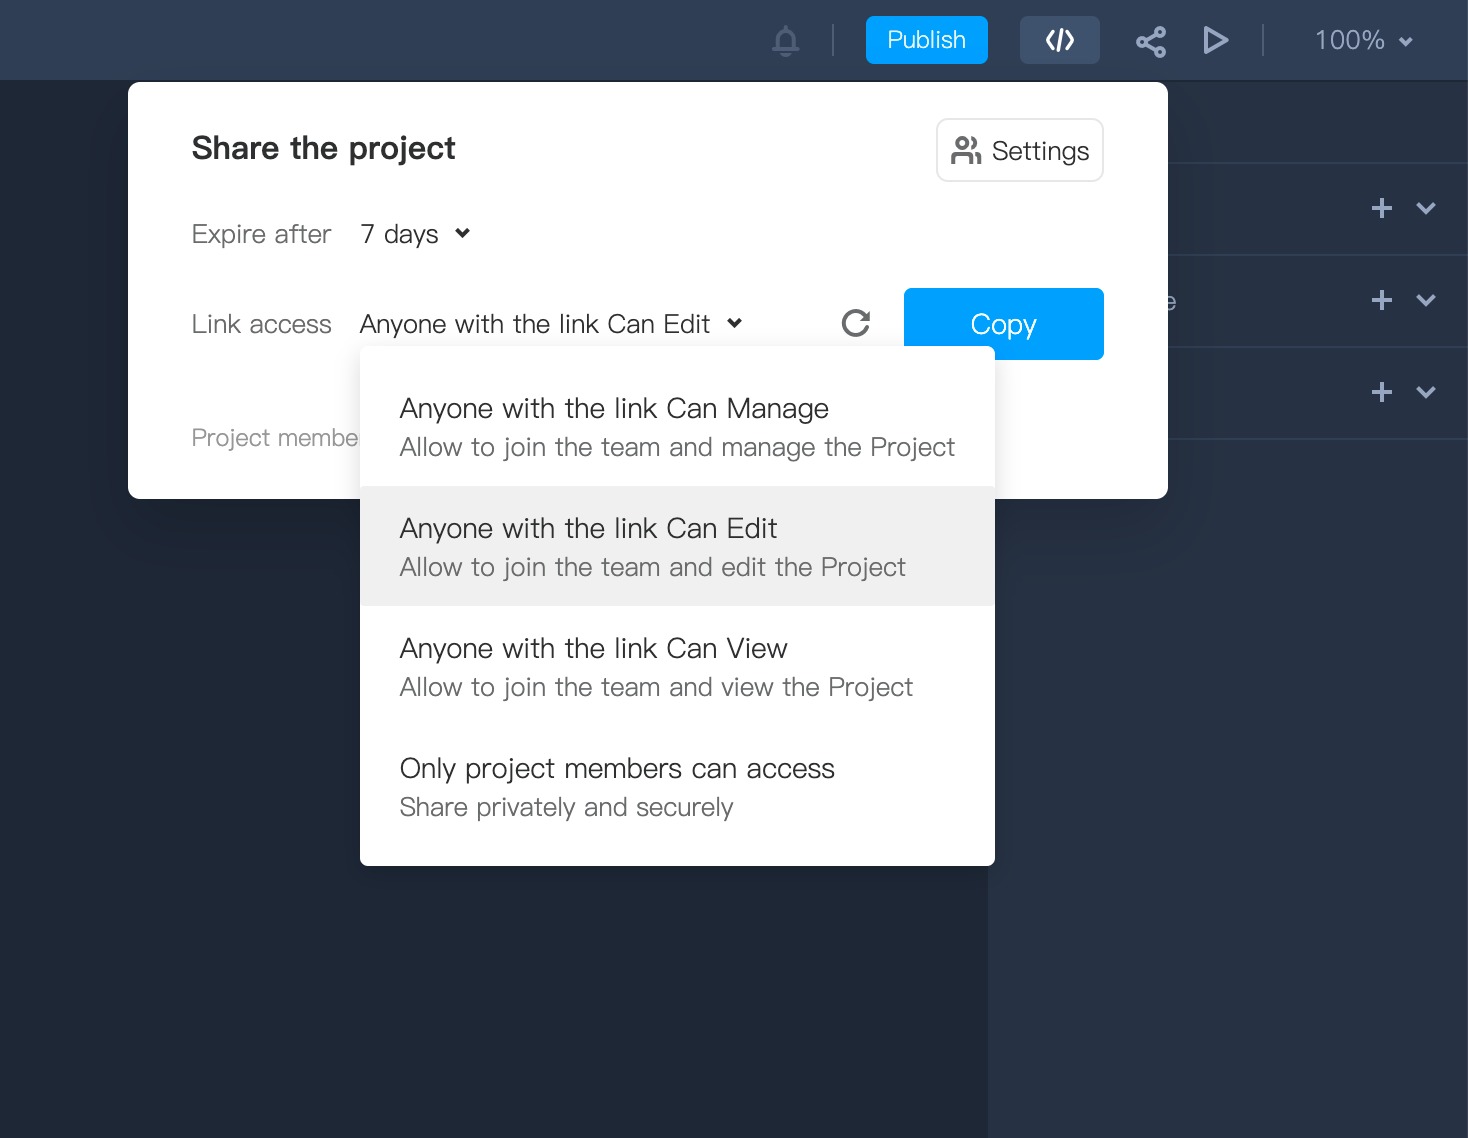
When creating a Private project, you have the ability to define access permissions for members of your Private projects, enhancing data security.Can Manage - Granting users the "Manage" access to the project allows them to join the project or project folder and manage it effectively. This level of access is ideal for team members who need administrative control over the project.
Can Edit - By assigning users the "Edit" access, you enable them to join the project or project folder and make edits to its content. This level of access is suitable for collaborators or your teammates who need to actively contribute and modify project elements.
Can View - Providing users with "View" access permits them to join the project or project folder, but they can only view its contents without making any edits. This access level is ideal for stakeholders or team members who require visibility into the project's progress without altering its content.
Two ways to set the access permissions:
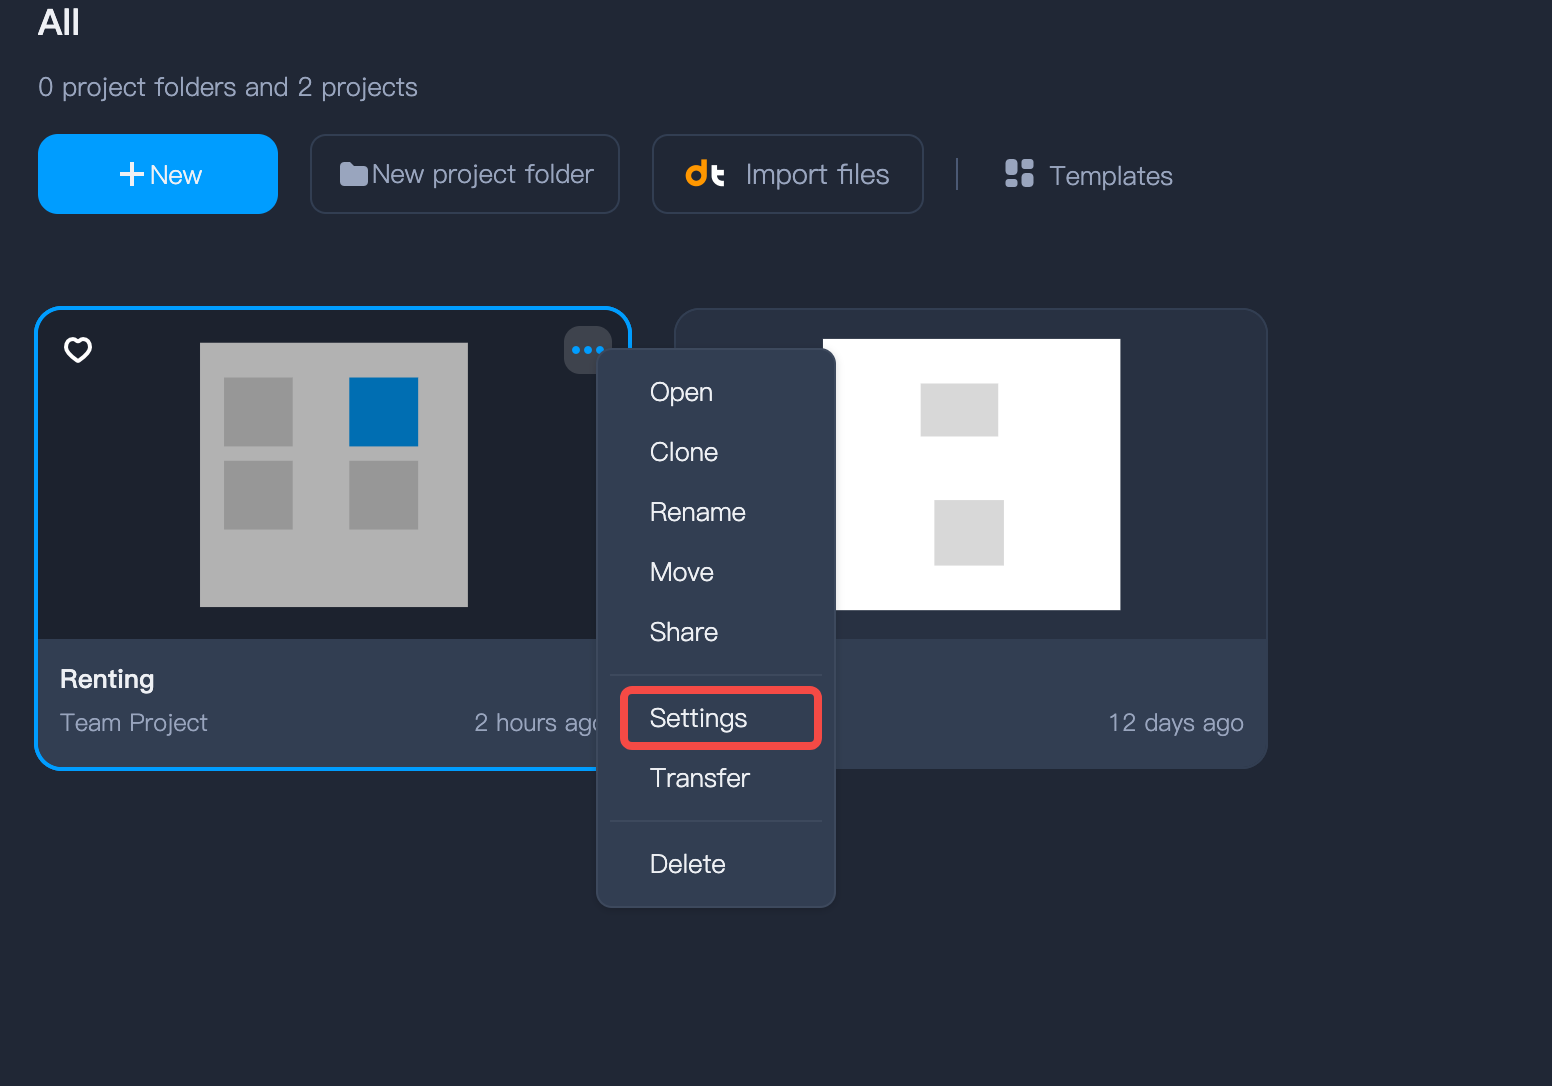
Expand the right-click menu of the project on the project homepage.
Select "Settings" to access the permissions settings
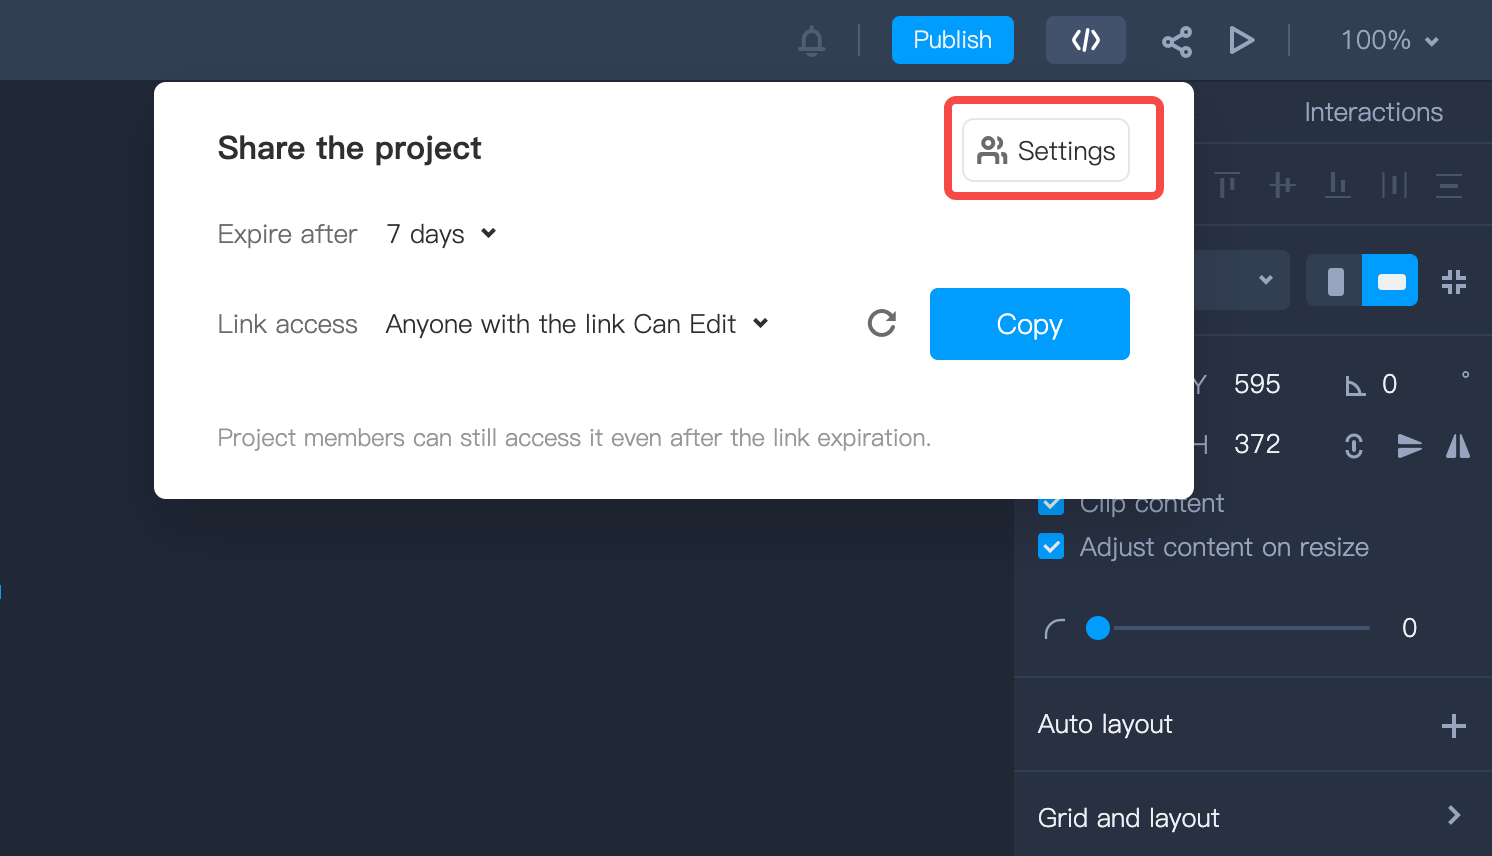
Enter a project and click the “Share” button in the top toolbar
Click "Settings" in the pop-up window
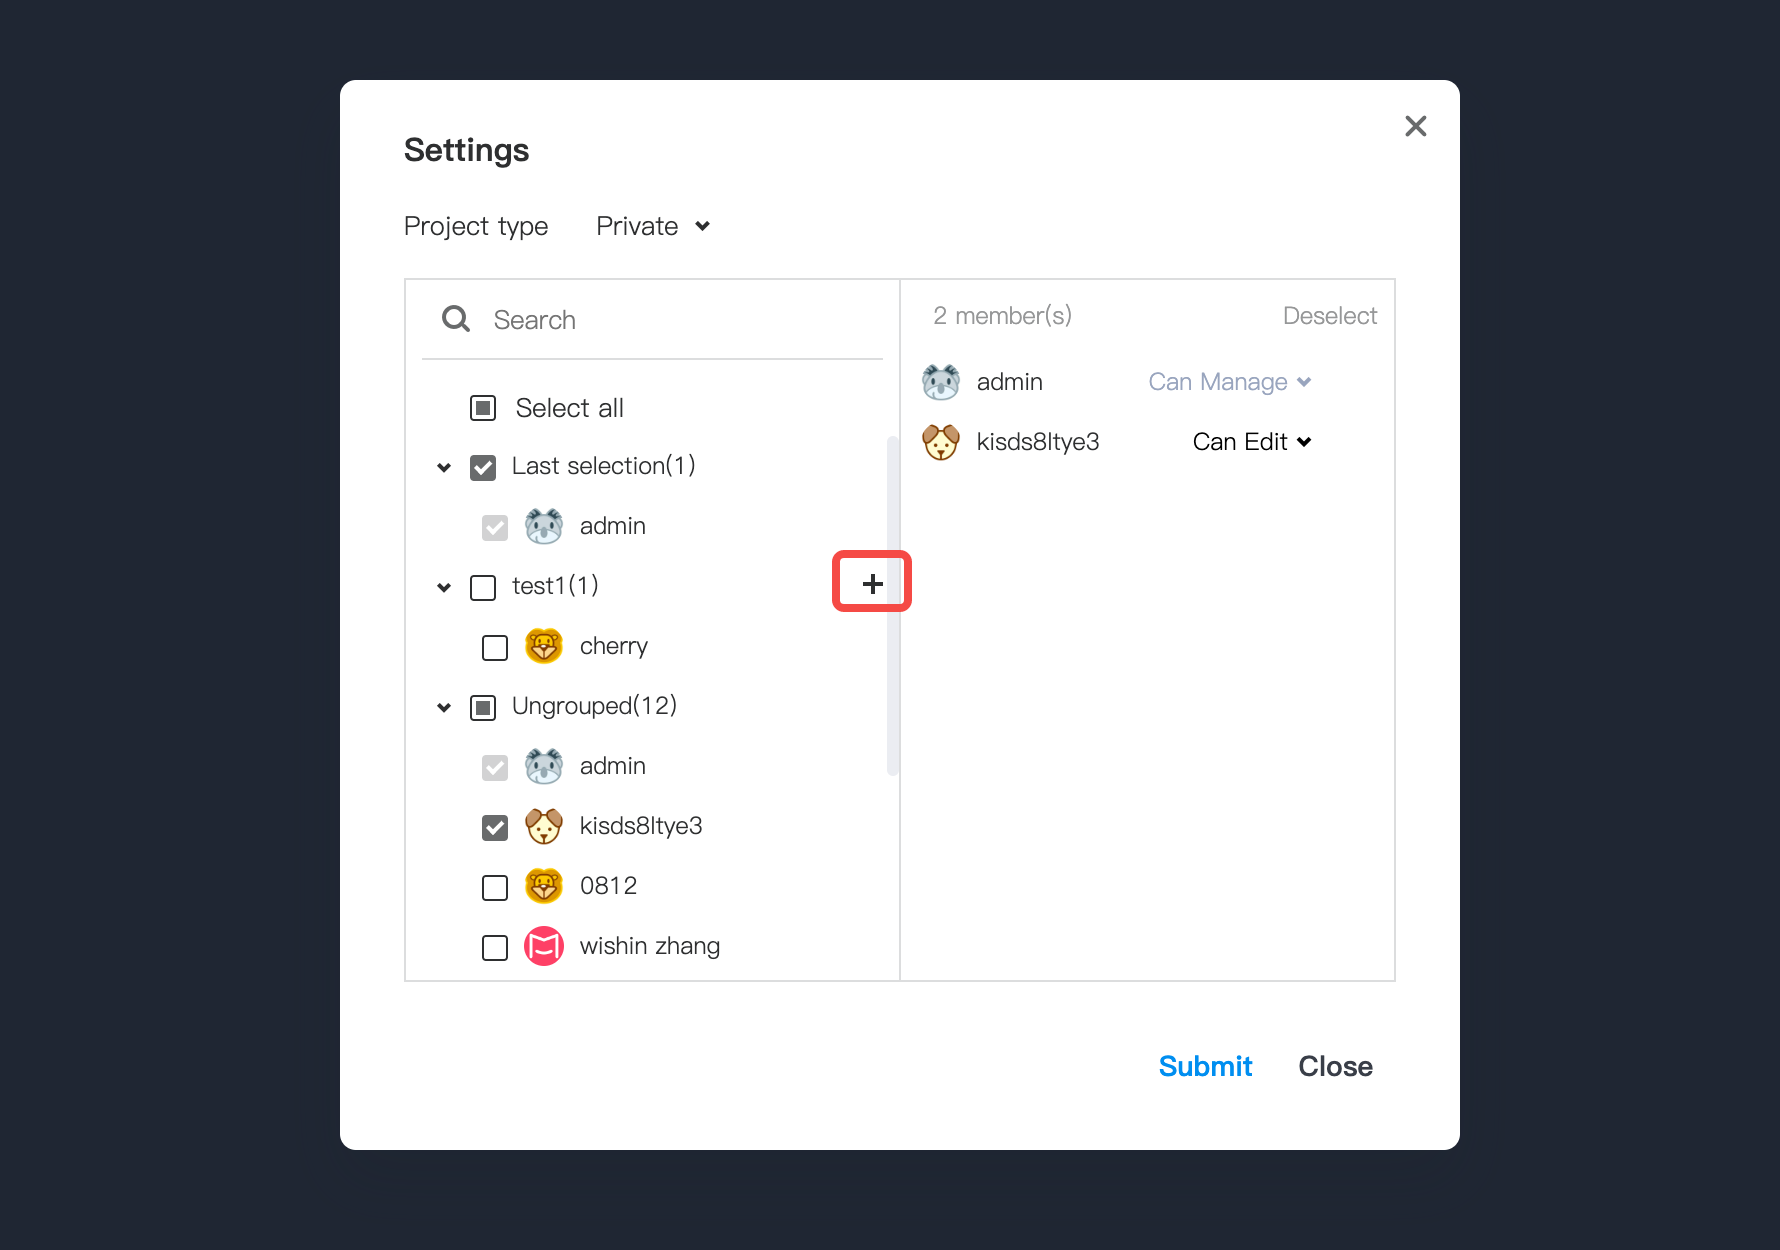
Tick or untick the checkbox on the left section to add or remove a member
Configure the access permissions for individual member on the right section
How to share projects?
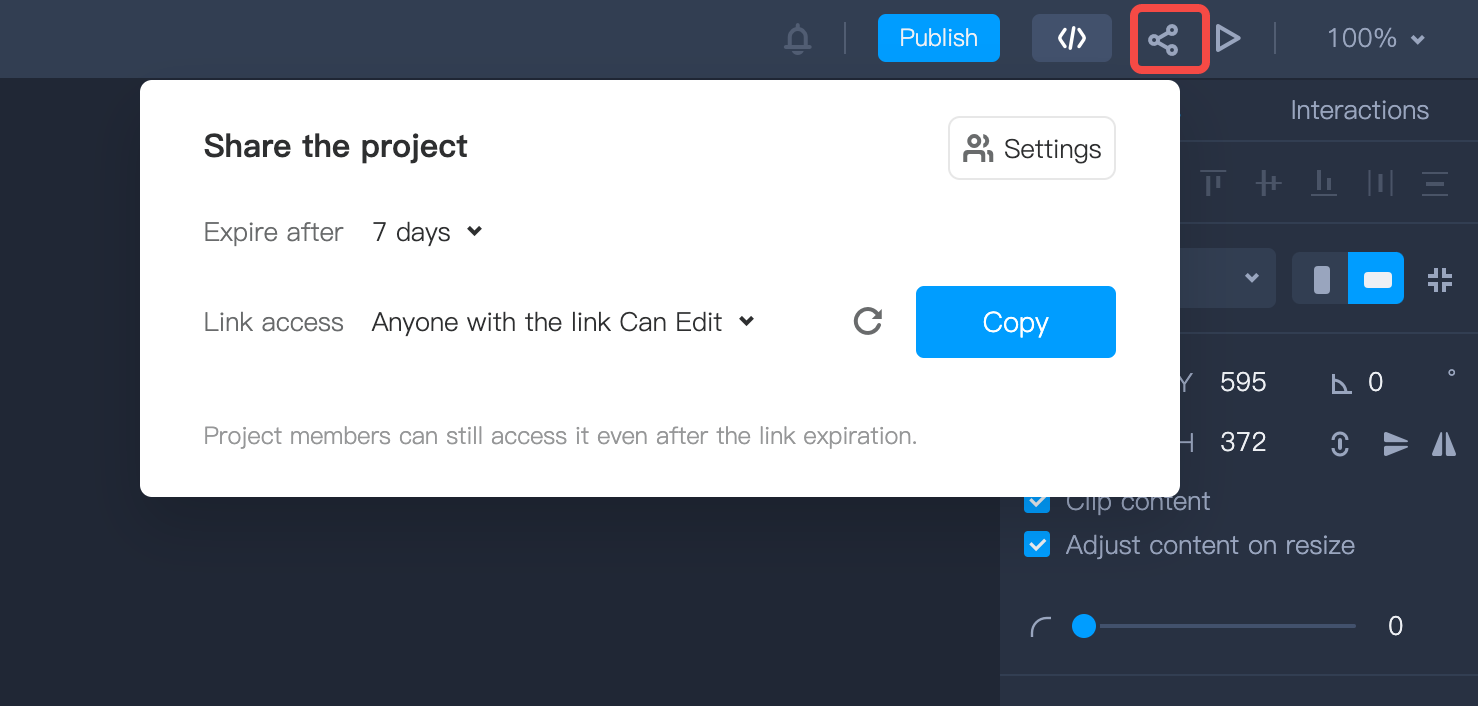
While working on a project, you have two convenient ways for sharing your projects with others via a single link:Enter a project and click the “Share” button in the top toolbar
Copy the invite link in the pop-up window
Now, simply send the link to anyone you want to collaborate with
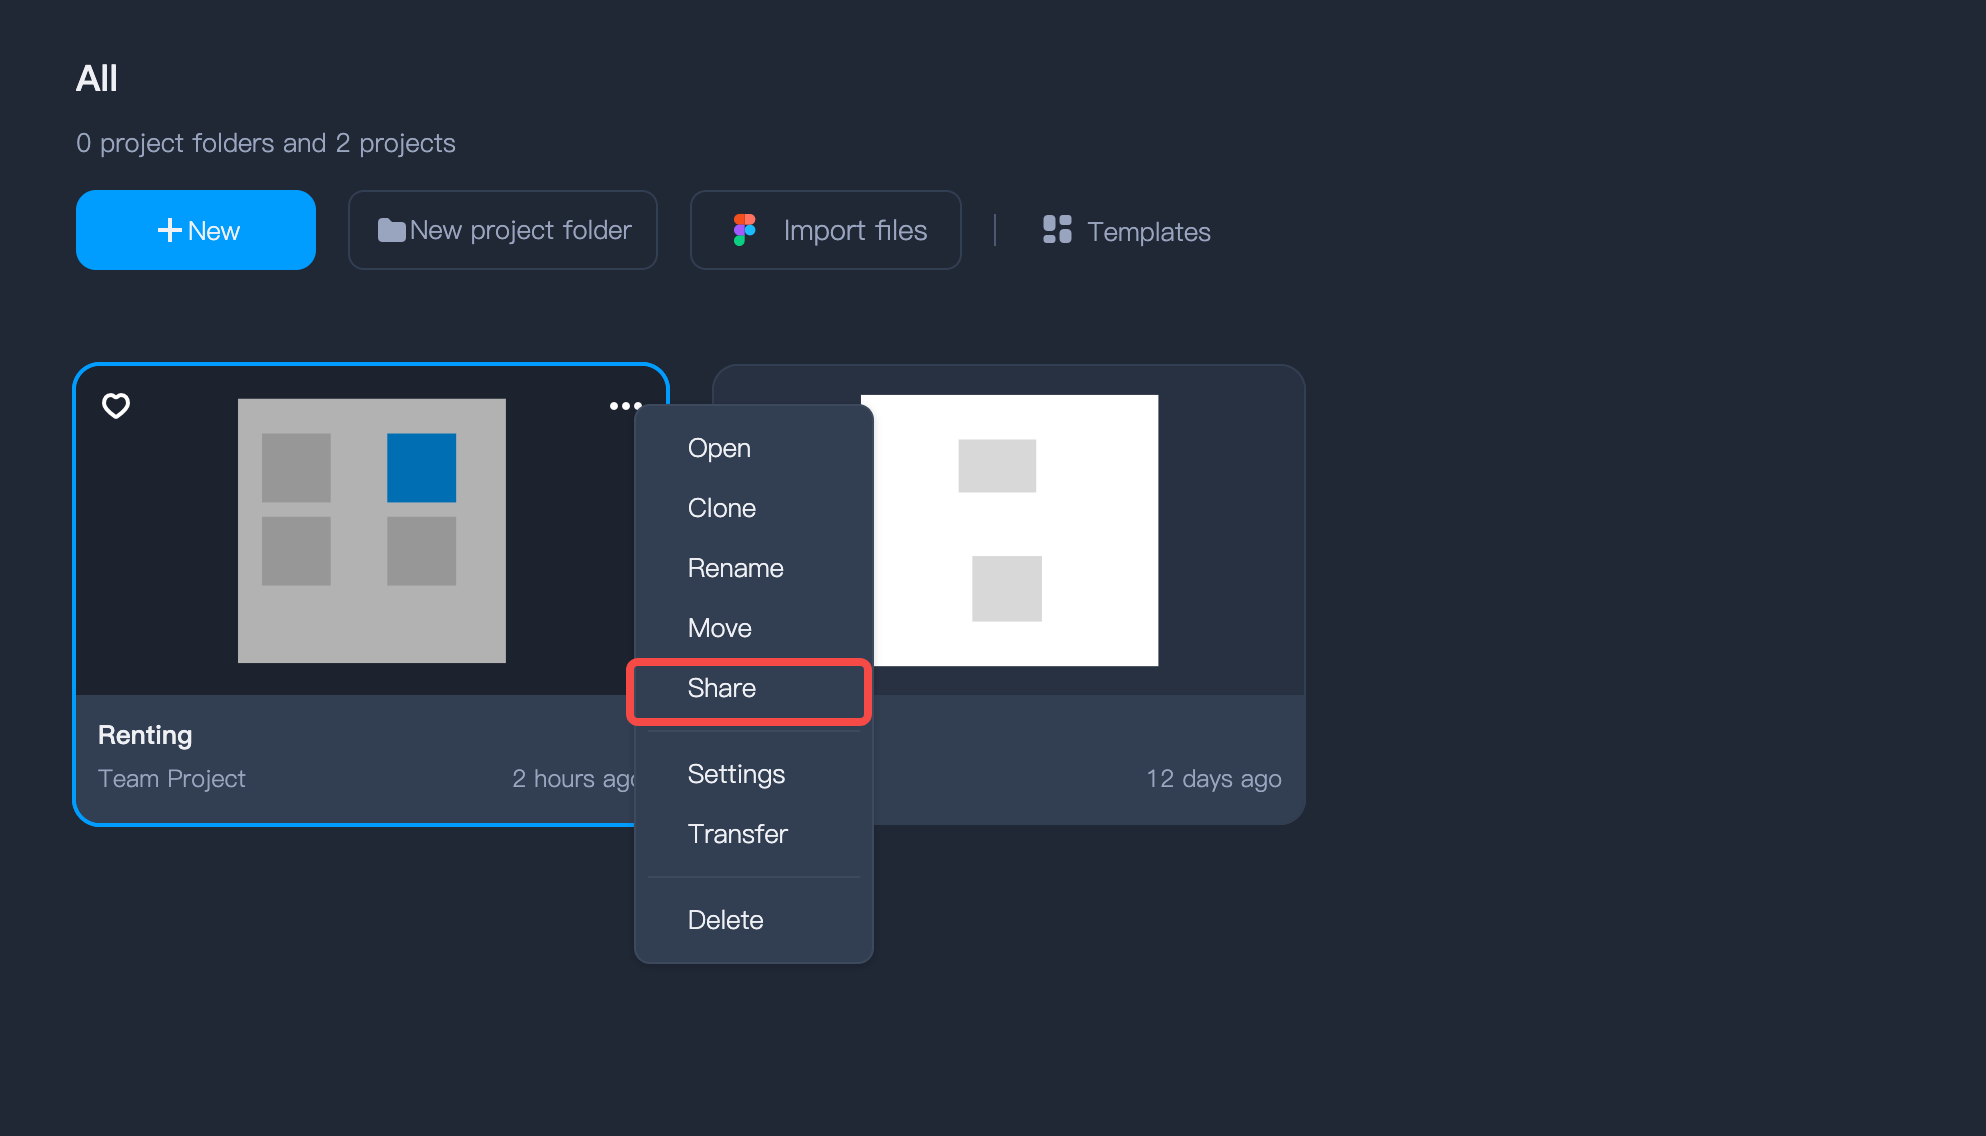
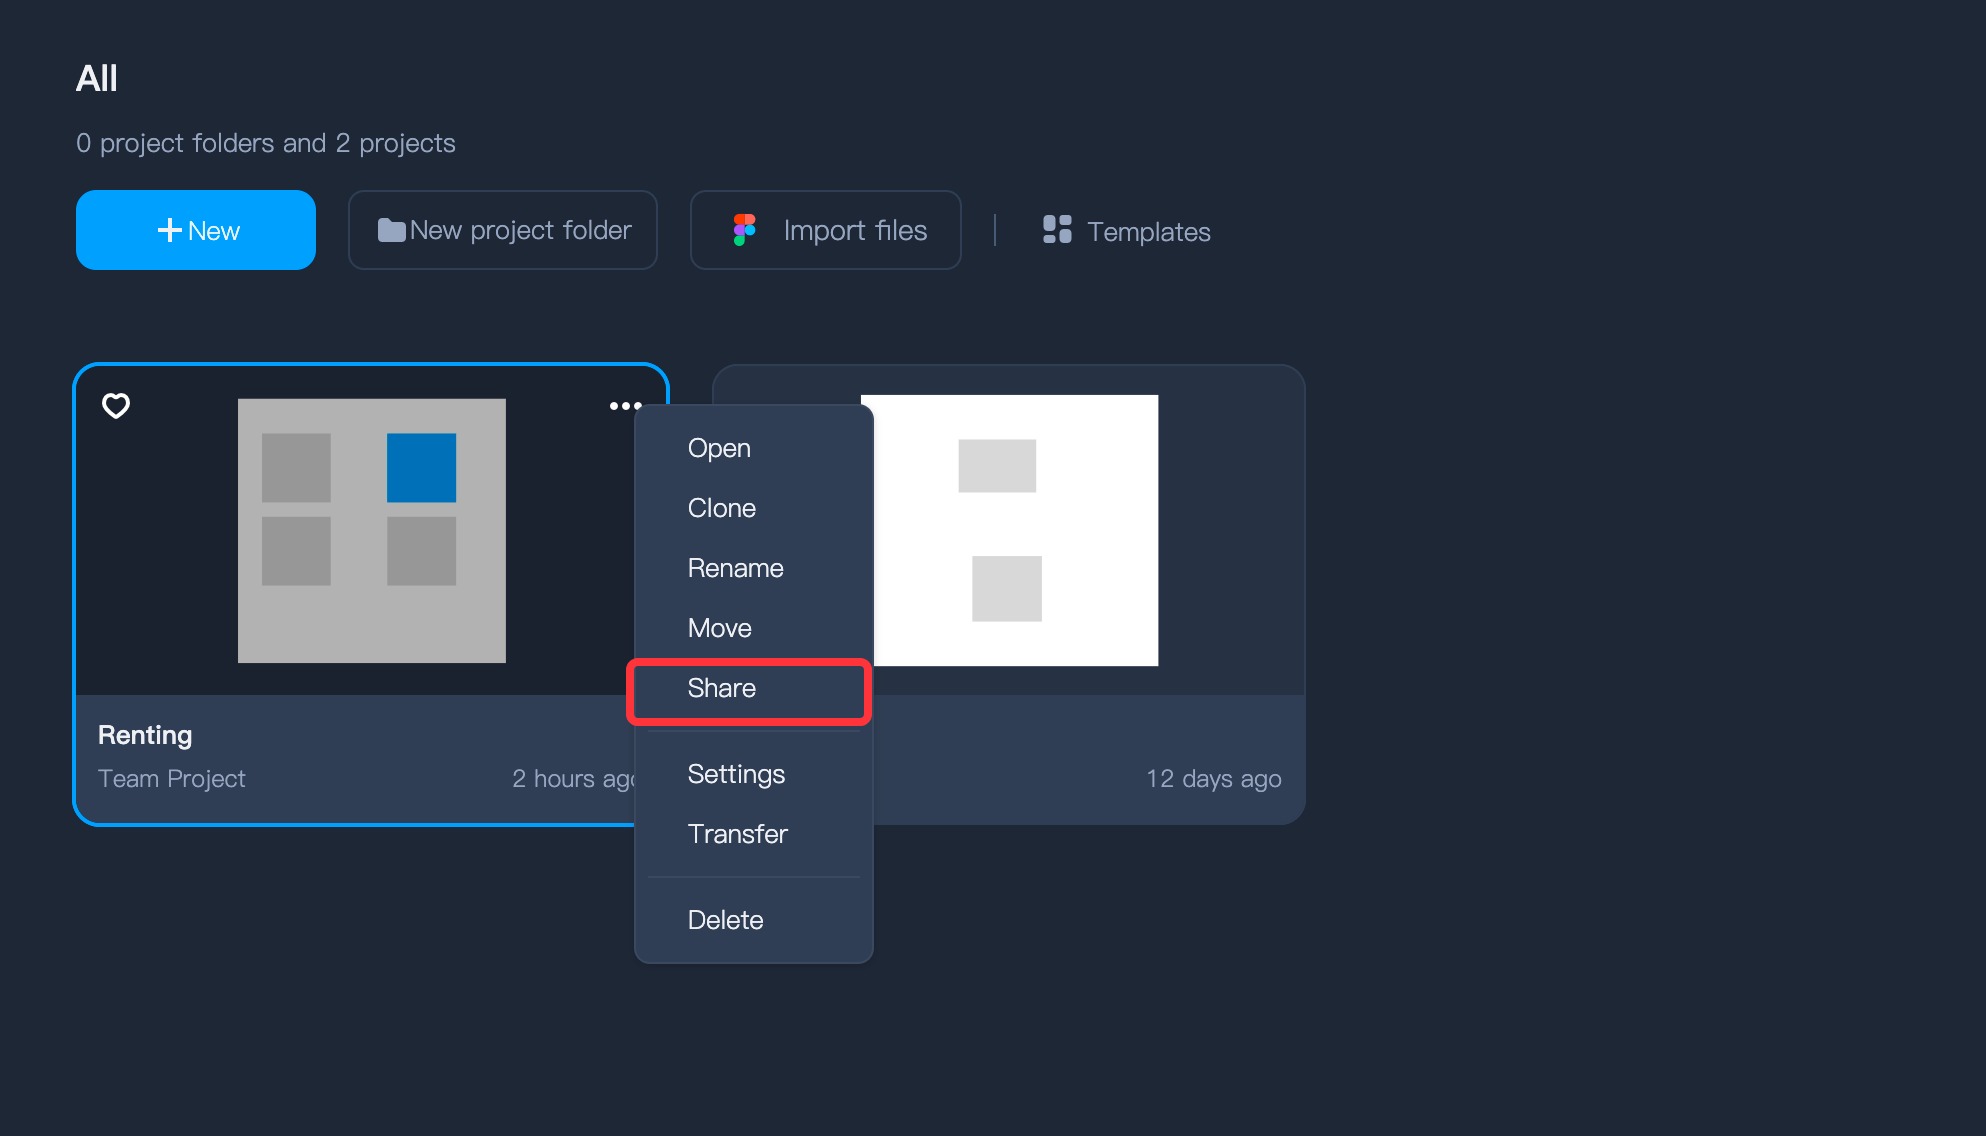
Expand the right-click menu of the project on the project homepage
Click "Share" from the available menu options
How to invite members to your projects?
In Mockplus DT, you can invite a member to your project for a better collaboration, all via a single invite link.Expand the right-click menu of the project on the project homepage
Click "Share" from the available menu options
Now, simply copy the link to invite anyone that you want to collaborate with
Enter a project and click the “Share” button in the top toolbar
Copy the invite link in the pop-up window
Click "Settings" in the pop-up share project window
Copy the invite link and share it with anyone you want
How to manage project members?
Here is how:Hover over a project
Expand the right-click menu of the project and select "Members"
Add or delete project members under the Permission tab in the pop-up window
How to create project folders?
You can create a project folder to organize and manage your projects.Enter the Homepage of Mockplus DT
Click the New project folder on the top
Drag projects into the project folder or directly create projects within the folder
Nest project folders to meet your needs
How to set access permissions for project folders?
Project folders share similar access permissions with your personal projects. For a more detailed understanding, you can refer to the access permissions for personal projects.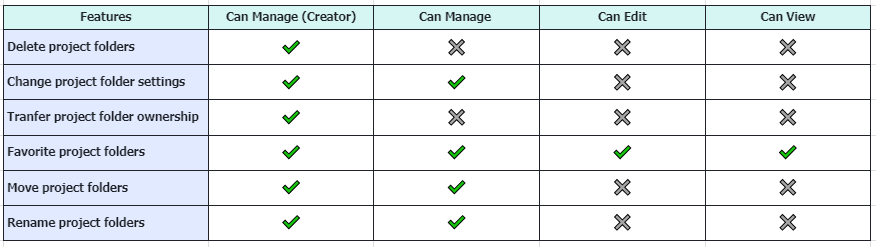
Two ways to set the access permissions:
Expand the right-click menu of the project folder on the project homepage.
Select "Settings" to access the permissions settings.

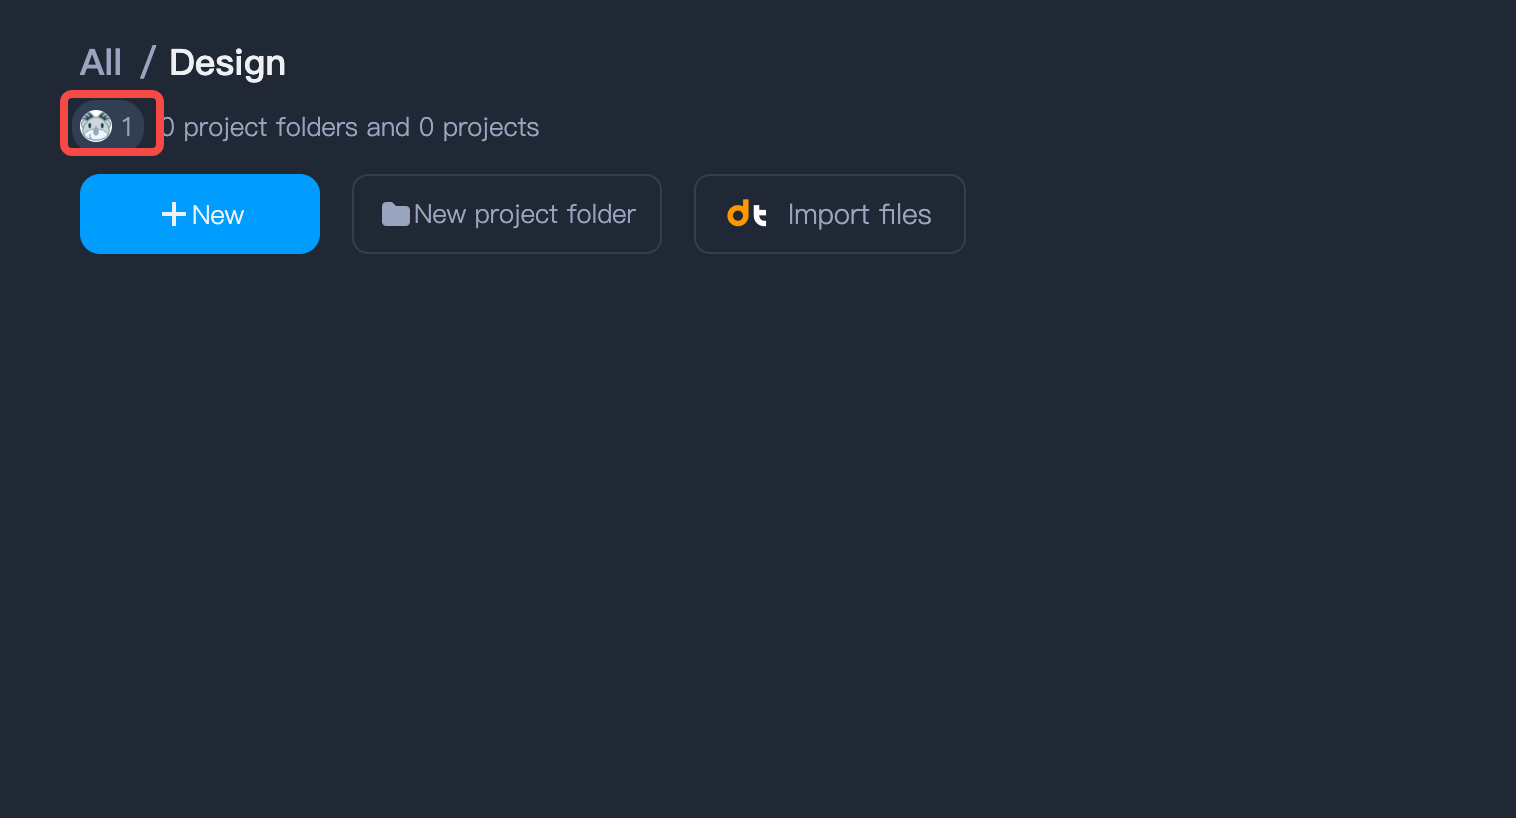
Enter a project folder and click on the creator's avatar
Set the access permissions in the pop-up window
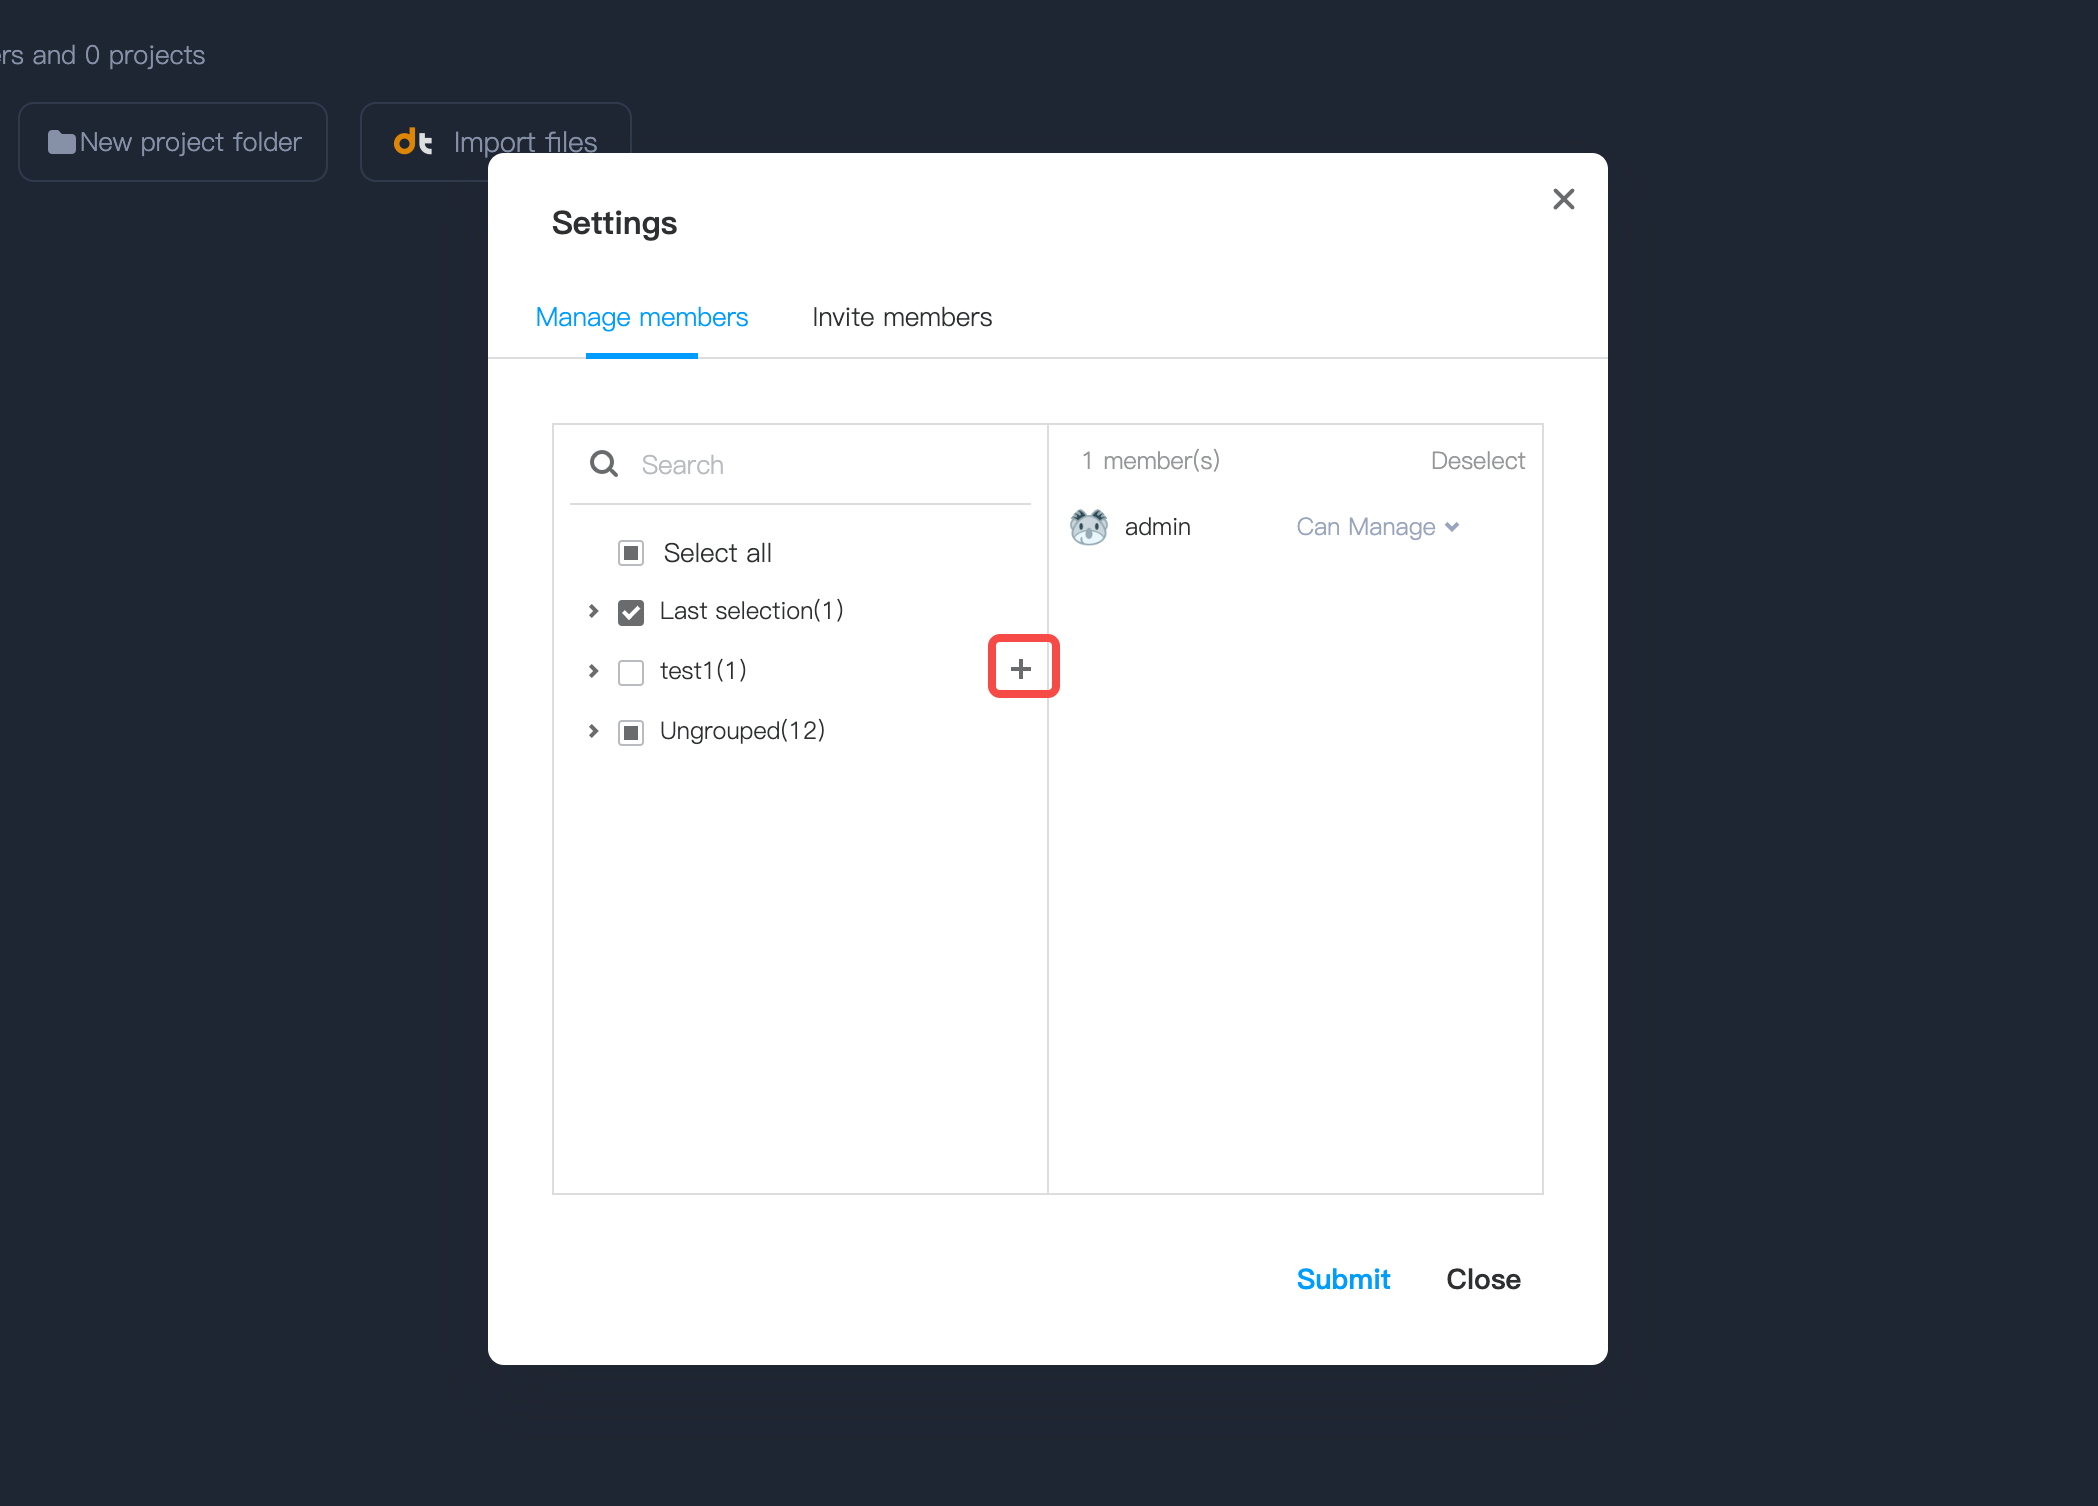
Tick or untick the checkboxes on the left section to add or remove members
Configure the access permissions for individual member on the right section
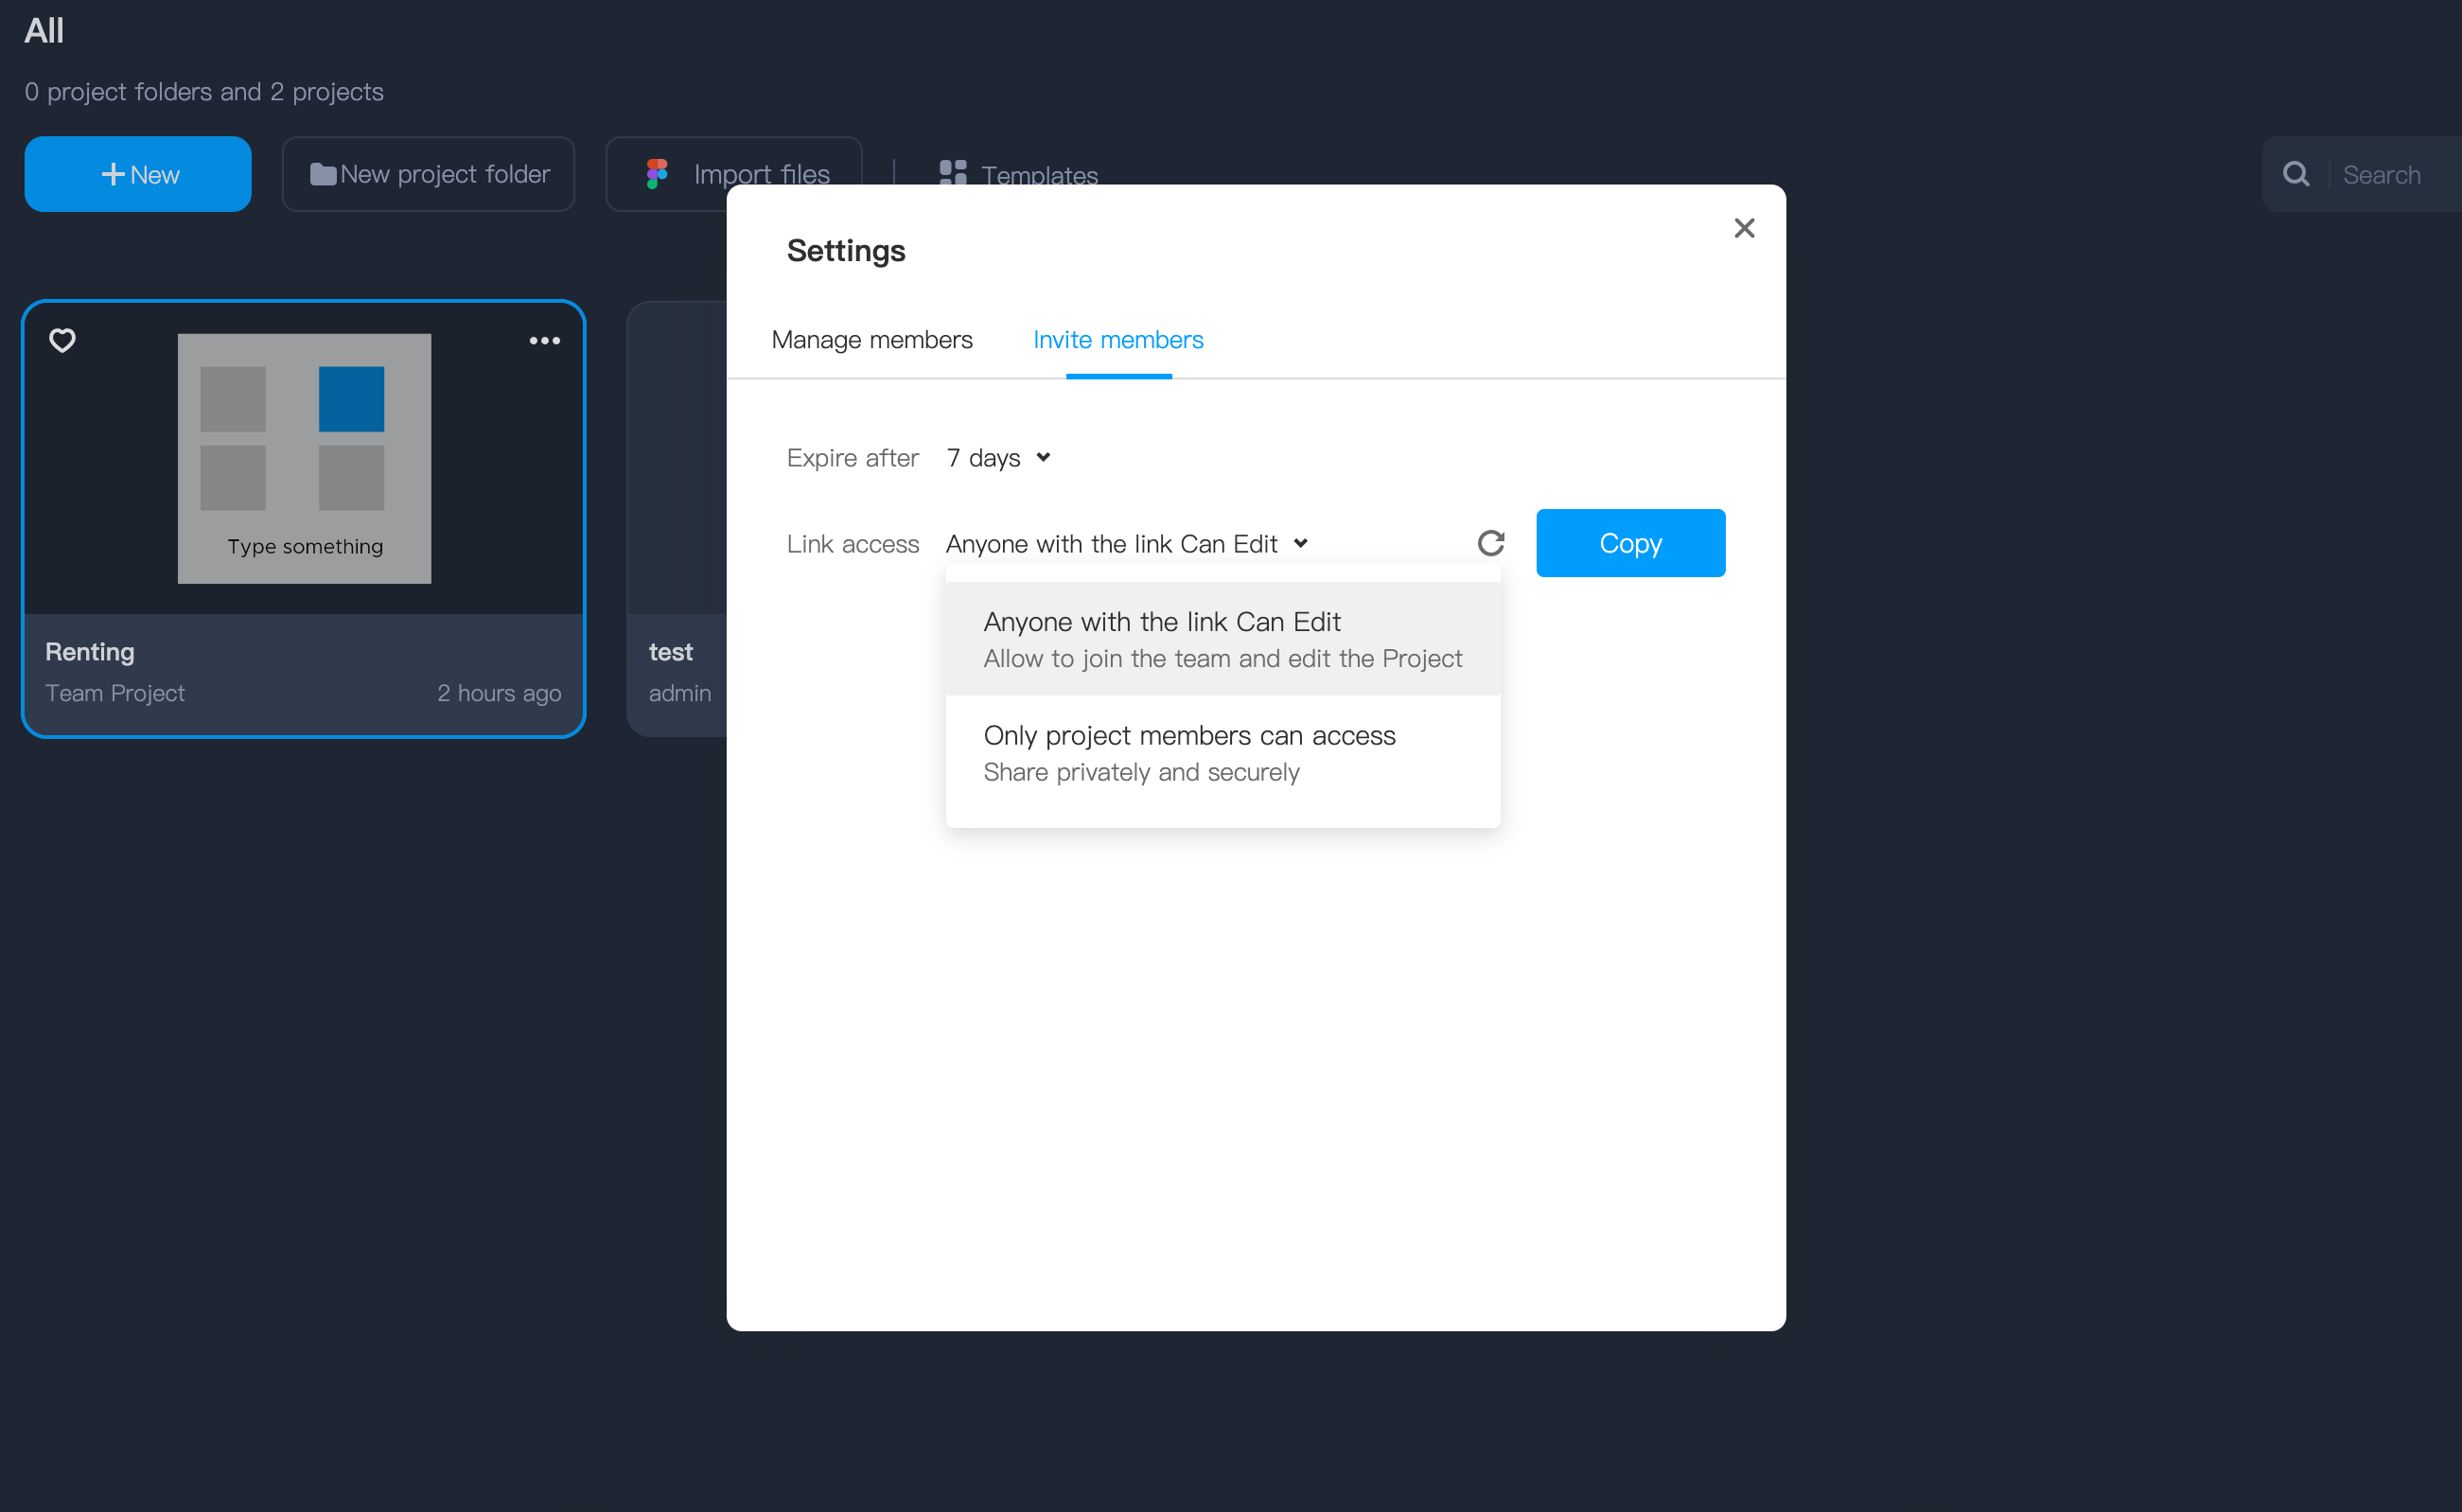
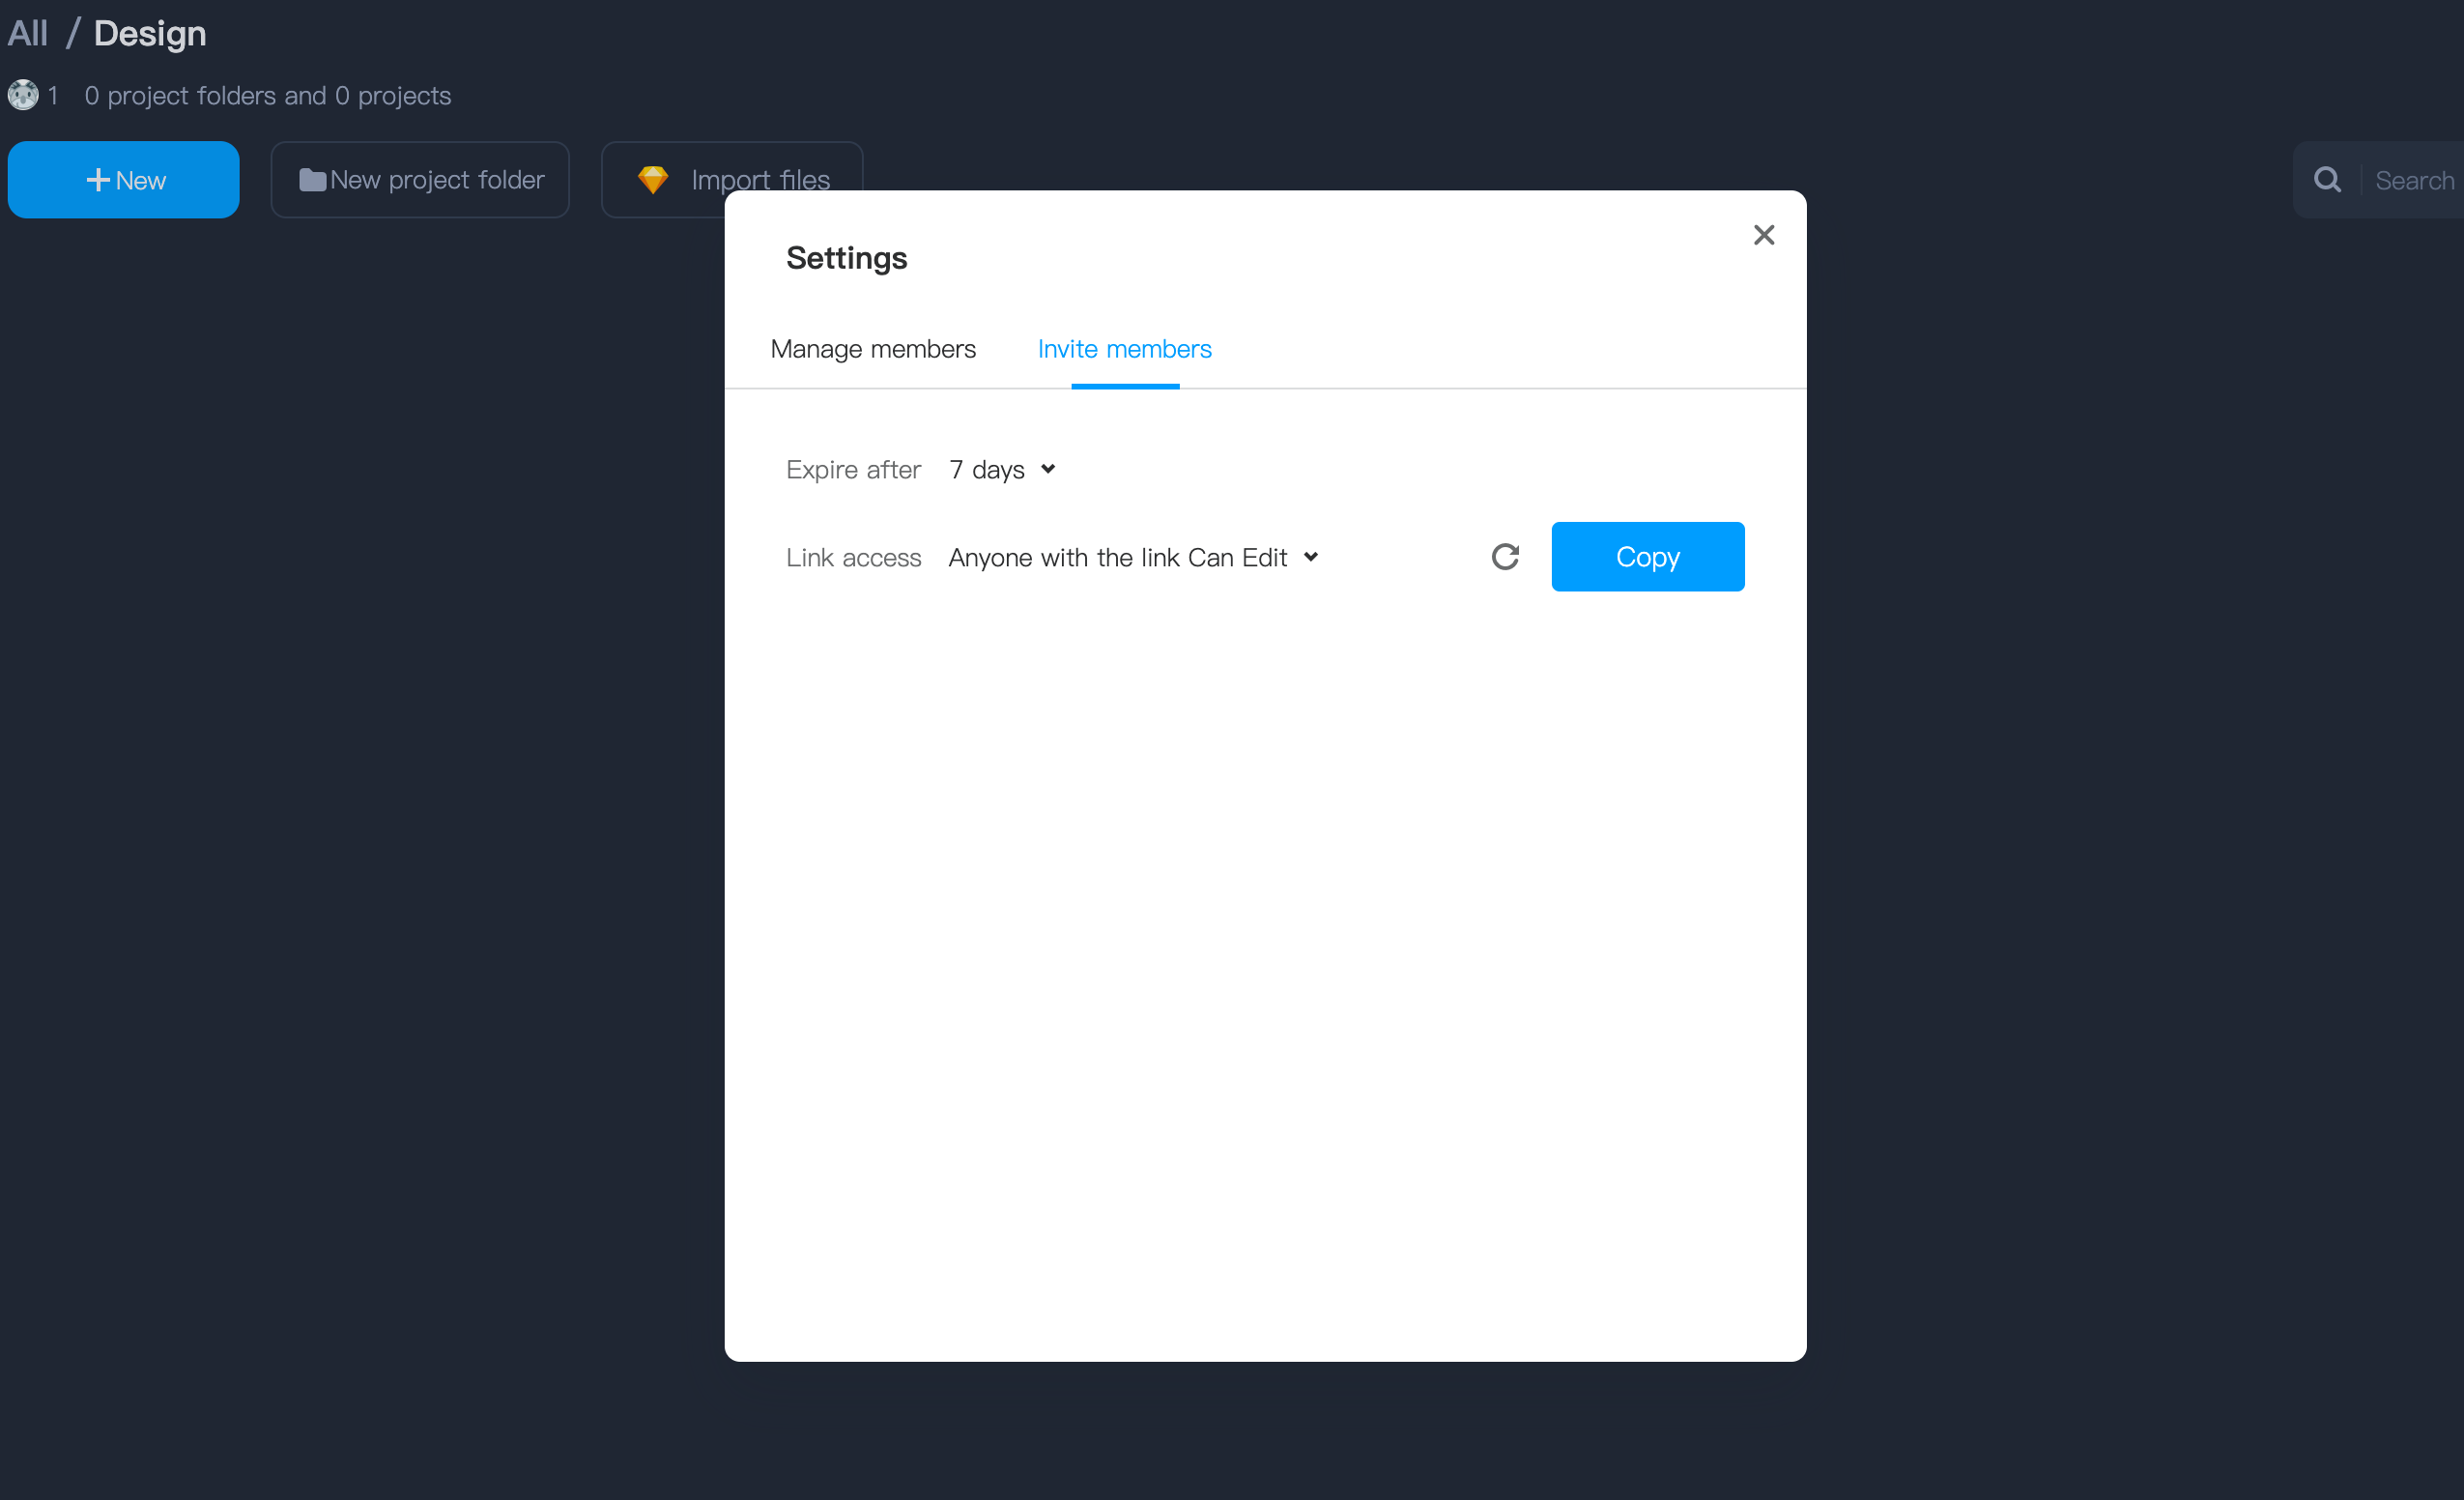
How to invite members to your project folders?
Step 1. Expand the right-click menu of the project folder on homepage
Step 2. Select "Settings" from the menu
Step 3. Switch to the "Invite members" tab
Step 4. Copy that invite link
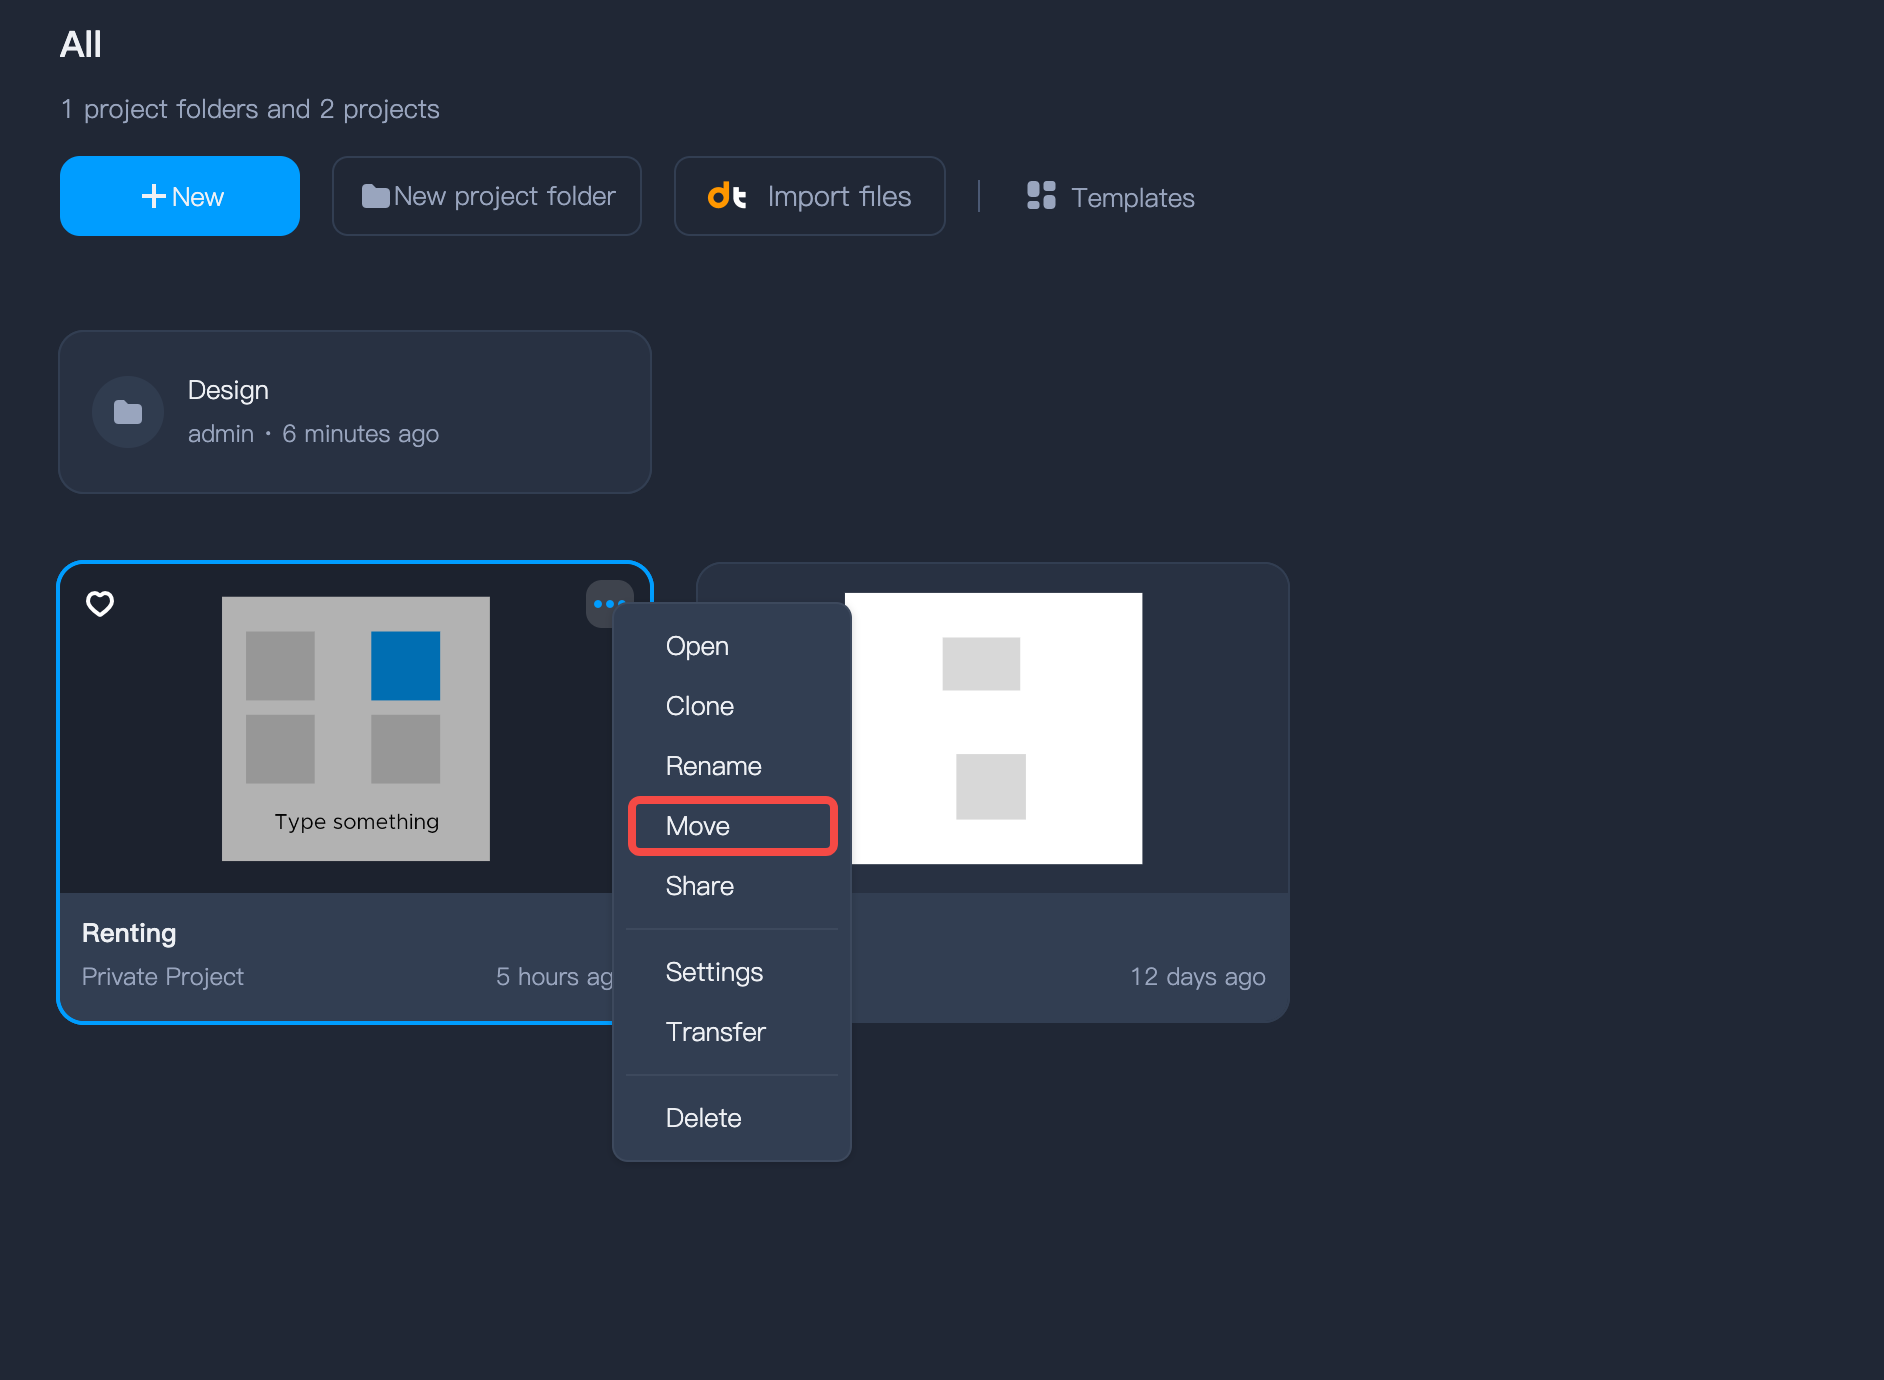
How to move projects and project folders?
You can move projects across different project folders and teams, or move project folders between different teams:Enter the Homepage of Mockplus DT
Hover over a project or project folder
Expand the right-click menu of the project or project folder
Click Move to start moving the project or project folder
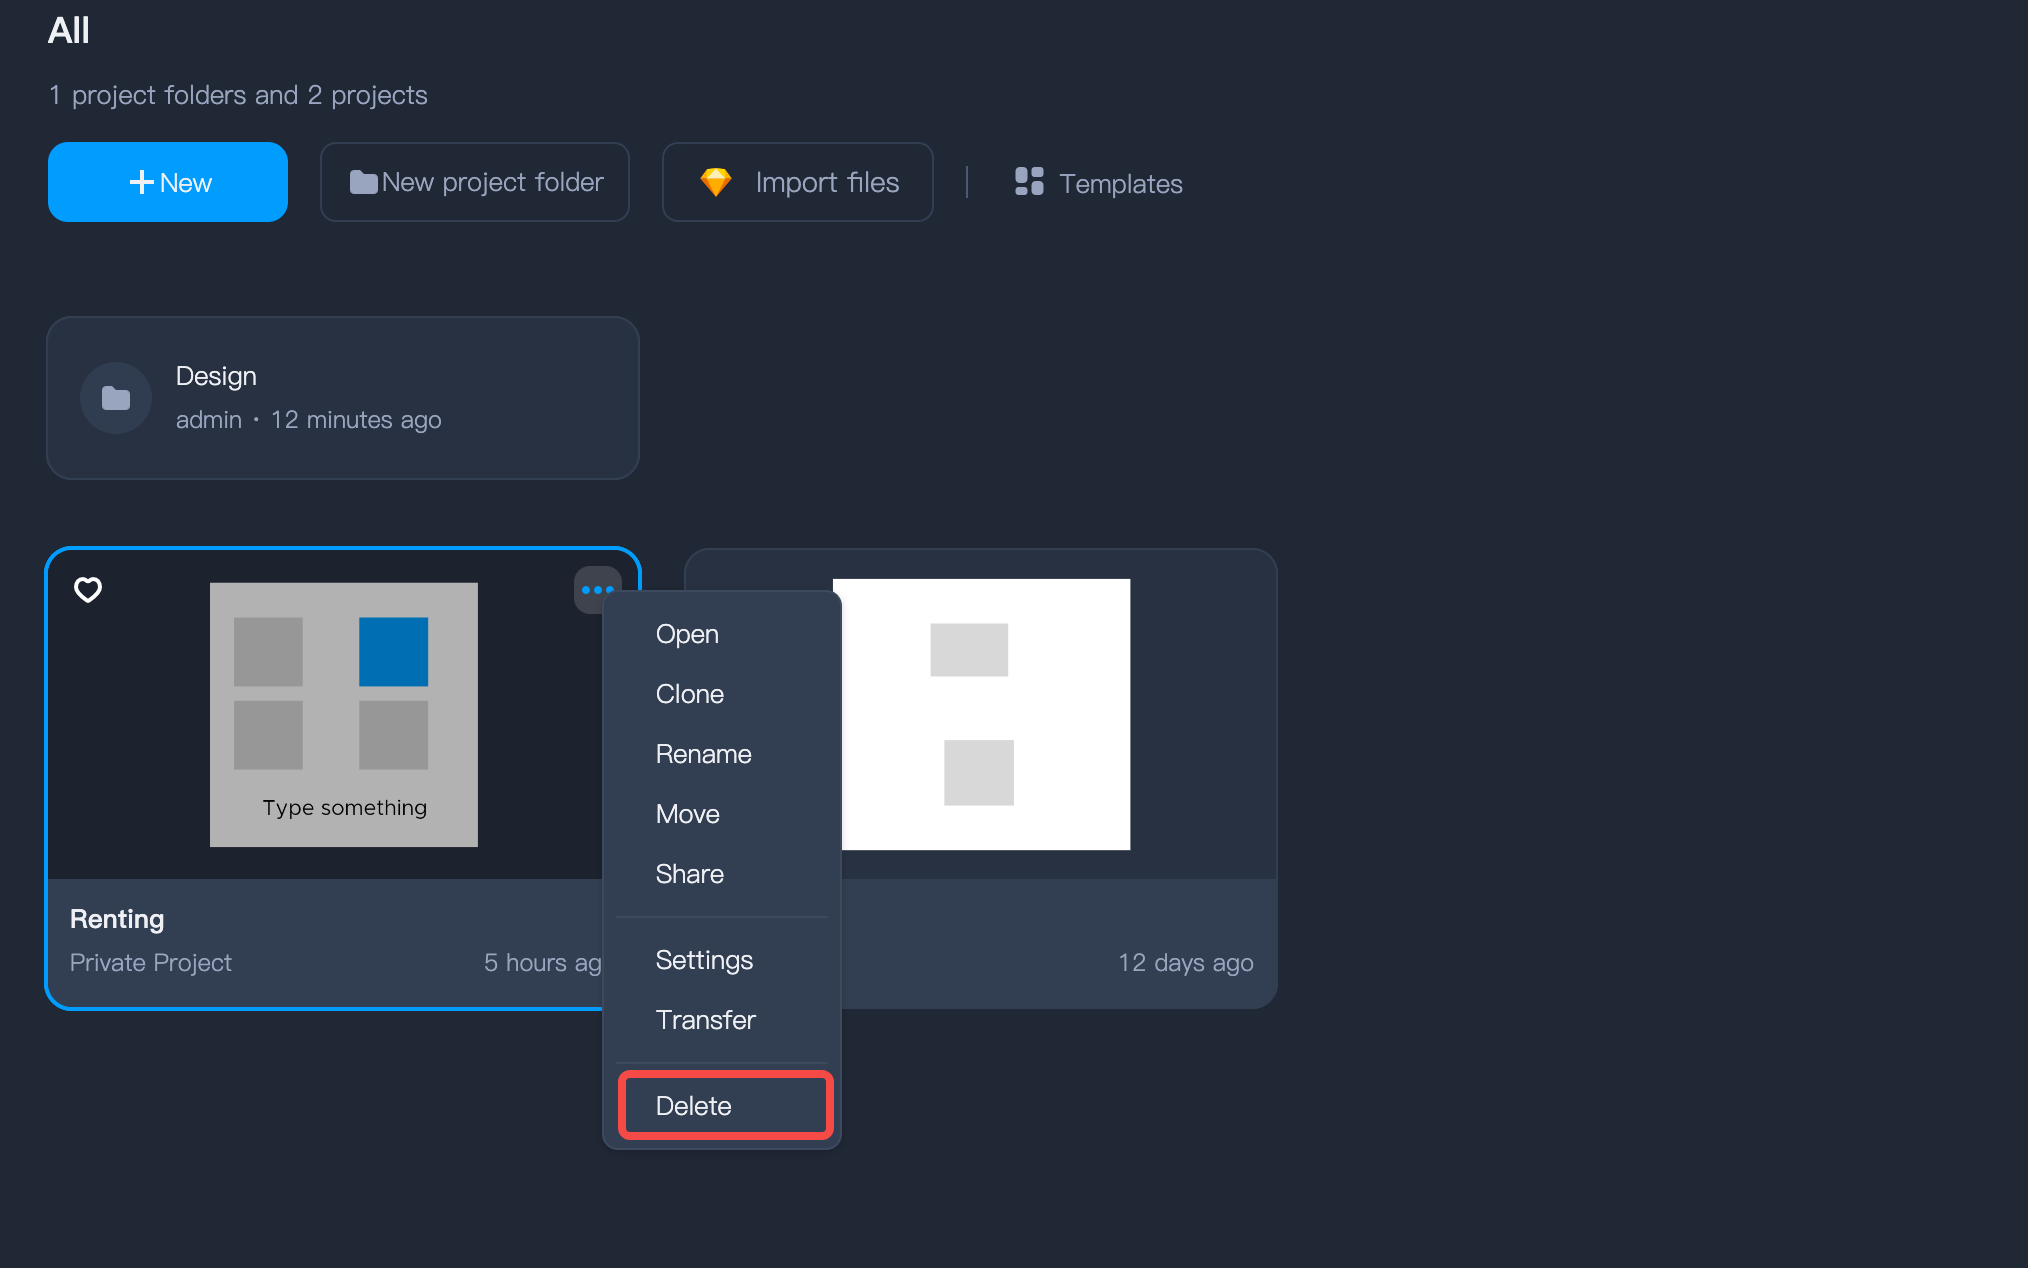
How to delete projects and project folders?
Enter the Homepage of Mockplus DT
Hover to a project or project folder
Expand the right-click menu of the project or project folder
Click Delete from the drop-down list
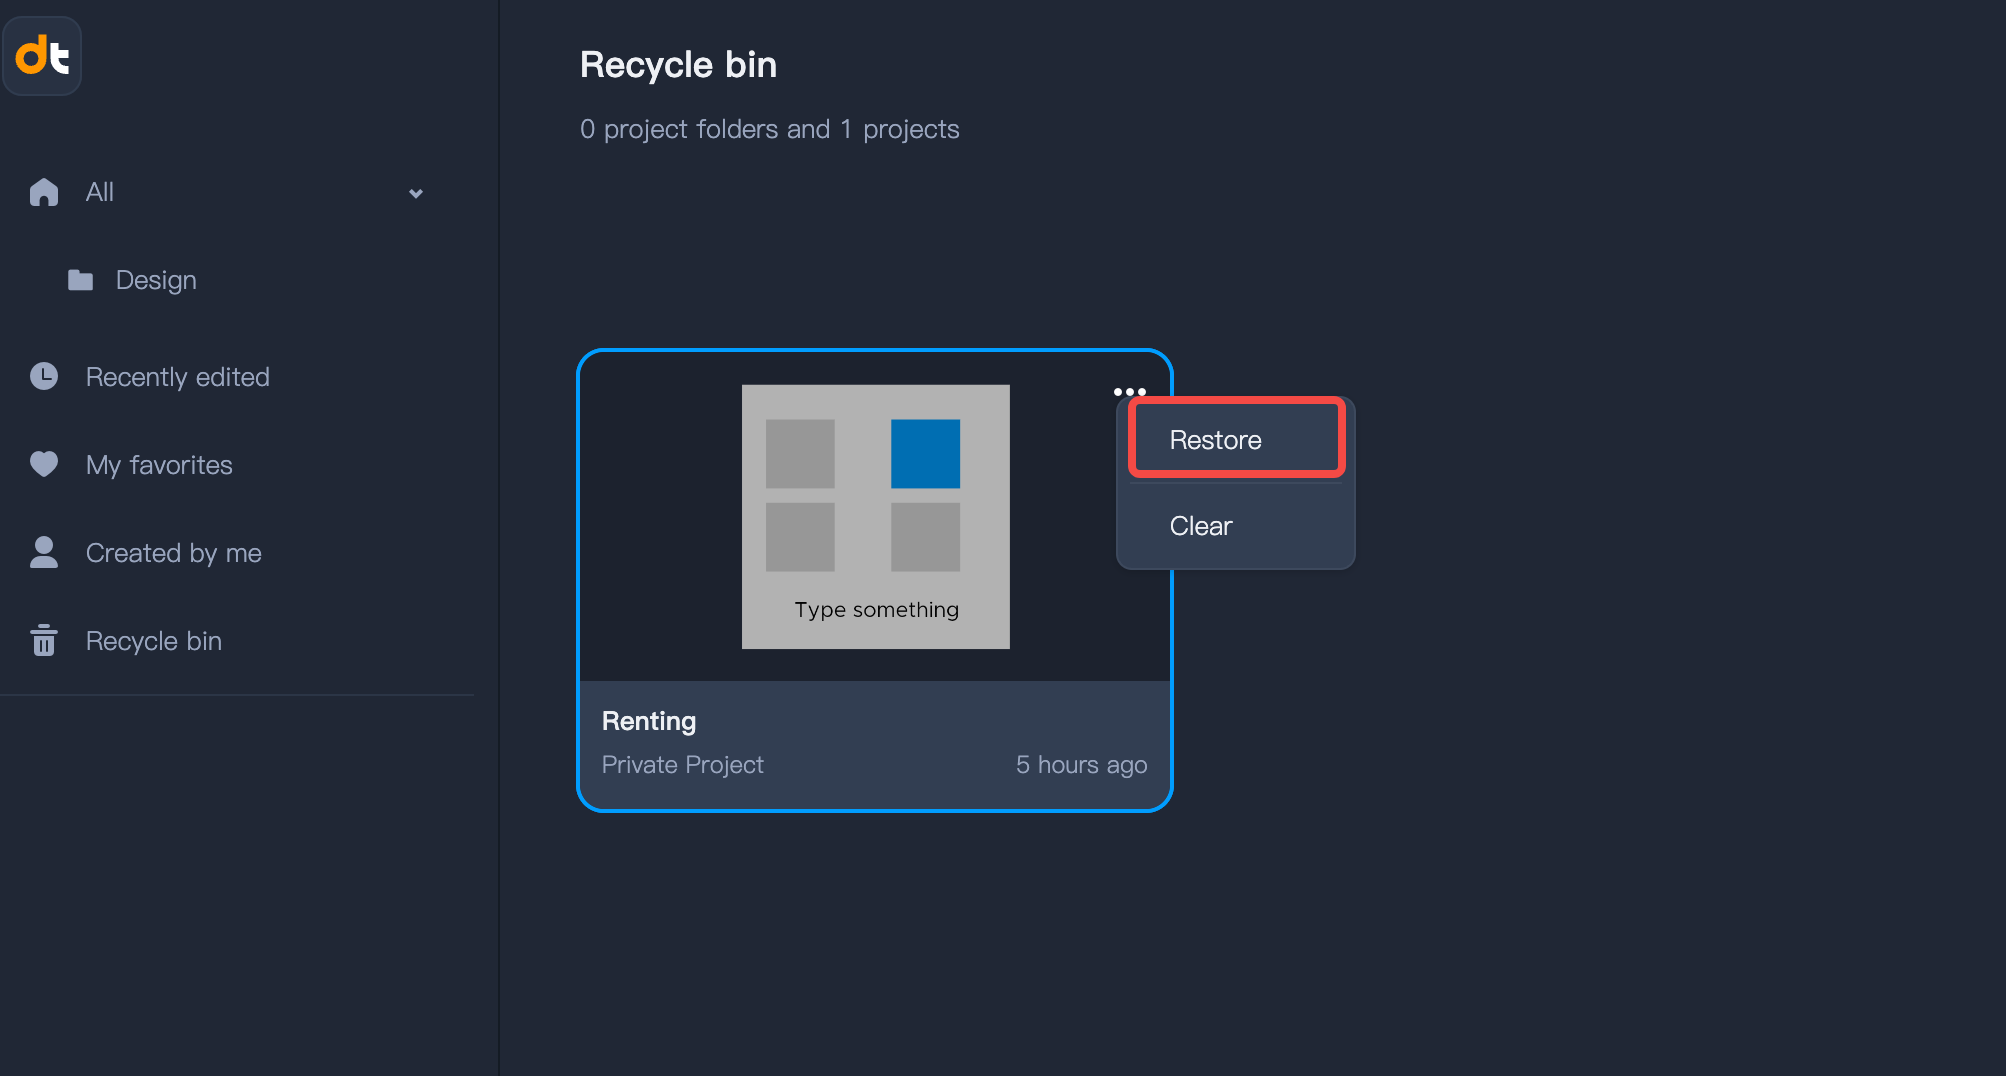
How to restore projects and project folders from Recycle Bin?
Enter the homepage of Mockplus DT
Select the Recycle bin tab in the left menu
Expand the right-click menu of the project or project folder
Click Restore to move the project/project folder back