Symbols lie in the “Assets” panel in Mockplus DT and enable you to save and reuse design elements across your designs, speeding up your workflow with ease.
How to Create a Symbol?
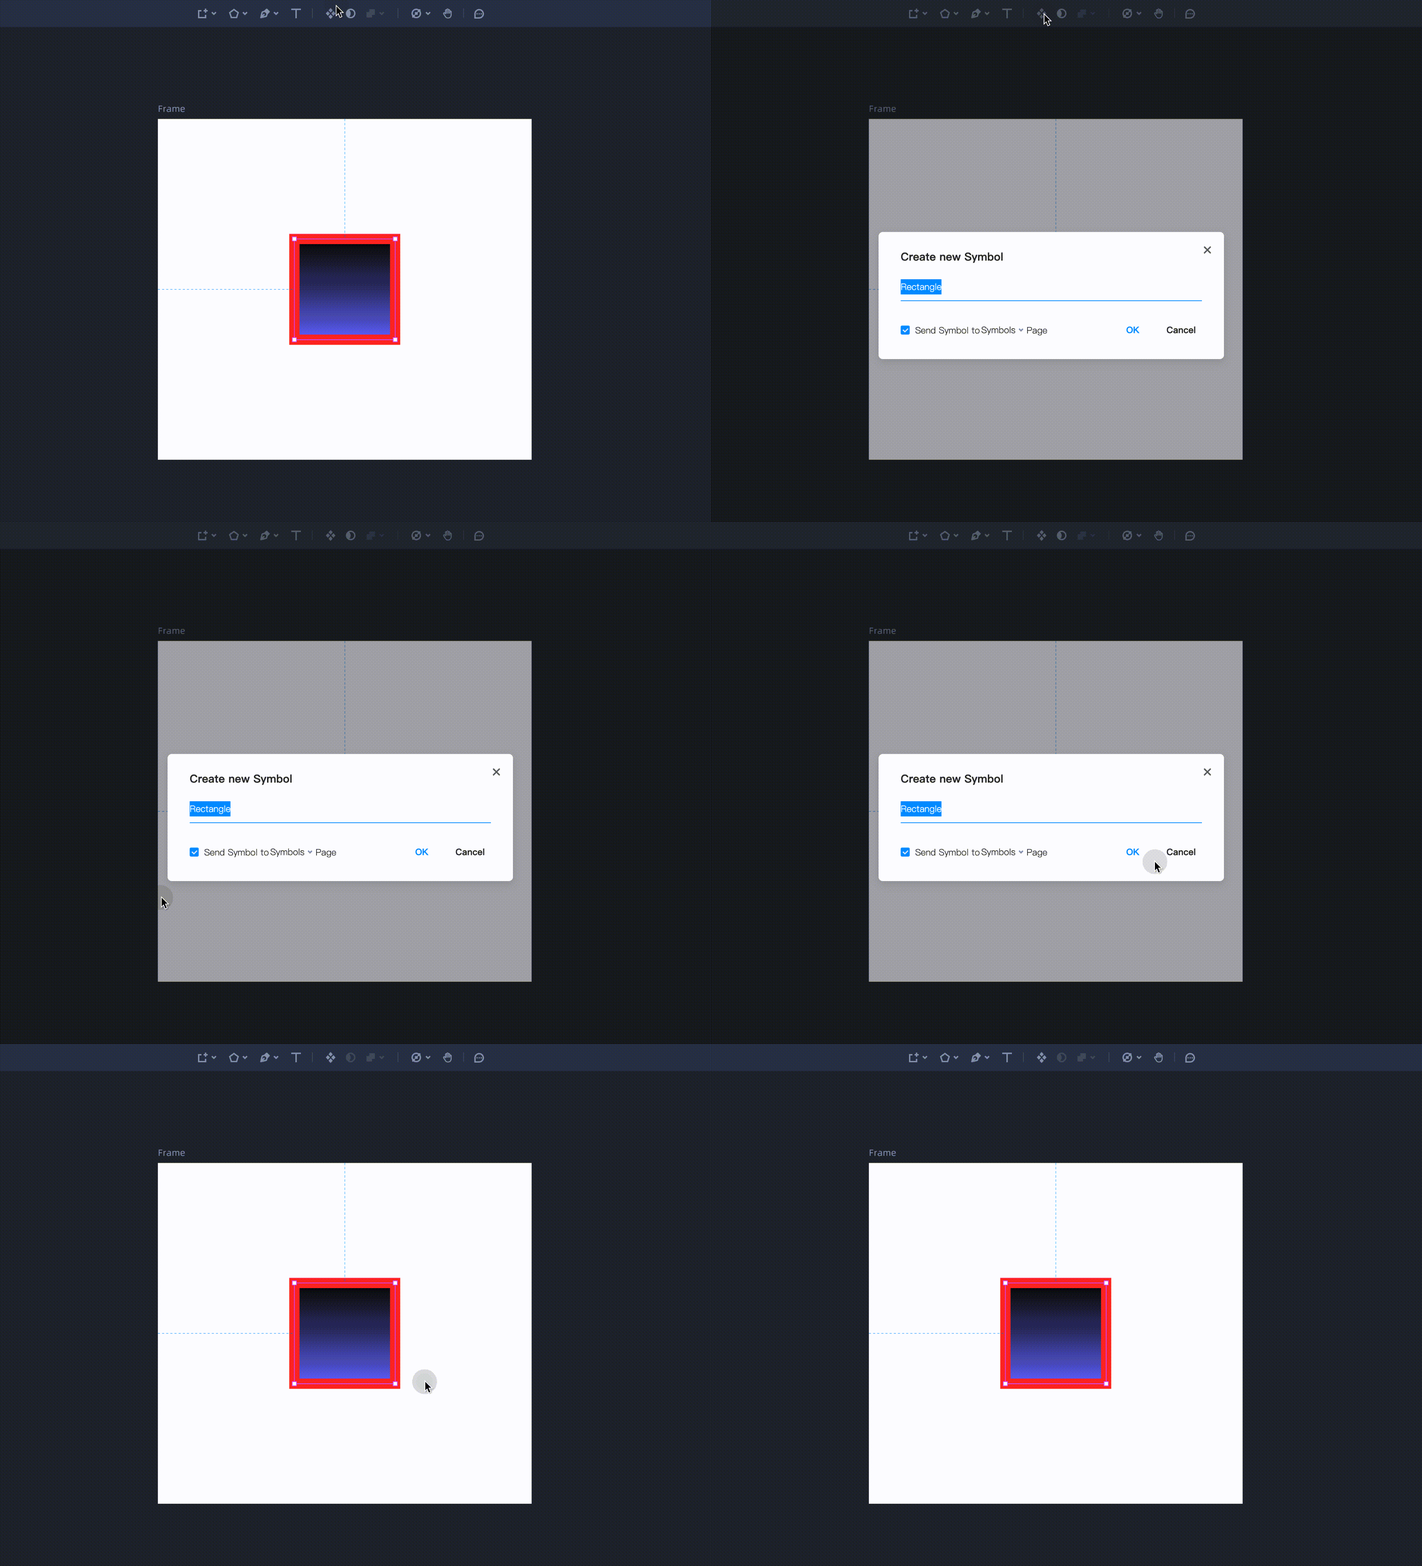
You can easily create a Symbol in Mockplus DT:Select a group, Artboard, or a selection of layers.
Choose “Create Symbol” from the top toolbar, or right-click to select “Create Symbol” from the menu.
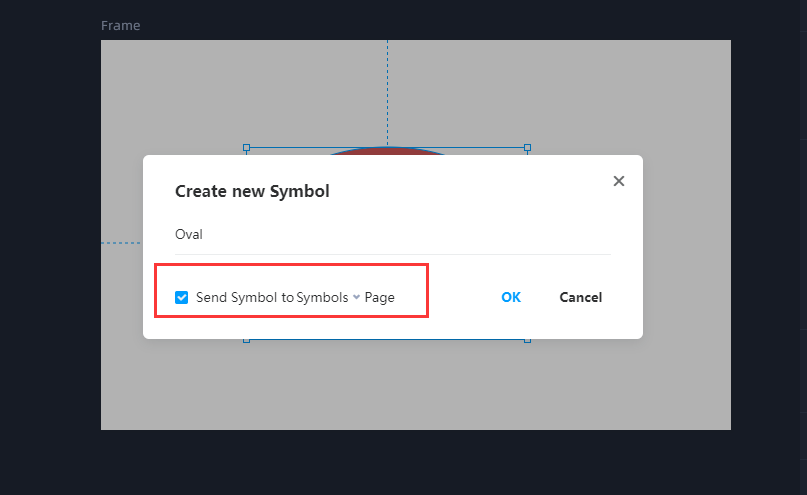
Give your symbol a name and choose whether to send its source version to a separate symbols page or keep it on the page you’re working on.
How to Manage Symbols by Groups?
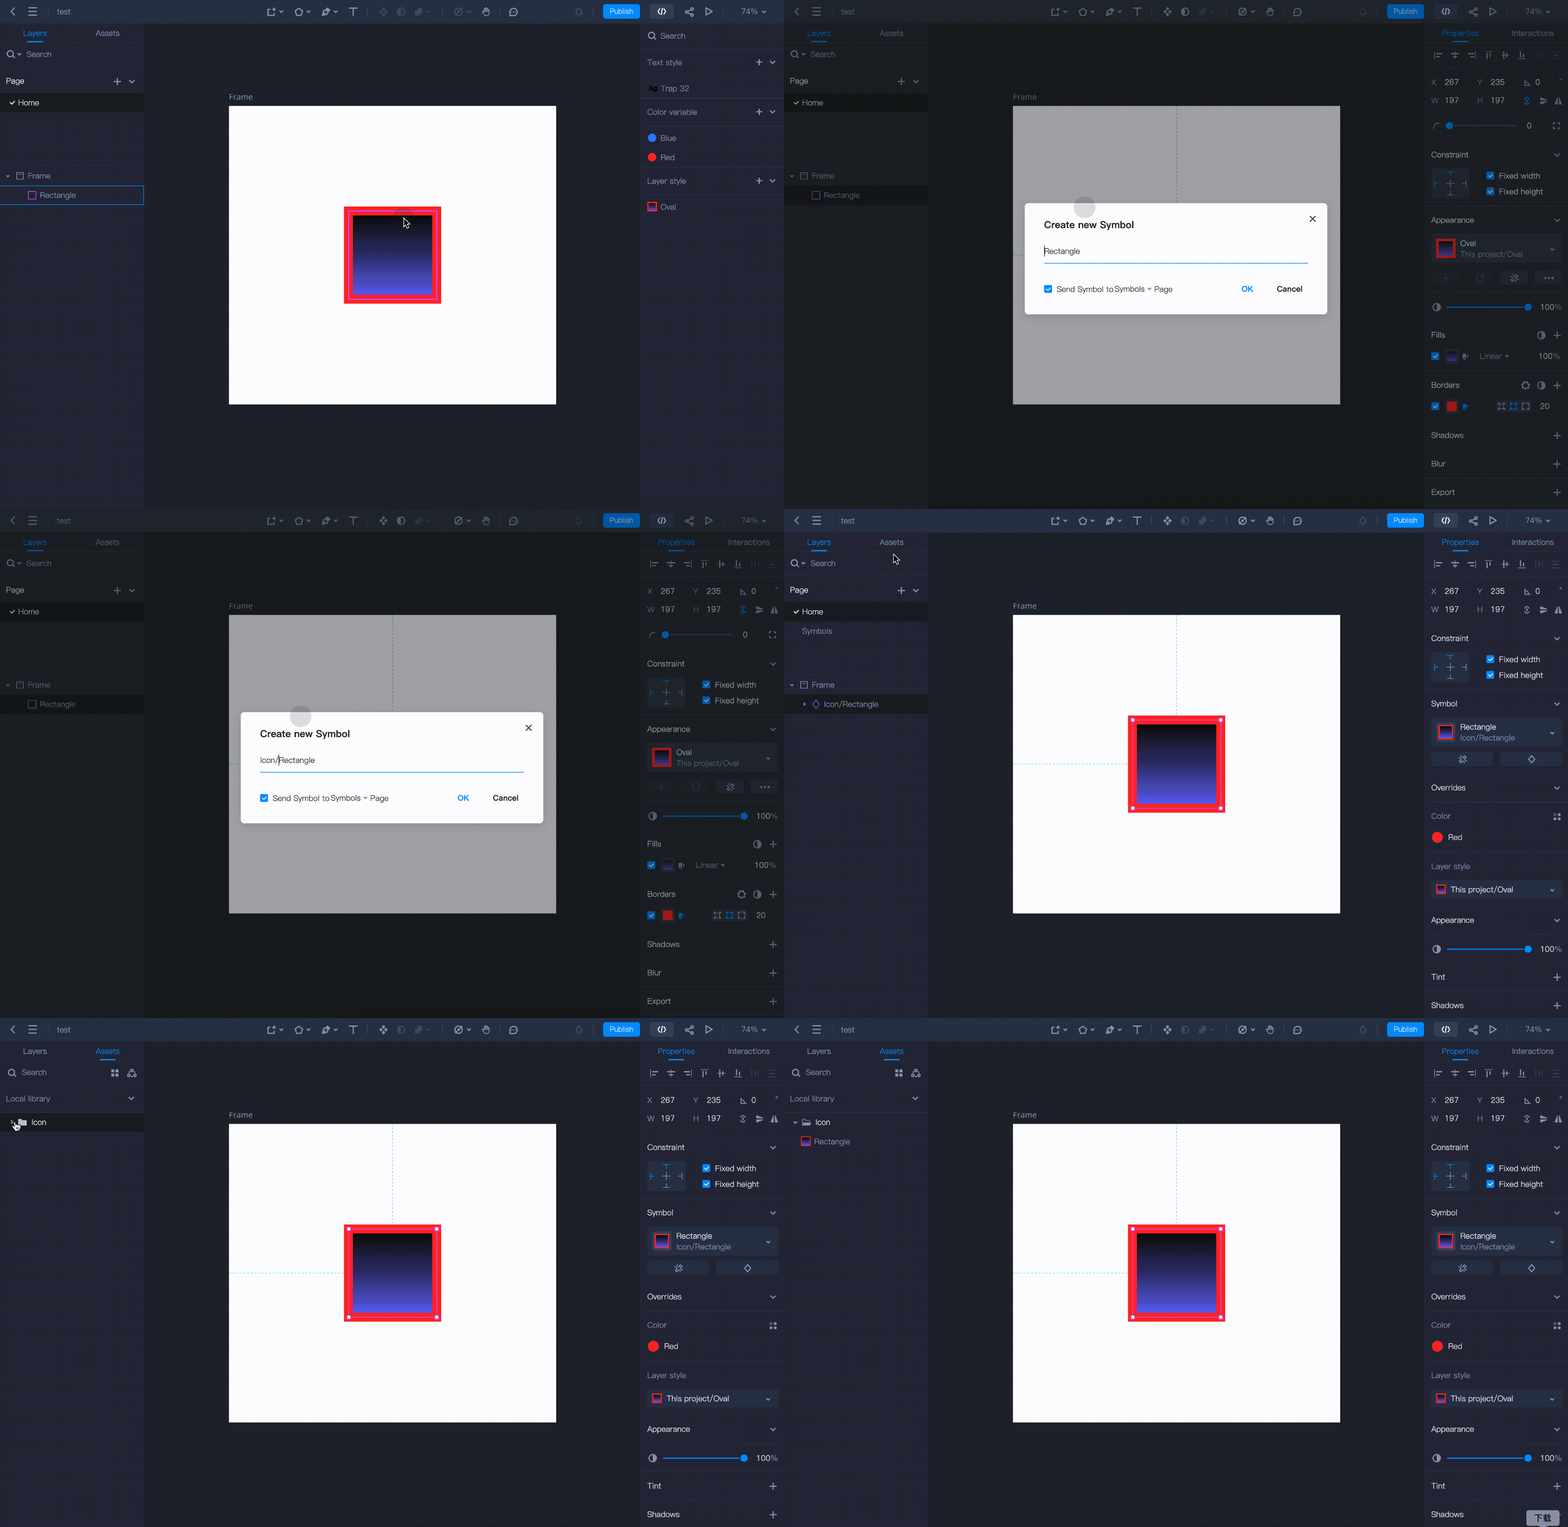
In Mockplus DT, you have the option to group or categorize all your symbols to be better presented in the “Assets” panel, helping you easily manage and find the symbol you want.Select a group, Artboard, or a selection of layers.
Choose “Create Symbol” from the top toolbar, or right-click to select “Create Symbol” from the menu.
Name the symbols using the format “Group-name/Style-name” from the pop-up window.
Your Symbols with the names “Icon/Light” and “Icon/Dark” will be placed in a group called “Icon.”
How to Send Symbols to One Page?
When you create a Symbol, you can also choose to send the Symbol to one single page, such as your Symbols or other page, so all of your design assets can be gathered in one page for better sharing and reuse, helping to create a consistent design system together.
How to Reuse a Symbol?
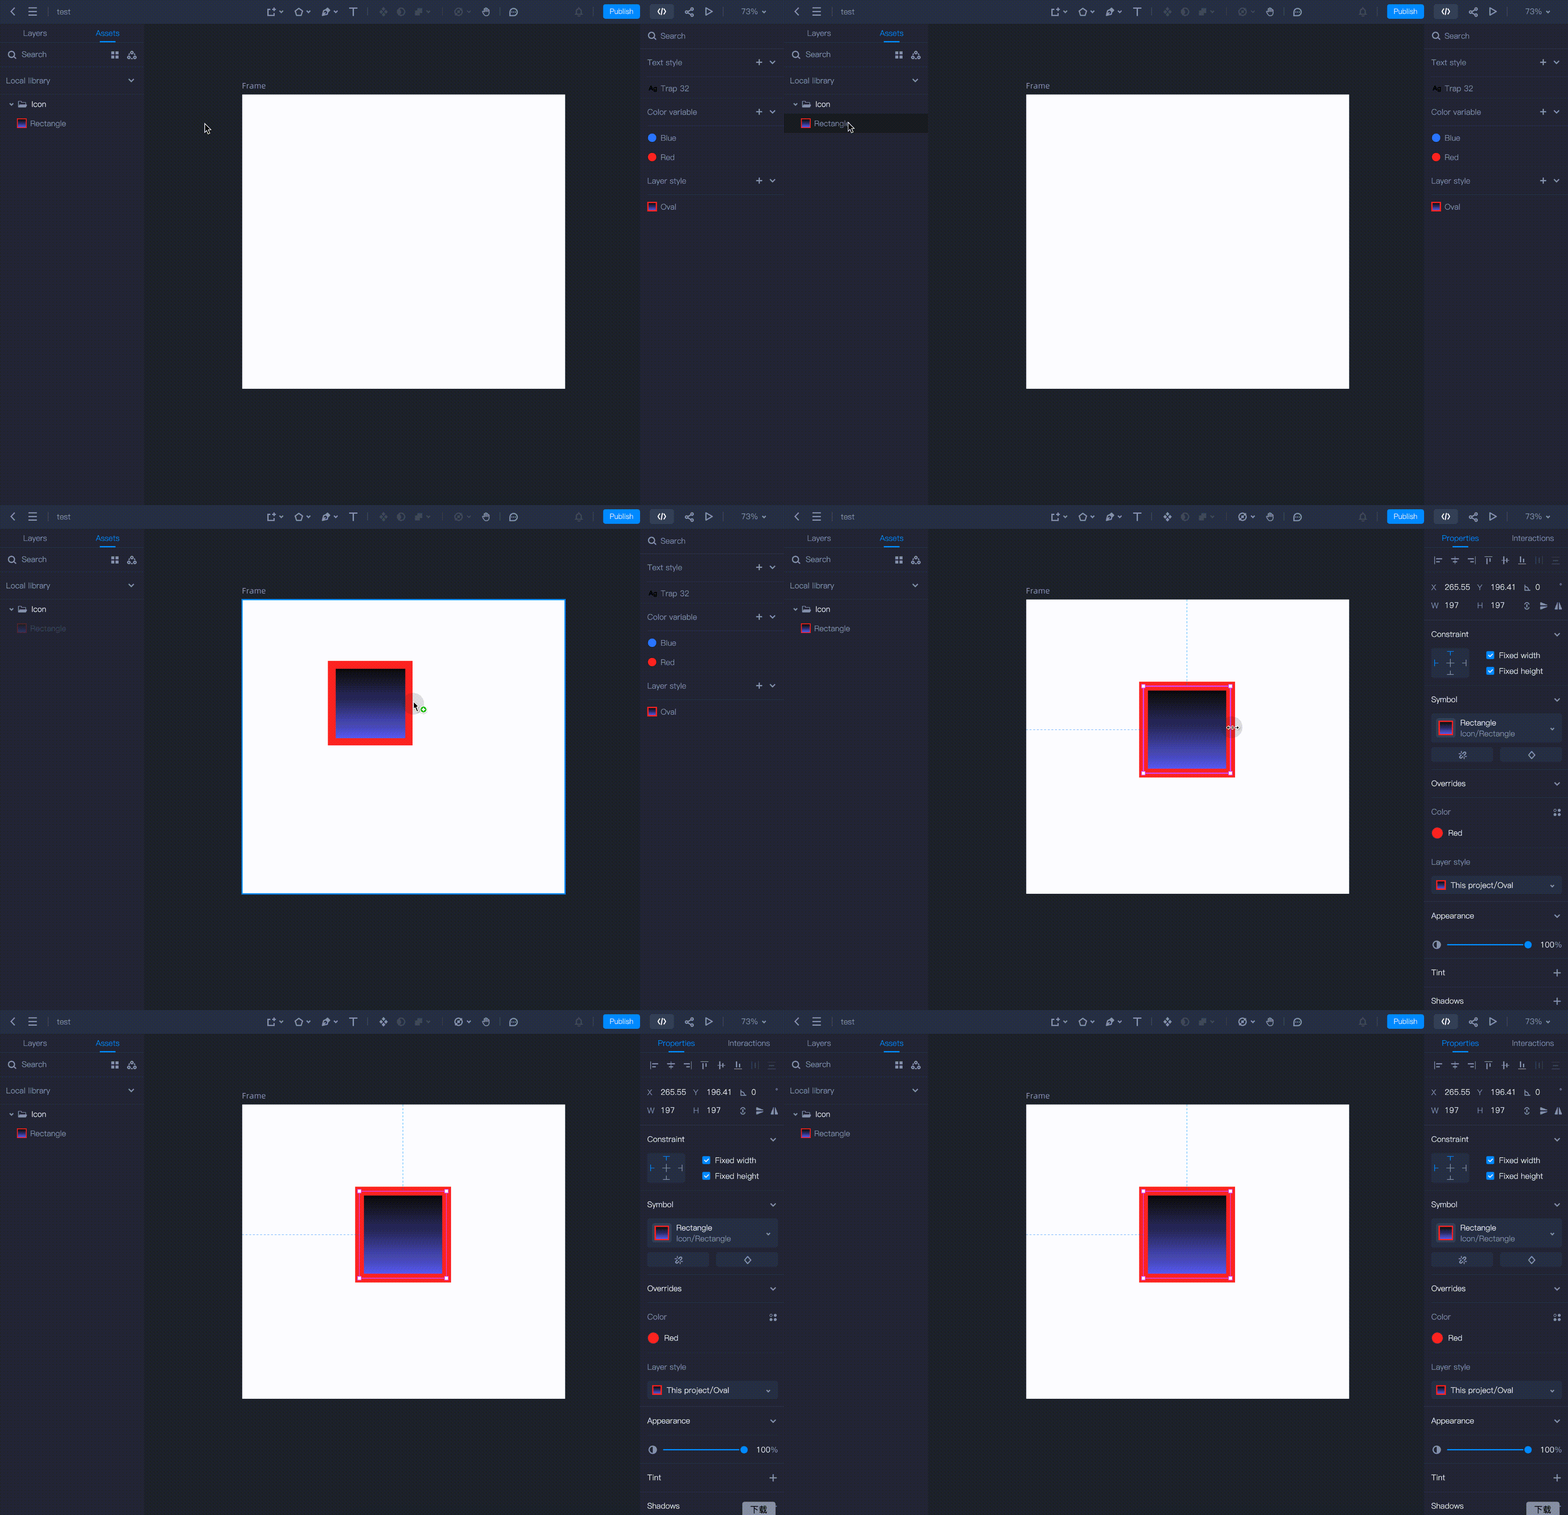
To reuse a symbol:Switch to the Assets Panel, where you will find all the symbols you chose to send to a separate symbols page during creation.
Drag and drop any symbol you need, on the Canvas to reuse it.
How to Edit a Symbol Source?
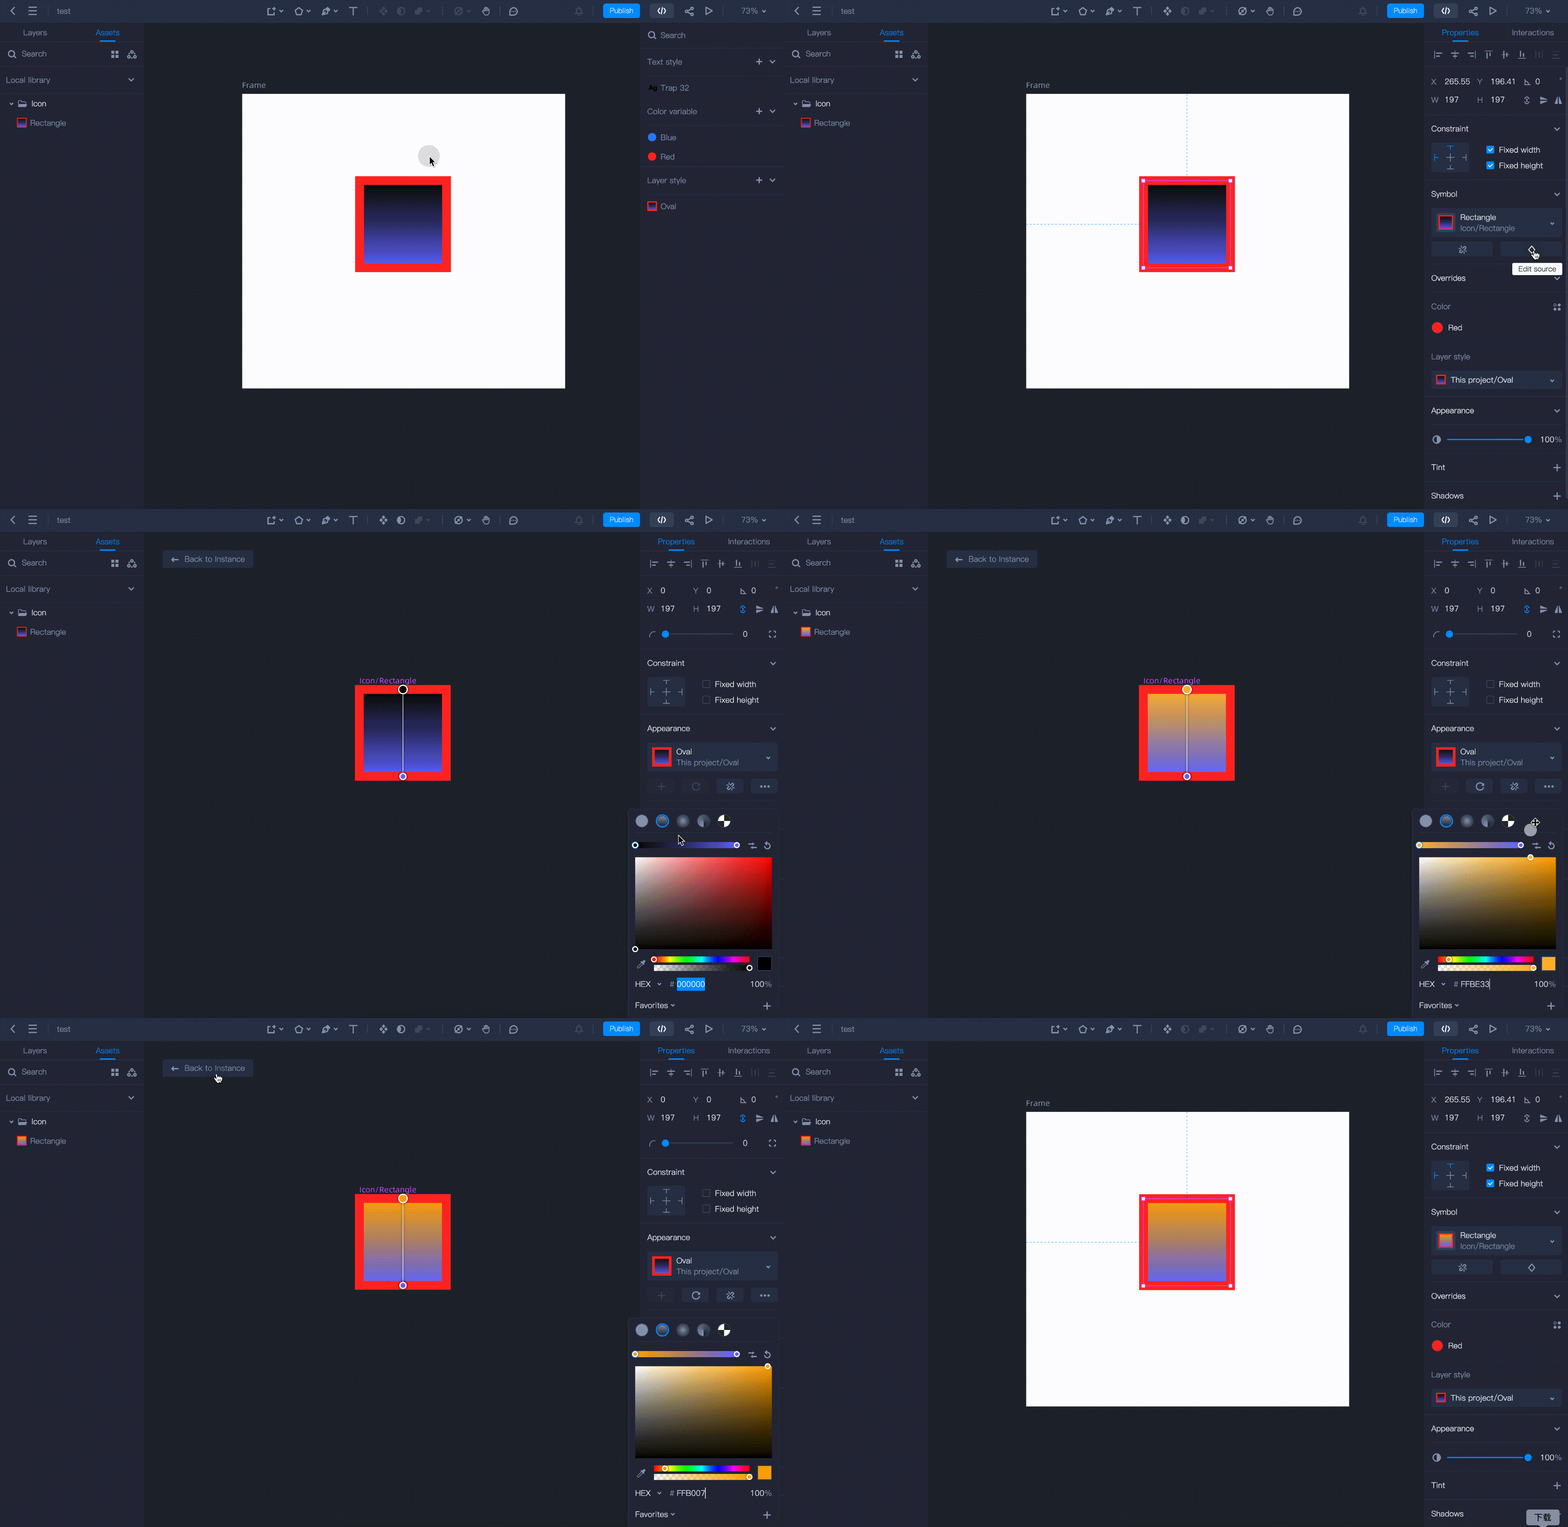
To edit a Symbol source on Mockplus DT, follow these steps:Select an Instance and double-click on it.
Press Enter on your keyboard, or click “Edit Source” on the Properties panel to go straight to it.
Any edits you make to the source will sync to any instances of it in your design.
When you’ve made your changes, choose “Return to Instance” to go back to the instance and see how your changes have synced.
How to Detach a Symbol Instance from a Symbol Source?
To detach a Symbol Instance from a Symbol Source:You need to select an Instance first and right-click on it.
Choose “Detach from Symbol” from the menu, or directly click the “Detach” button from the Symbol Panel to detach it.
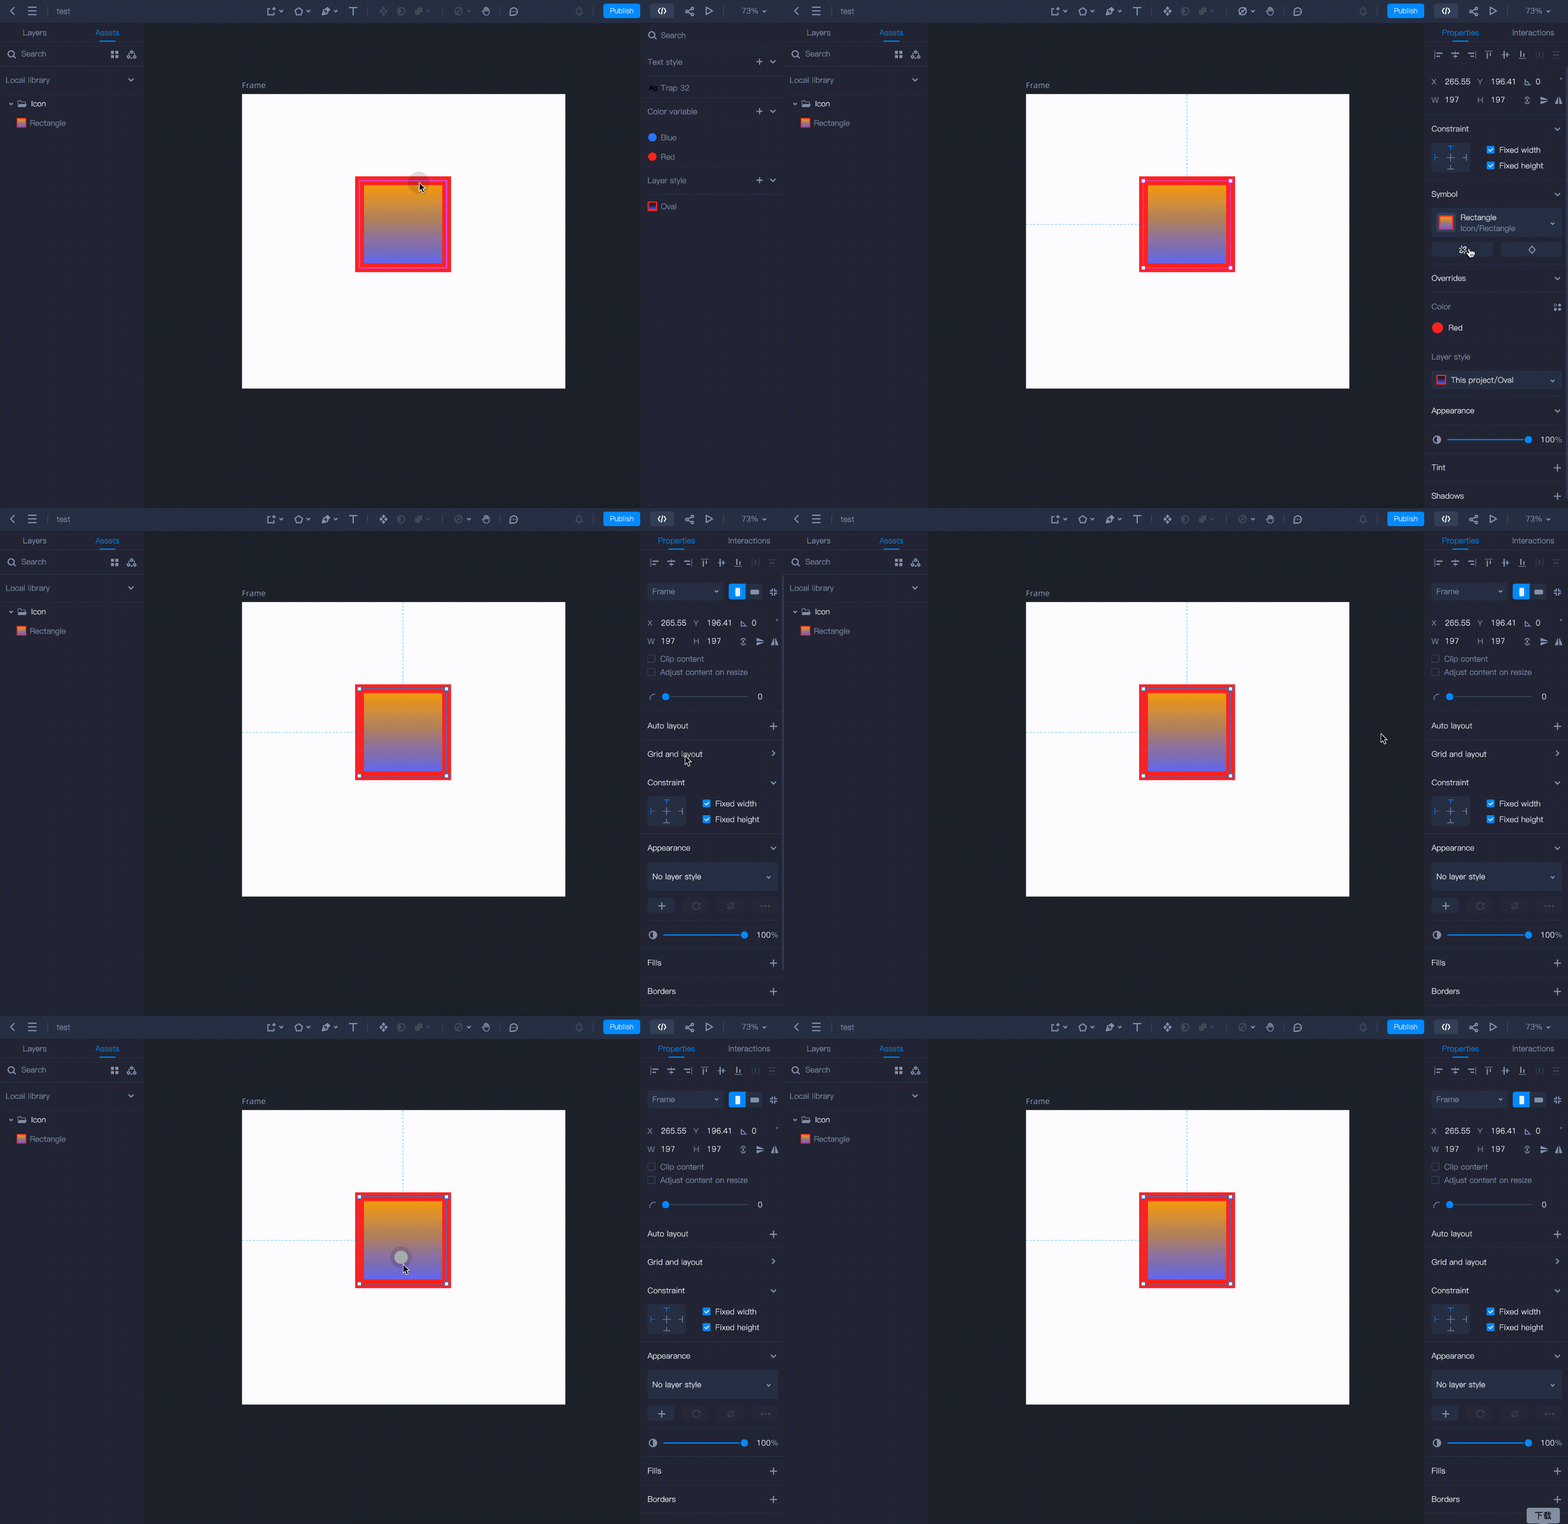
- This will convert any instance and any nested symbols it contains to groups, which will not sync to the edits you make to the Source.
How to Swap a Symbol?
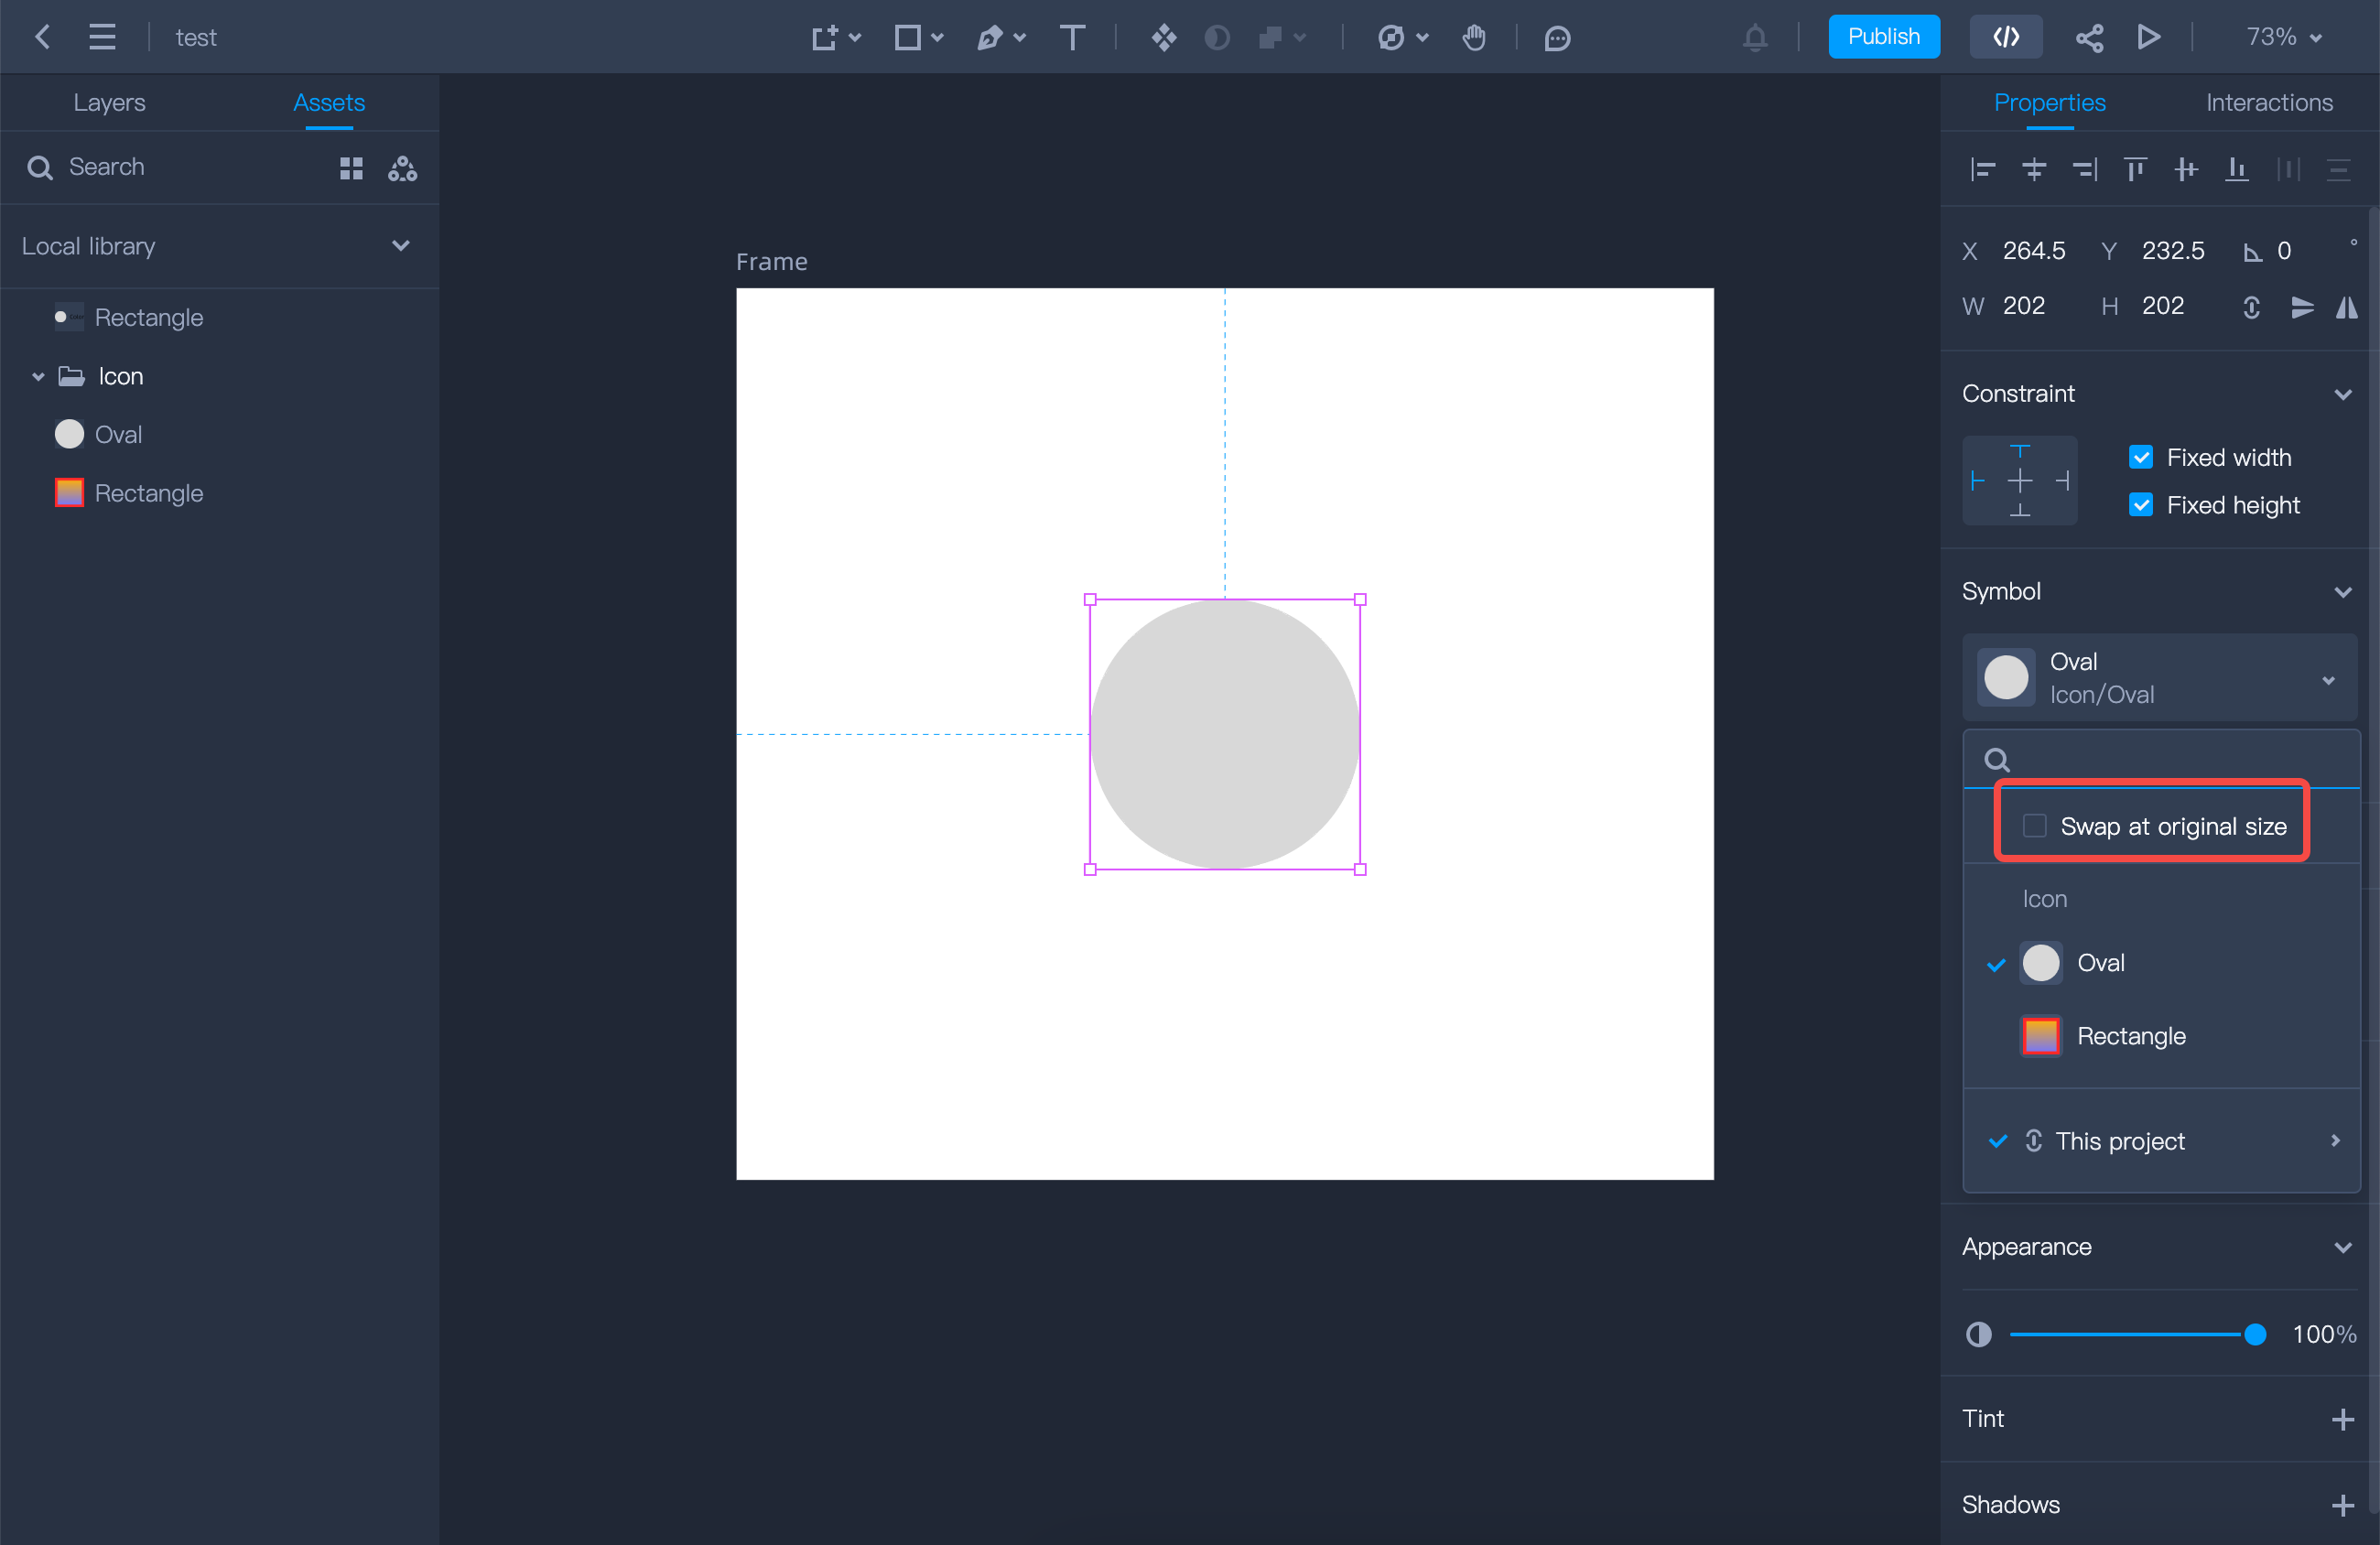
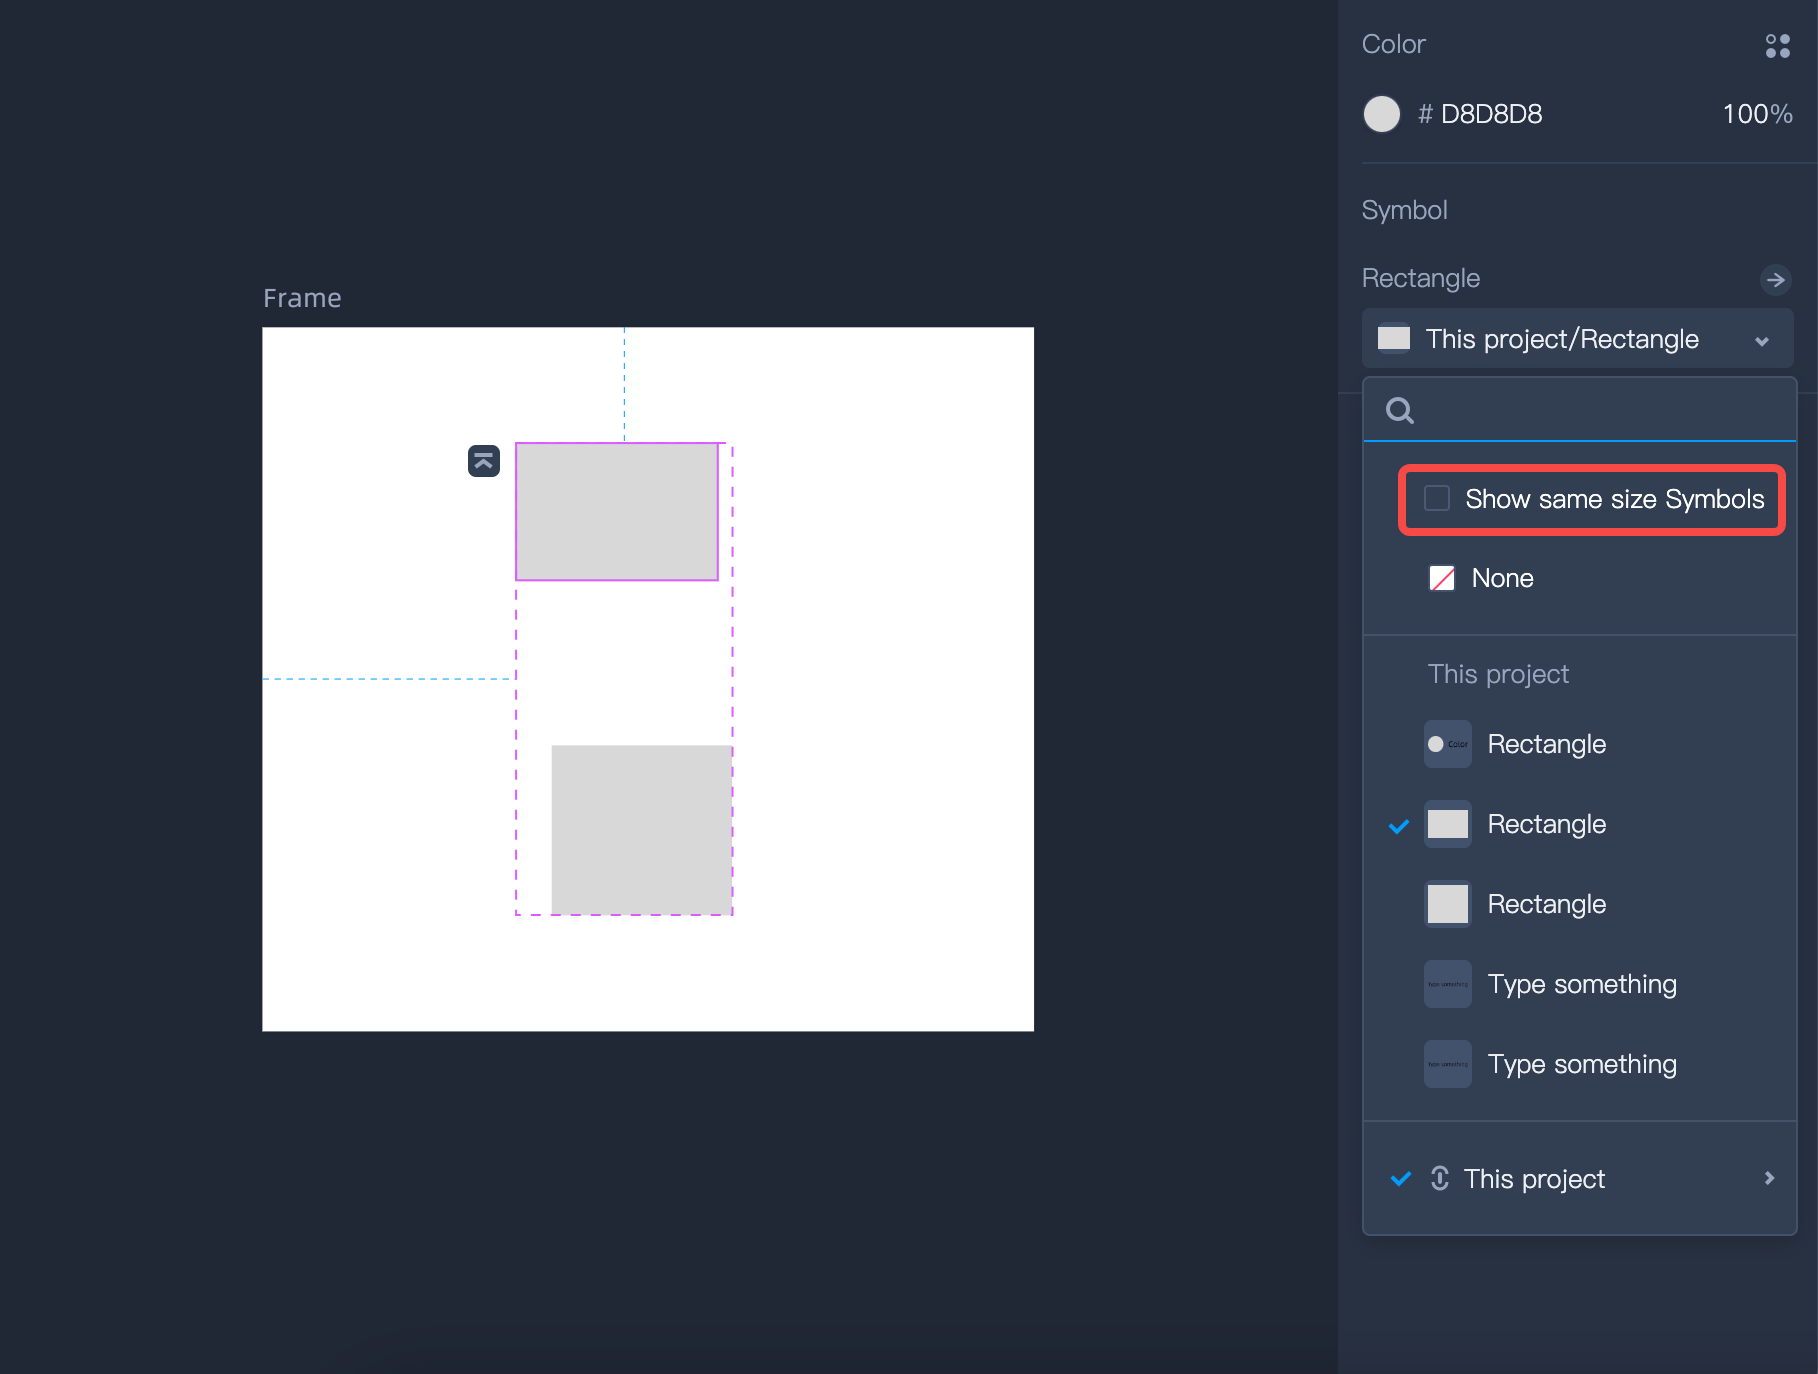
You can swap all or some symbols using the pop-up in the symbol panel from the “Properties” panel. Here’s how:Choose a Symbol from the list or search for the symbol you’re looking for and click to swap it with the currently selected symbol.
Note: In Mockplus DT, you can easily swap Text, Images, Text Styles, Layer Styles, and Symbols.
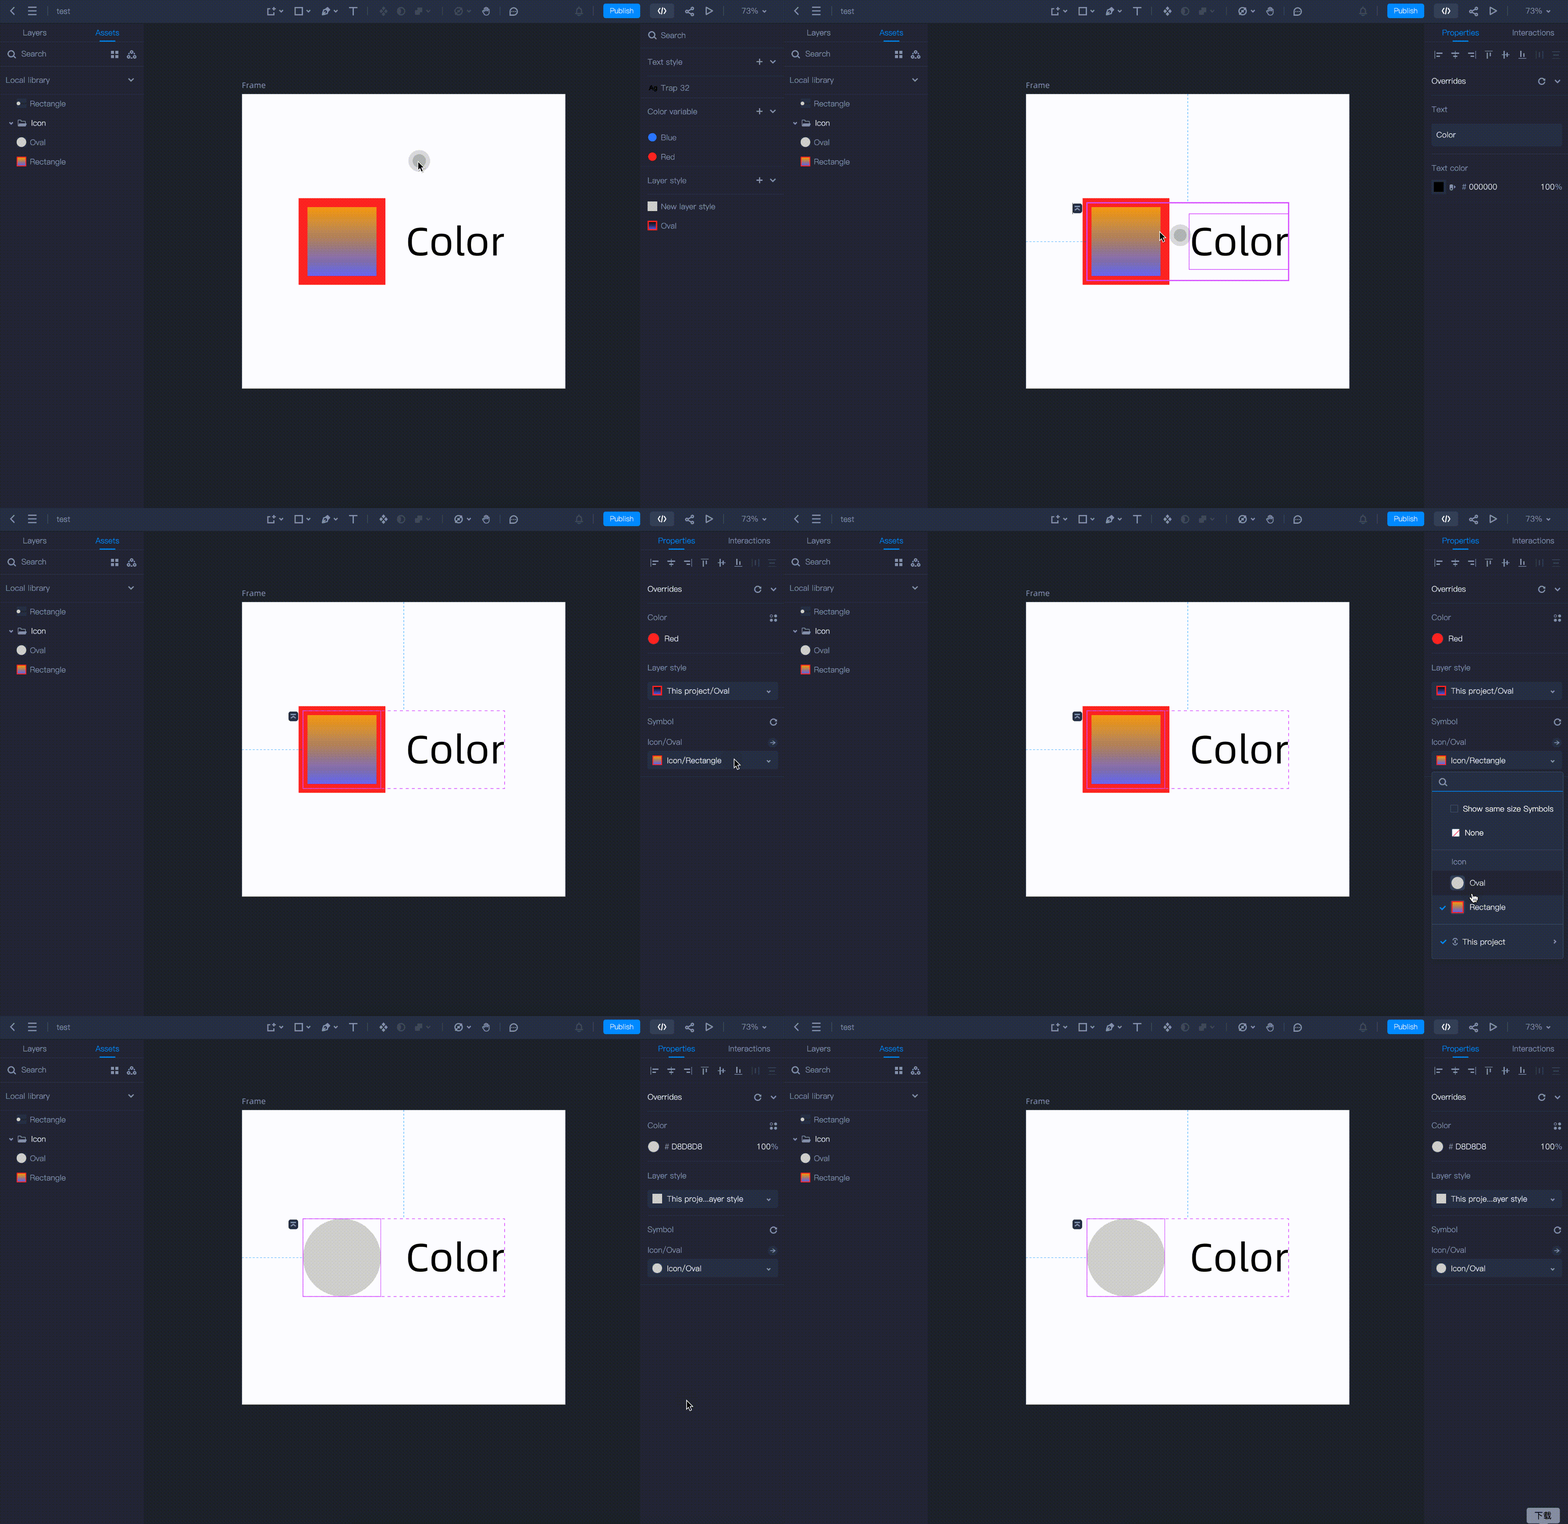
Resizing the Instance When swapping a Symbol, you can check the ‘Swap at original size’ option in the “Properties” panel to resize the instance you‘ve selected to fit its new Symbol Source.
