


 Mockplus Classic

Mockplus Classic v3.3 introduces the team management features, which allows for group management and permission setting for team members and projects.
1. Team management
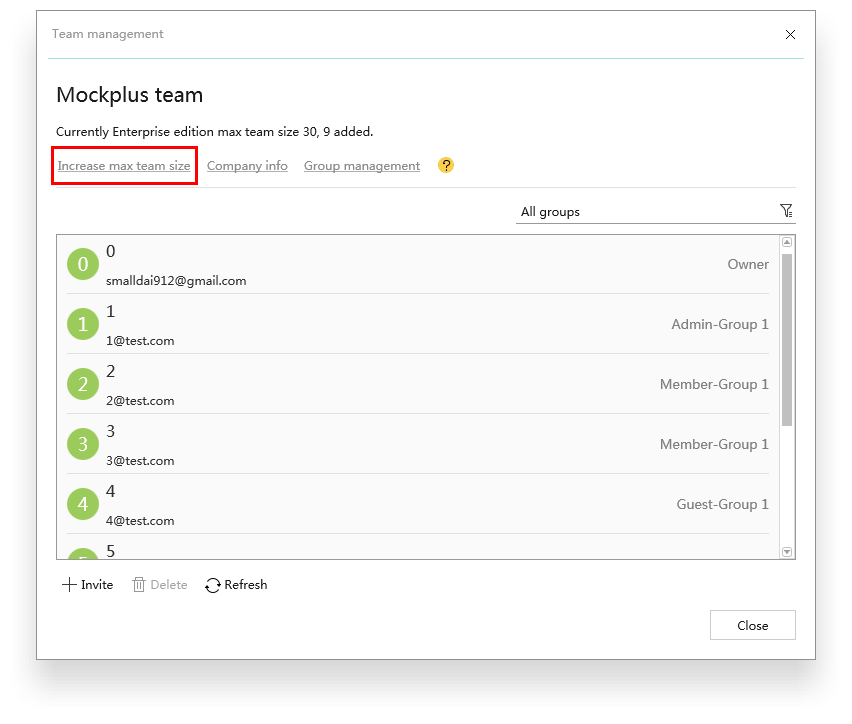
1) Increase max team size
Click “Increase max team size” under “Team management”, then it will switch to the “Buy” page for more team member seats.
Please note:
- The maximum number of team seats of Team Edition is 10 users.
- The maximum number of team seats of Enterprise Edition is 30 users.
It’s possible to increase the maximal team seats of Team Edition up to 30 users, by upgrading it to Enterprise Edition. If you need customized Team/Enterprise plans with over 30 users, please contact us via support@mockplusapp.com.
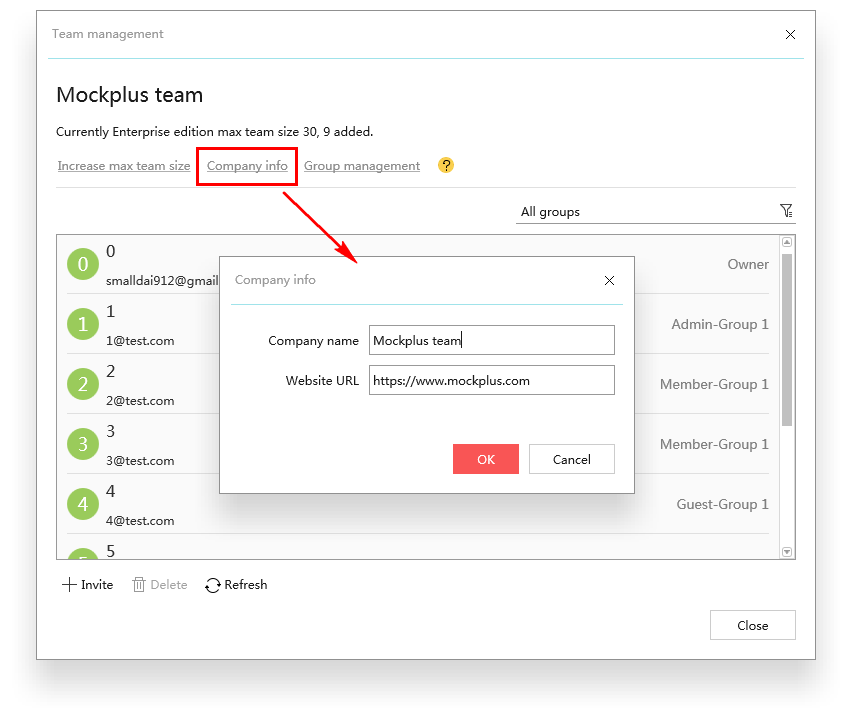
2) Modify company info
Click “Company info” to modify the company name and website URL. Note that, your company name will be displayed on the upper-left of the main menu in the start window and on the “Team management” menu as shown.
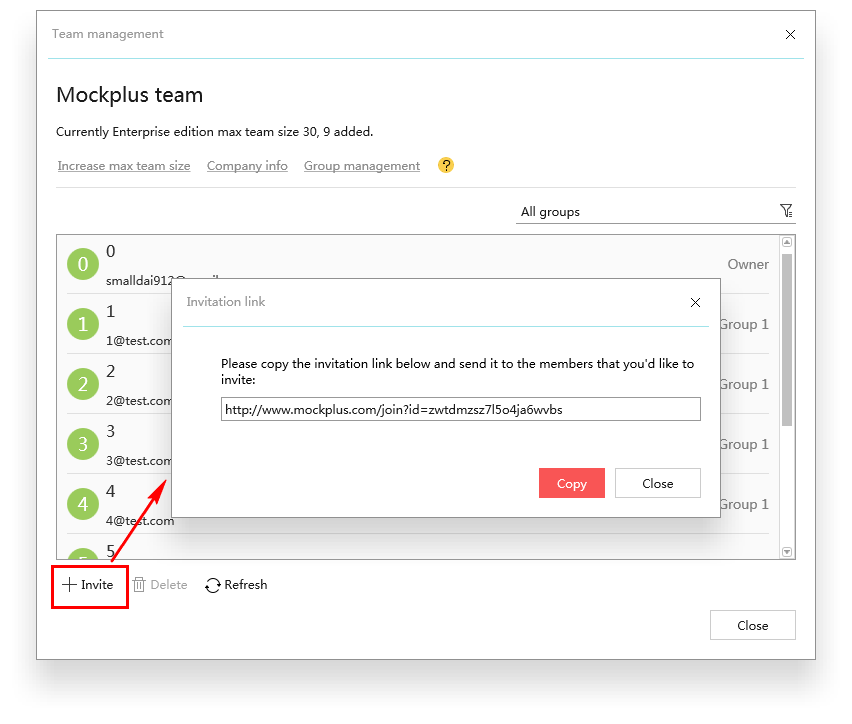
3) Invite members
Click “Invite” at the bottom of “Team management” to generate an invitation link and share it to the members that you’d like to invite. Then they can log in with their Mockplus Classic accounts and join your team.
4) Remove members
Select a team member that you want to remove and click “Remove”.

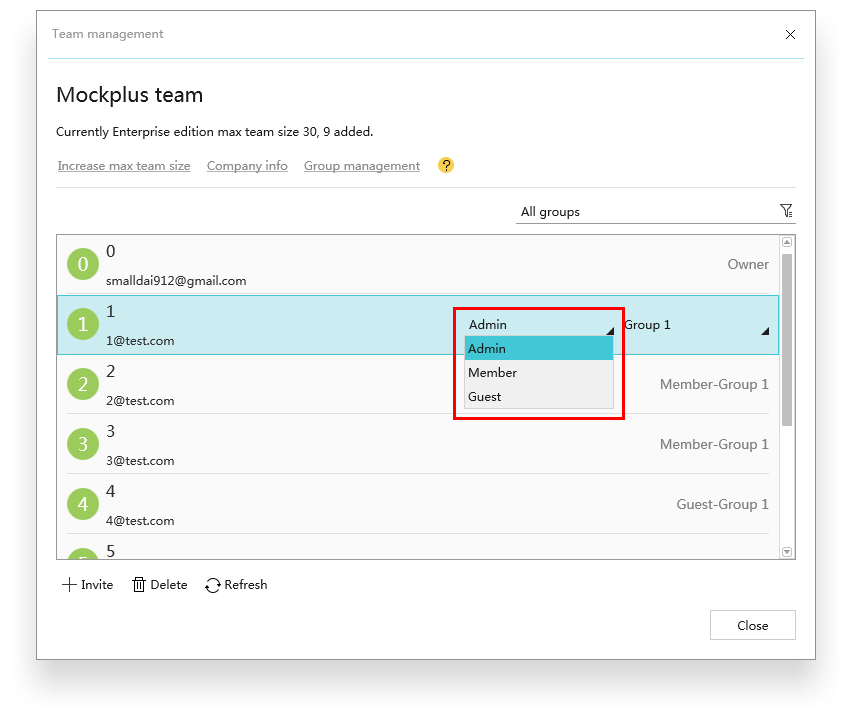
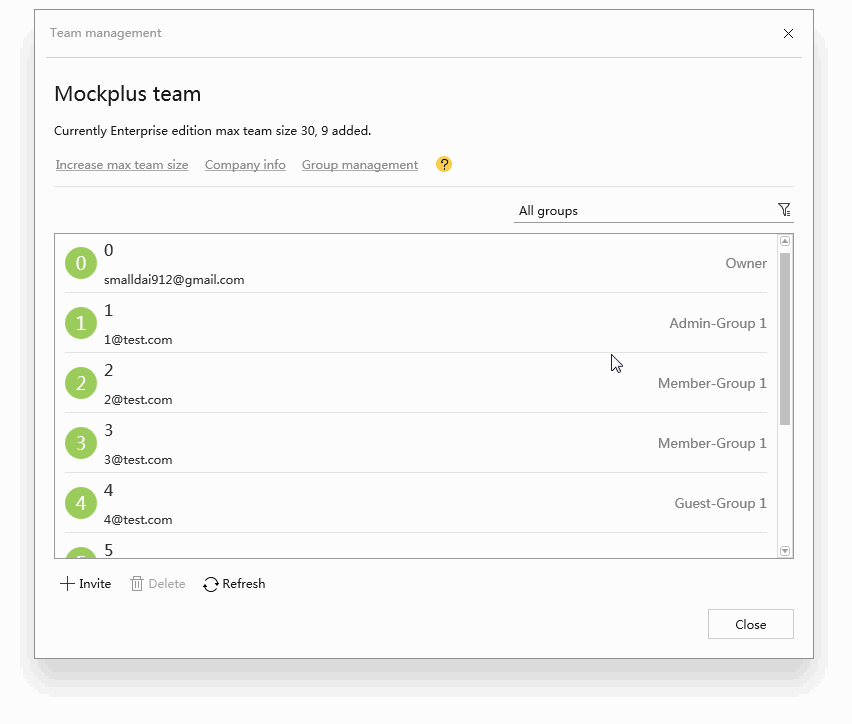
5) Set roles for team members
Highlight a team member and select a role from the first drop-down list to set a role for him/her. The available role options are: “Admin”, “Member” and “Guest”.
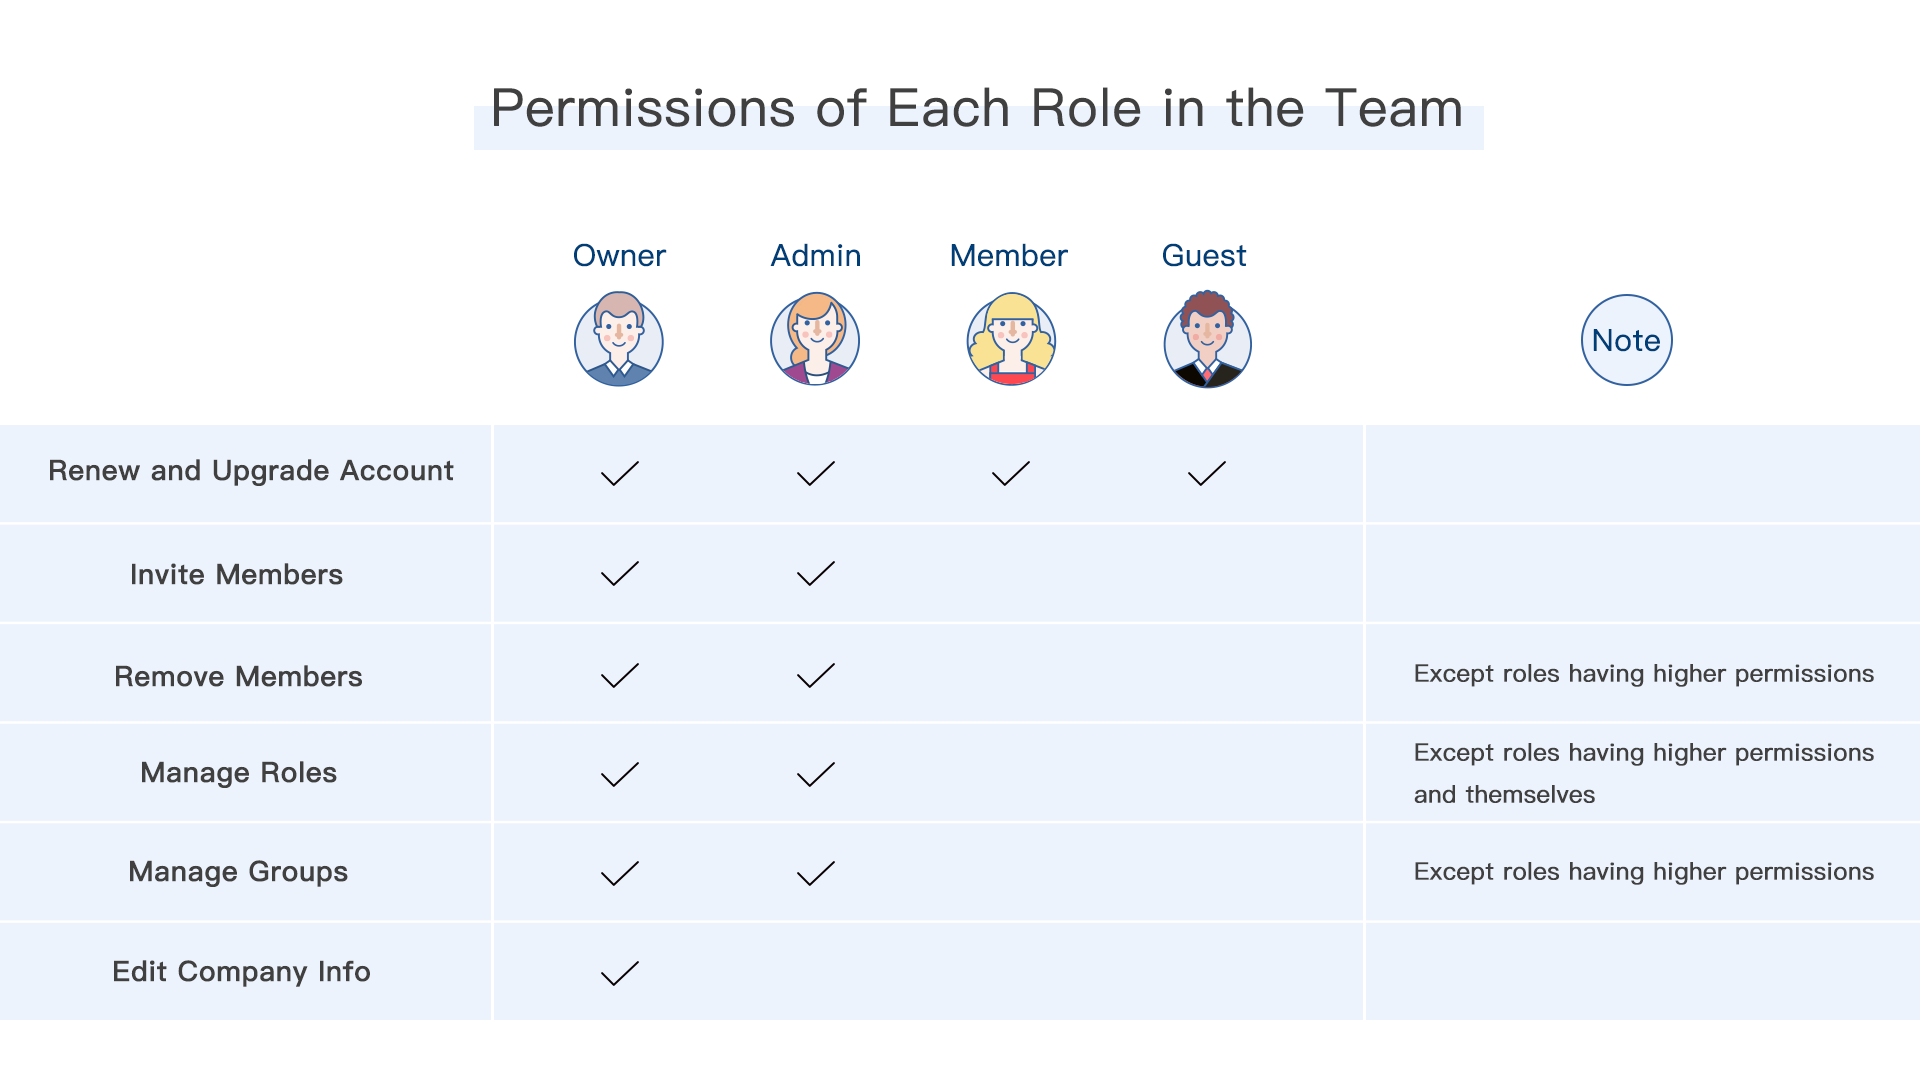
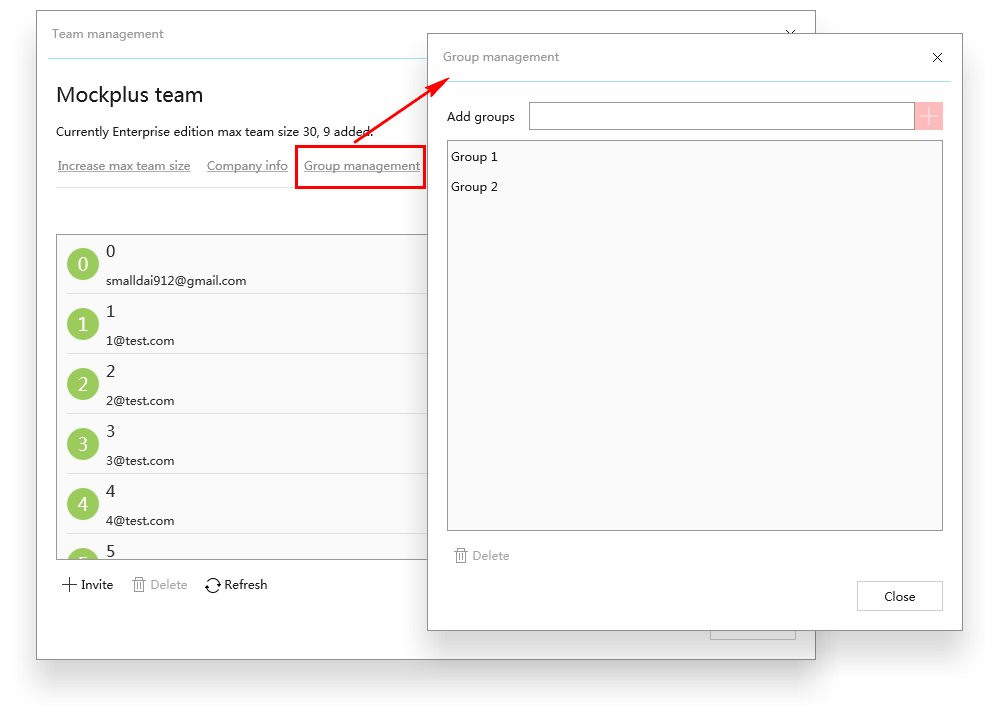
6) Group management
Click “Group management” to add or remove groups.
Highlight a team member and select a group from the second drop-down list to assign him/her to a target group.
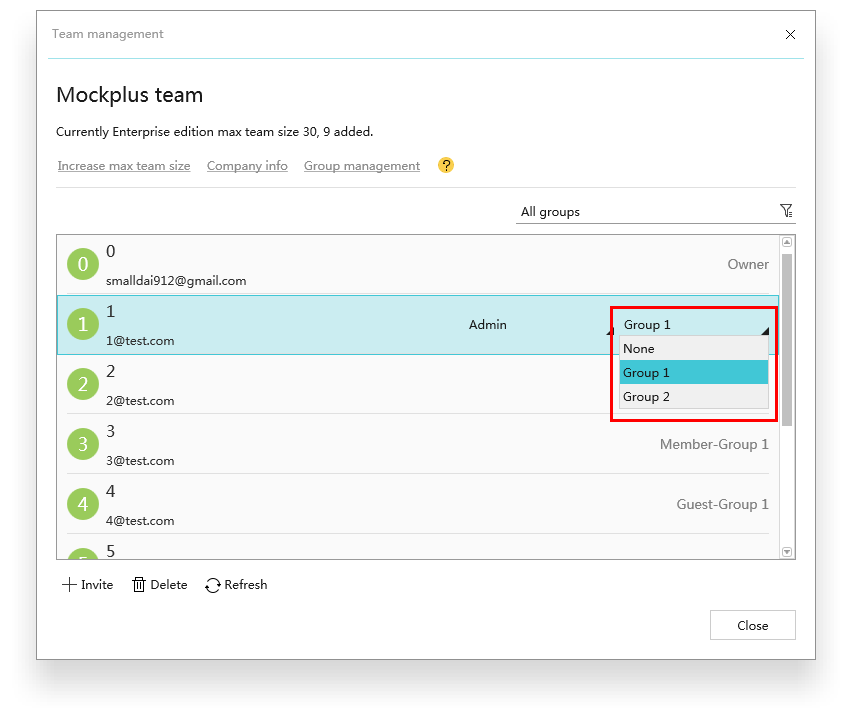
Expand the drop-down list on the right side to check members of different groups.
2. Project management
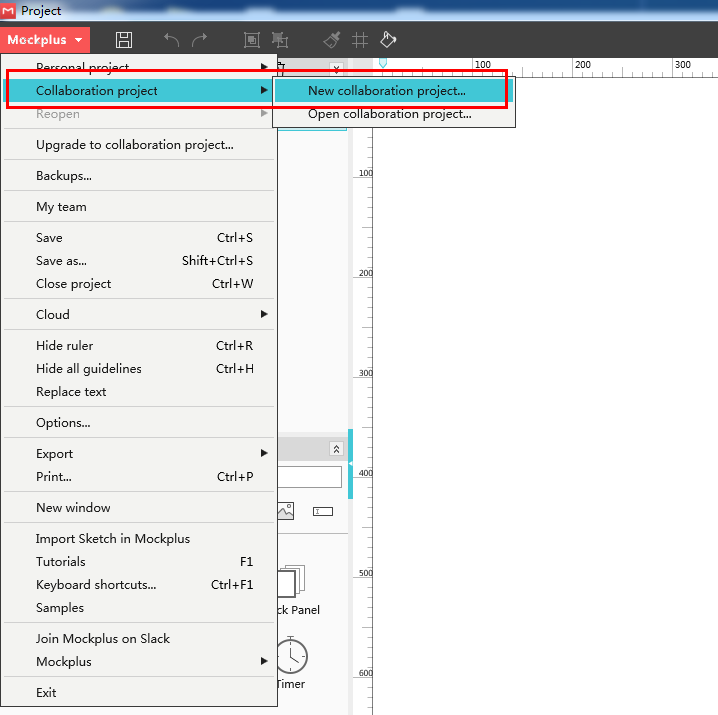
1) Create a new collaboration project
Click “New project” under the “Collaboration project” tab on the startup window.
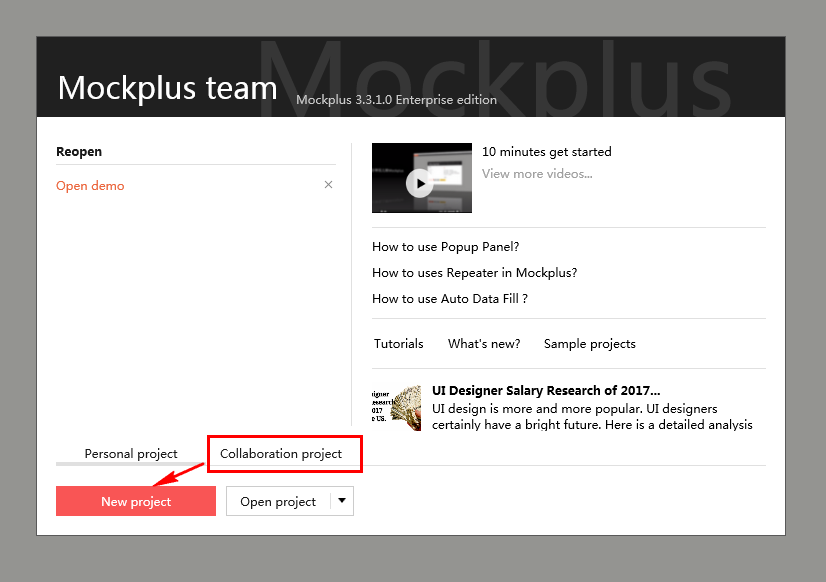
Or navigate to the main menu and choose “Collaboration project” in order to create a collaborative project.
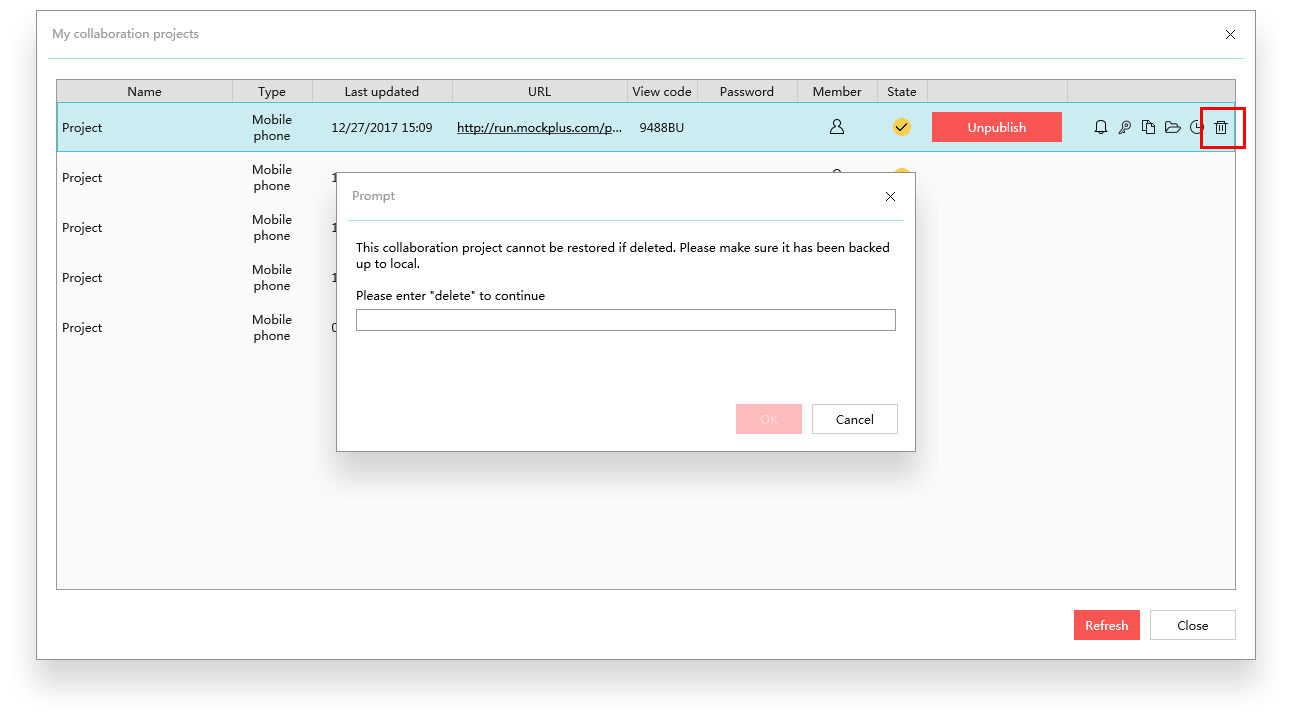
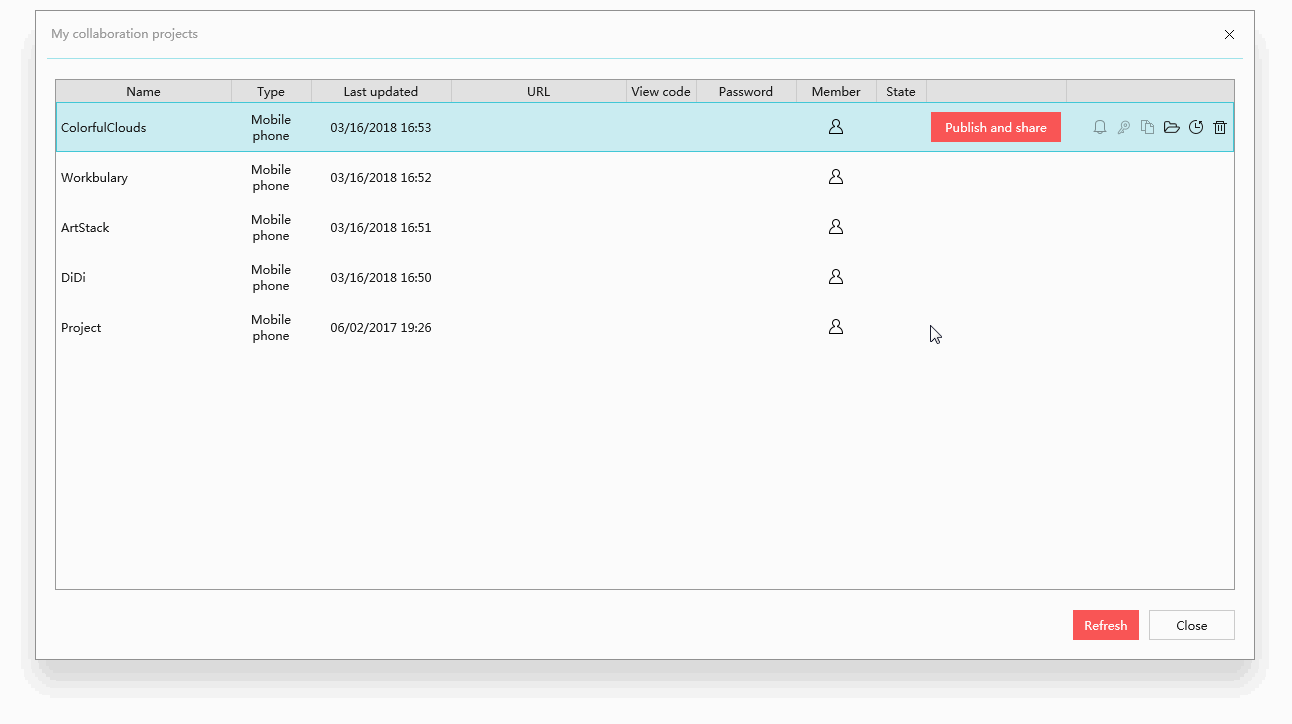
2) Delete collaboration project
Open “My collaboration projects”, select a collaboration project, click the “Delete” option in the right side, and enter “delete” to confirm your deletion. Please note that the deletion cannot be restored.
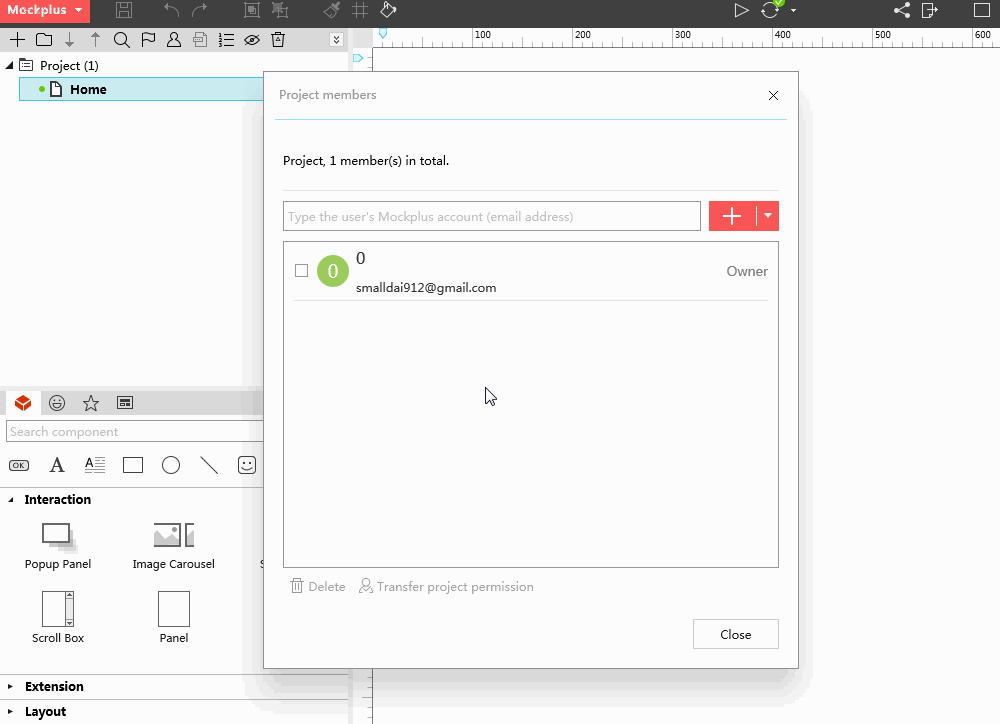
3) Transfer project permission
Click “Project members”, highlight a team member and click “Transfer project permission” to transfer project permissions as you wish.
When project permission has been transferred successfully, this team member will be labeled as “Owner”.
Please note:
- The owner of a collaboration project by default is the creator of this project.
- The owner of a collaboration project has more advanced options to manage the team, such as adding/removing project members, transfering project permissions, and more.
- The owner and admin of a team are allowed to transfer permissions of projects created by the team.
4) Add/remove project members
Type the user’s Mockplus Classic account (email address ) in the blank and click the “Add” button. Or click the button beside the “Add” button to choose a team member. Highlight a member and click “Remove” to delete this project member.
5) Publish/unpublish a collaboration project
Open “My collaboration project” and click “Publish and share”. And then, a URL will be automatically generated for previewing and sharing. The state of this published project will also be changed into a yellow hook.
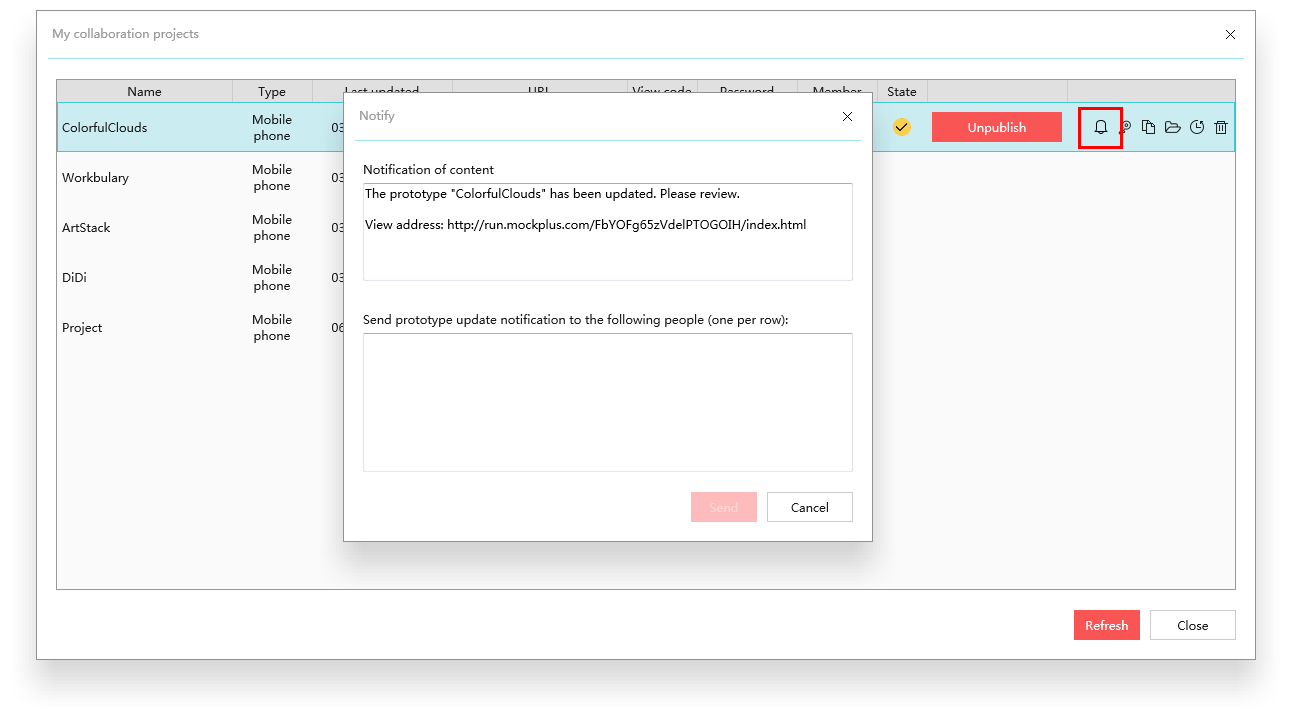
6) Notify others to review/test
Once the project is published, click the bell icon in order to edit the notification content and the email address of the reviewer(s). Remember to click the “Send” button to notify your team members.
7) Password protect the project
After the project has been published, click the key icon and input the password in order to password protect your project. As you can see, all of the passwords will be displayed in the “Password” column. To access the project, others should click the project URL and then input the password in the popup window.
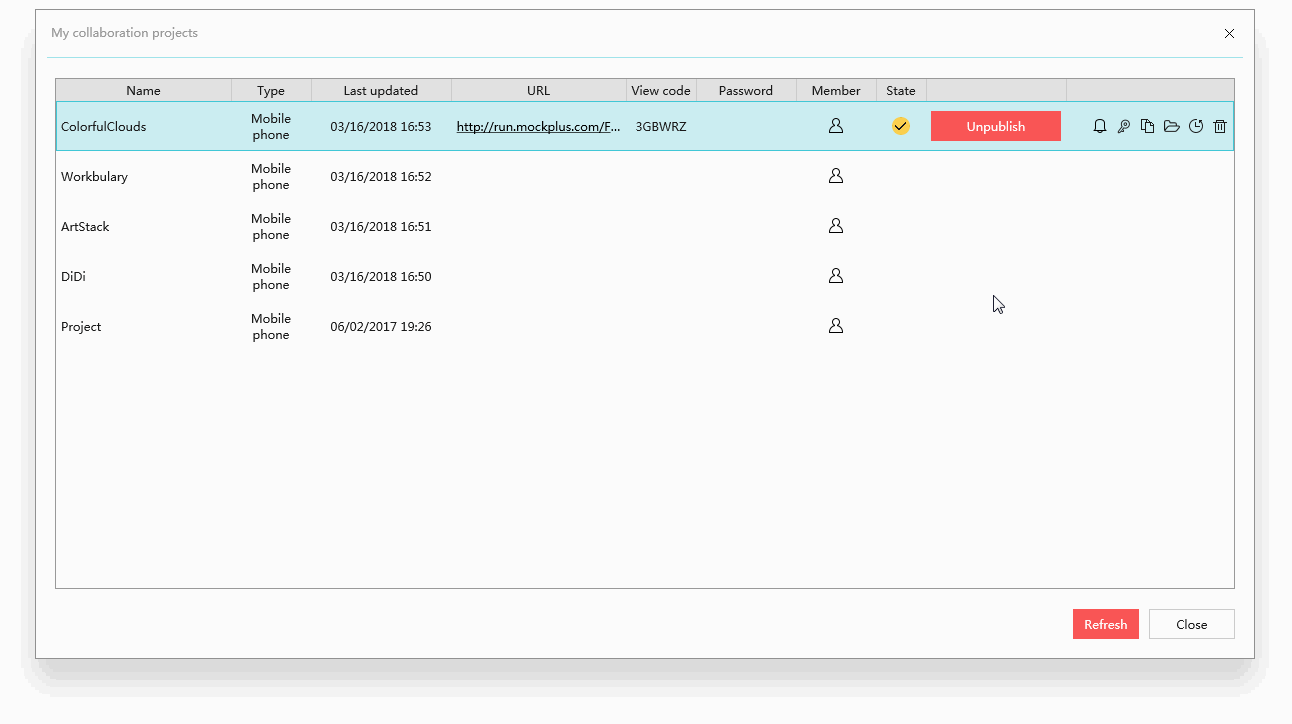
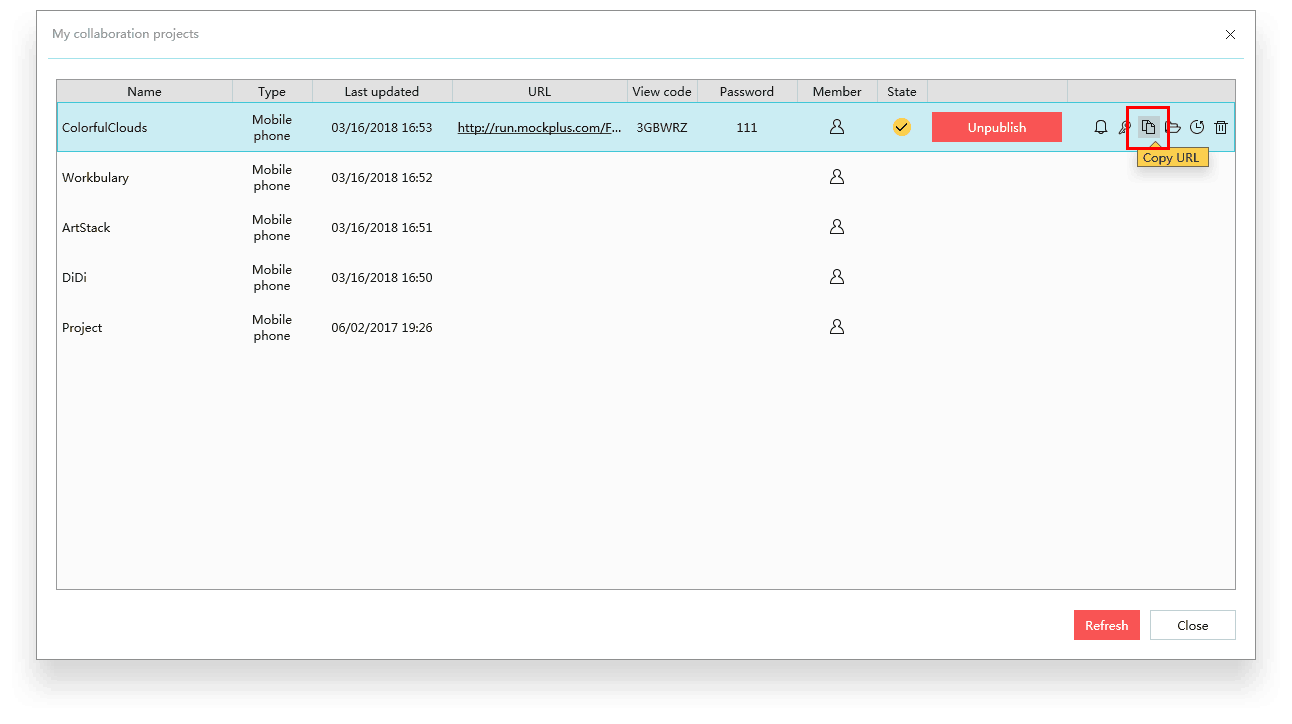
8) Copy project URL
After the publish, it’s possible to copy the URL by simply clicking the folder icon. You will be prompted that “Copied to clipboard”, which enables you to send this shareable link to reviewers. If this project is password-protected, it’s required to input the password when viewing it.
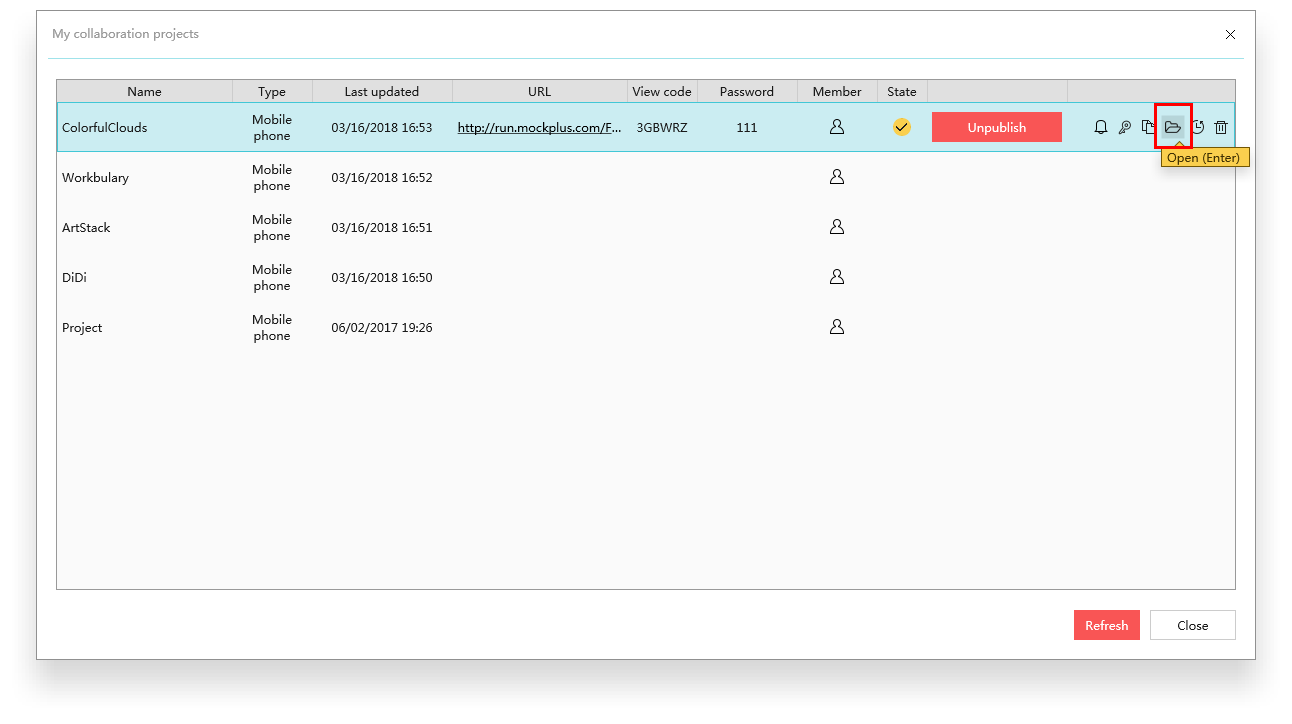
9) View or download project
Click the “Open (Enter)” option to open the project for viewing and downloading.
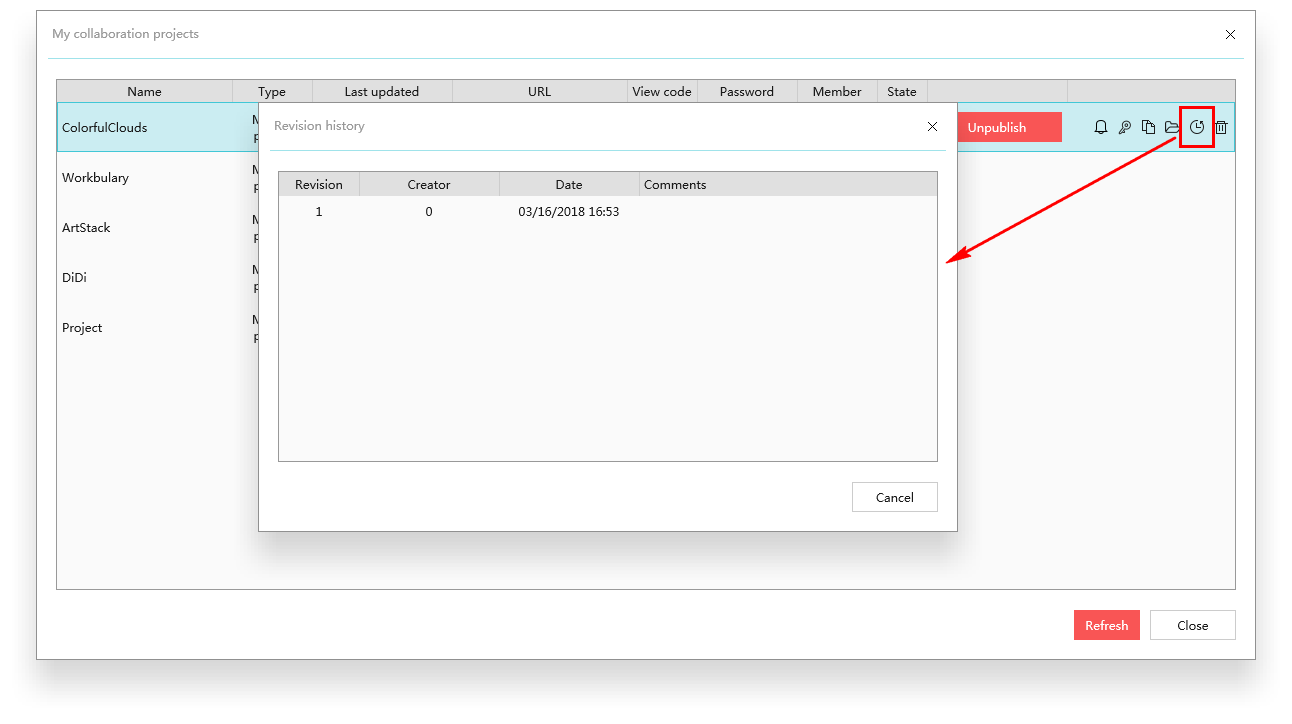
10) Check revision history
Click the time icon (or “View history” option) to check the corresponding revision history of your project.
3. FAQs
Q1: How can I manage my team members if I have an account of Mockplus Classic Team Edition?
A1: Click “My team” at the upper-right corner of Mockplus Classic Start interface, then you can freely manage team members to your requirements.
Q2: Is it possible to assign team members in accordance with my needs since I’m not sure about the number of team members yet?
A2: Yes. You can freely add/remove/reassign team members according to your needs.
Q3: Does every team member have to log in with a different account?
A3: Yes. Every team member is supposed to log in with a different account. And you can freely invite them to join and also remove them if necessary.
Q4: Can I set collaboration projects to be accessed by different team members?
A4: Yes. For example, you can set a team member as Admin who will have access to all projects and manage team members of different projects freely. As for common team members, they are allowed to access the projects that they have joined. And you can add some guests who can only view projects and cannot modify anything.