


 Mockplus Classic

The way to edit “Data Grid” is very easy which is controlled by a set of text codes. Once you become familiar with the codes, you are able to edit “Data Grid” effortlessly.
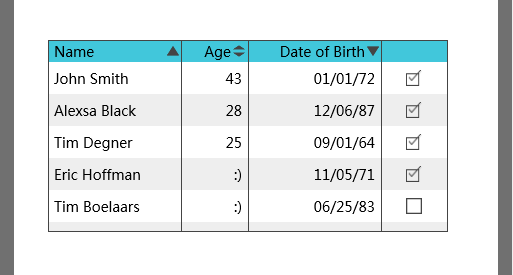
The picture below is a “Data Grid” in a Mockplus Classic project:
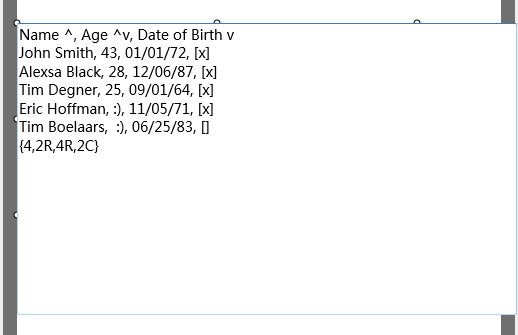
Double click the “Data Grid” to enable edit and you will see the text codes as shown below:
Complicated? Don’t worry, you will be able to decode the text in no time.
Let’s take a look at the first row (header) and the last row (column width control).
The first row: “Name ^, Age ^v, Date of Birth v”
This means: this table has three columns, which are Name (A to Z), Age (Custom Sort), Date of Birth.
The last row: “{4,2R,4R,2C}”
“2R” means the width of the second column is 2/ (4+2+4+2), and it is aligned to the Right(R). In the same manner, L means aligned to the Left, C means aligned in the Center.
The second row: “John Smith, 43, 01/01/72, [x]”
This means: the name is John Smith, age is 43, date of birth is 01/01/72. The“[x]” in the end means that this row has an check box, and its status is checked. In the same manner, the “[]” in the end means that this row has an check box, and its status is unchecked.
(Tip: if you want to input a lot of data in the “Data Grid” , the best way is to input all the data in your favorite text editor beforehand and then copy them into the project all at once.)
In addition, you can also change other “Data Grid” properties in the property panel.