Usually, one page represents one state. But sometimes designers need to show the same page in different states. When one page has multiple states, it's usually hard to view, manage, and see the difference between them. The more we have multi-state pages in our design, the harder it becomes to view and manage them.
How to solve this problem? Fortunately, we have Mockplus Cloud. In the last article, we will show how to compare design pages for specific differences using a feature called State Page. We hope that this feature can improve your efficiency and productivity.
What is the State Page?
Before we learn about State Page, let's learn about multistate elements first. Multistate elements are UI elements that change their state on user action (i.e., on hover or click). For example, an icon can change its color or (and) size on user interaction.

(Multistate Elements)
The State Page is a page that contains multiple switchable copies that represent different states of that page. All states are slightly different from each other.
What can the State Page do for designers?
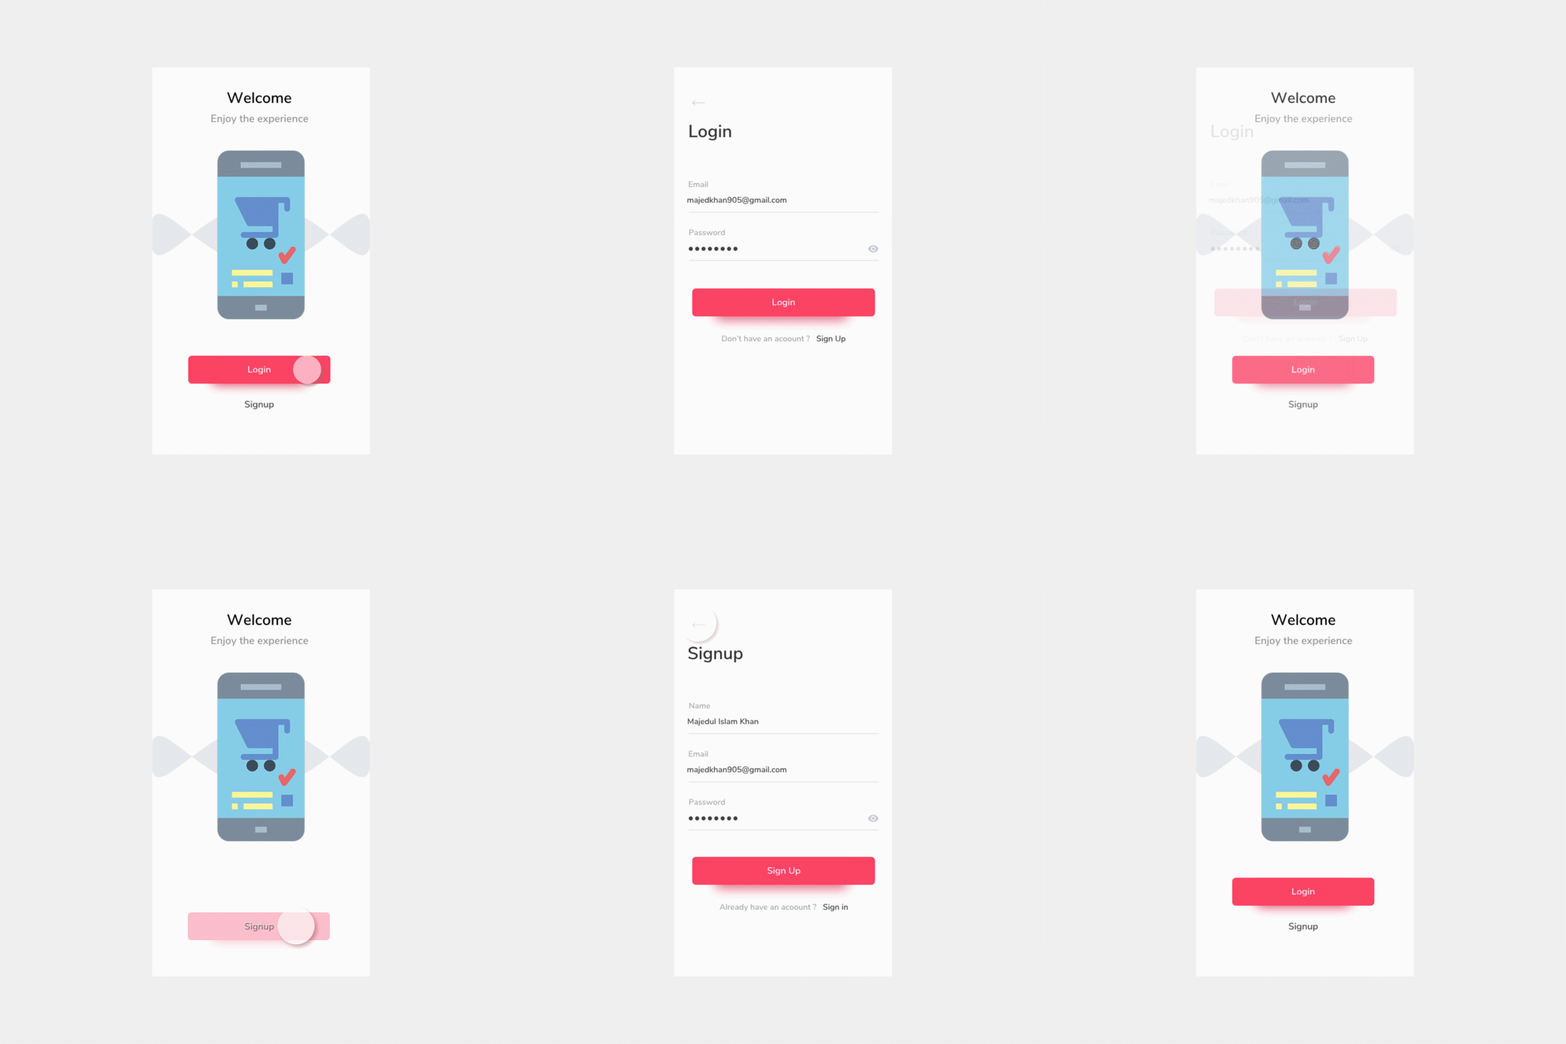
As shown in Figure 2, the Welcome UI has three states—Welcome, Login, and Signup. It's tedious and time-wasting for designers to create an individual page that will represent every state. State Page helps designers to upload similar pages with one click.
Usually, designers create multiple designs on an artboard in Adobe Photoshop. However, too many pages in a project make it hard to manage. So the designers have to group the project pages.
Then, designers desperately need a tool that will allow them to upload multiple copies with different states to one page for further online collaboration and development.
How does the State Page work?
In this article, we will show how to work with Adobe Photoshop plugin. Sketch and Adobe XD plugins are basically the same in terms of experience.
Step 1: Download PS plugin and install it
https://idoc.mockplus.com/download/ps
Step 2: Upload State Page(s)
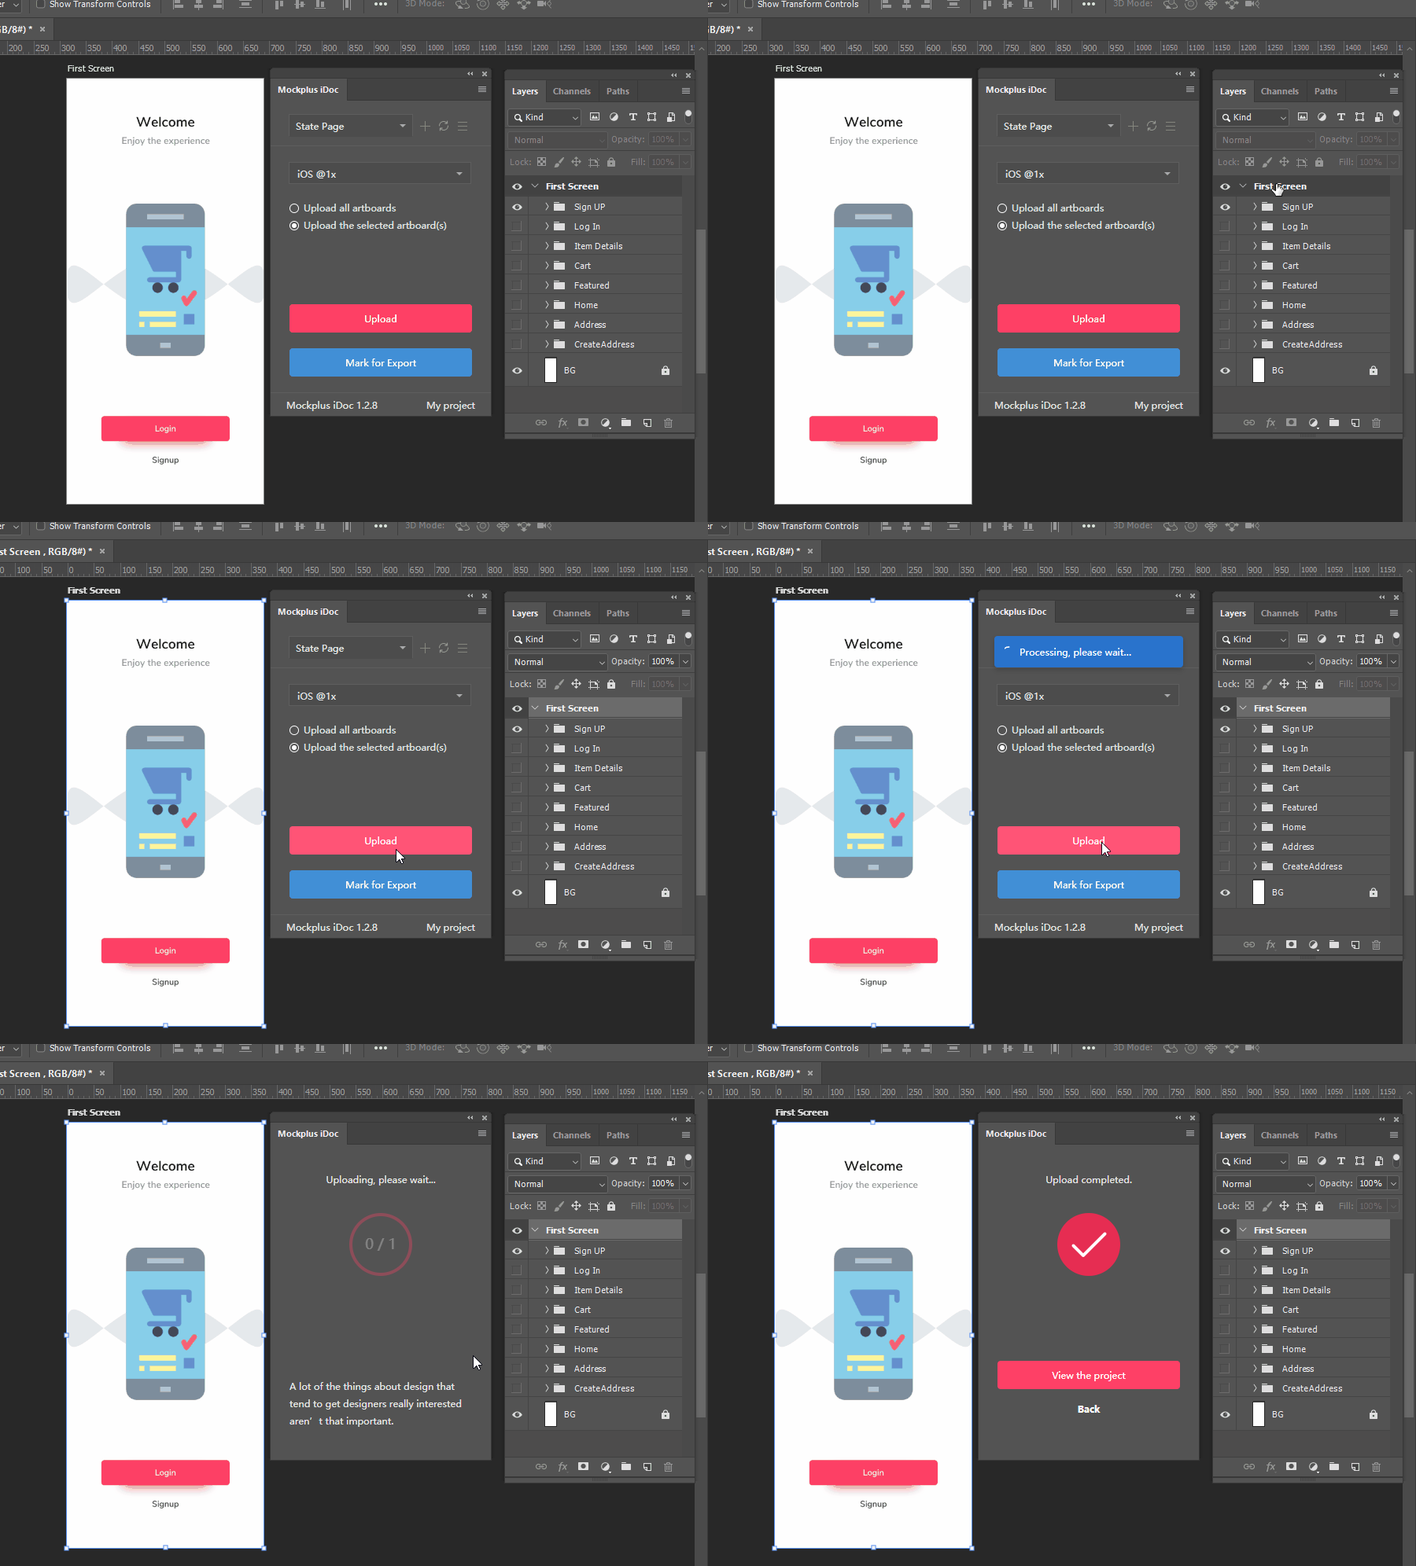
1. After you finish your design, select a single artboard in PS, select the “Upload the selected artboard(s)” option and click the “Upload” button to upload it.
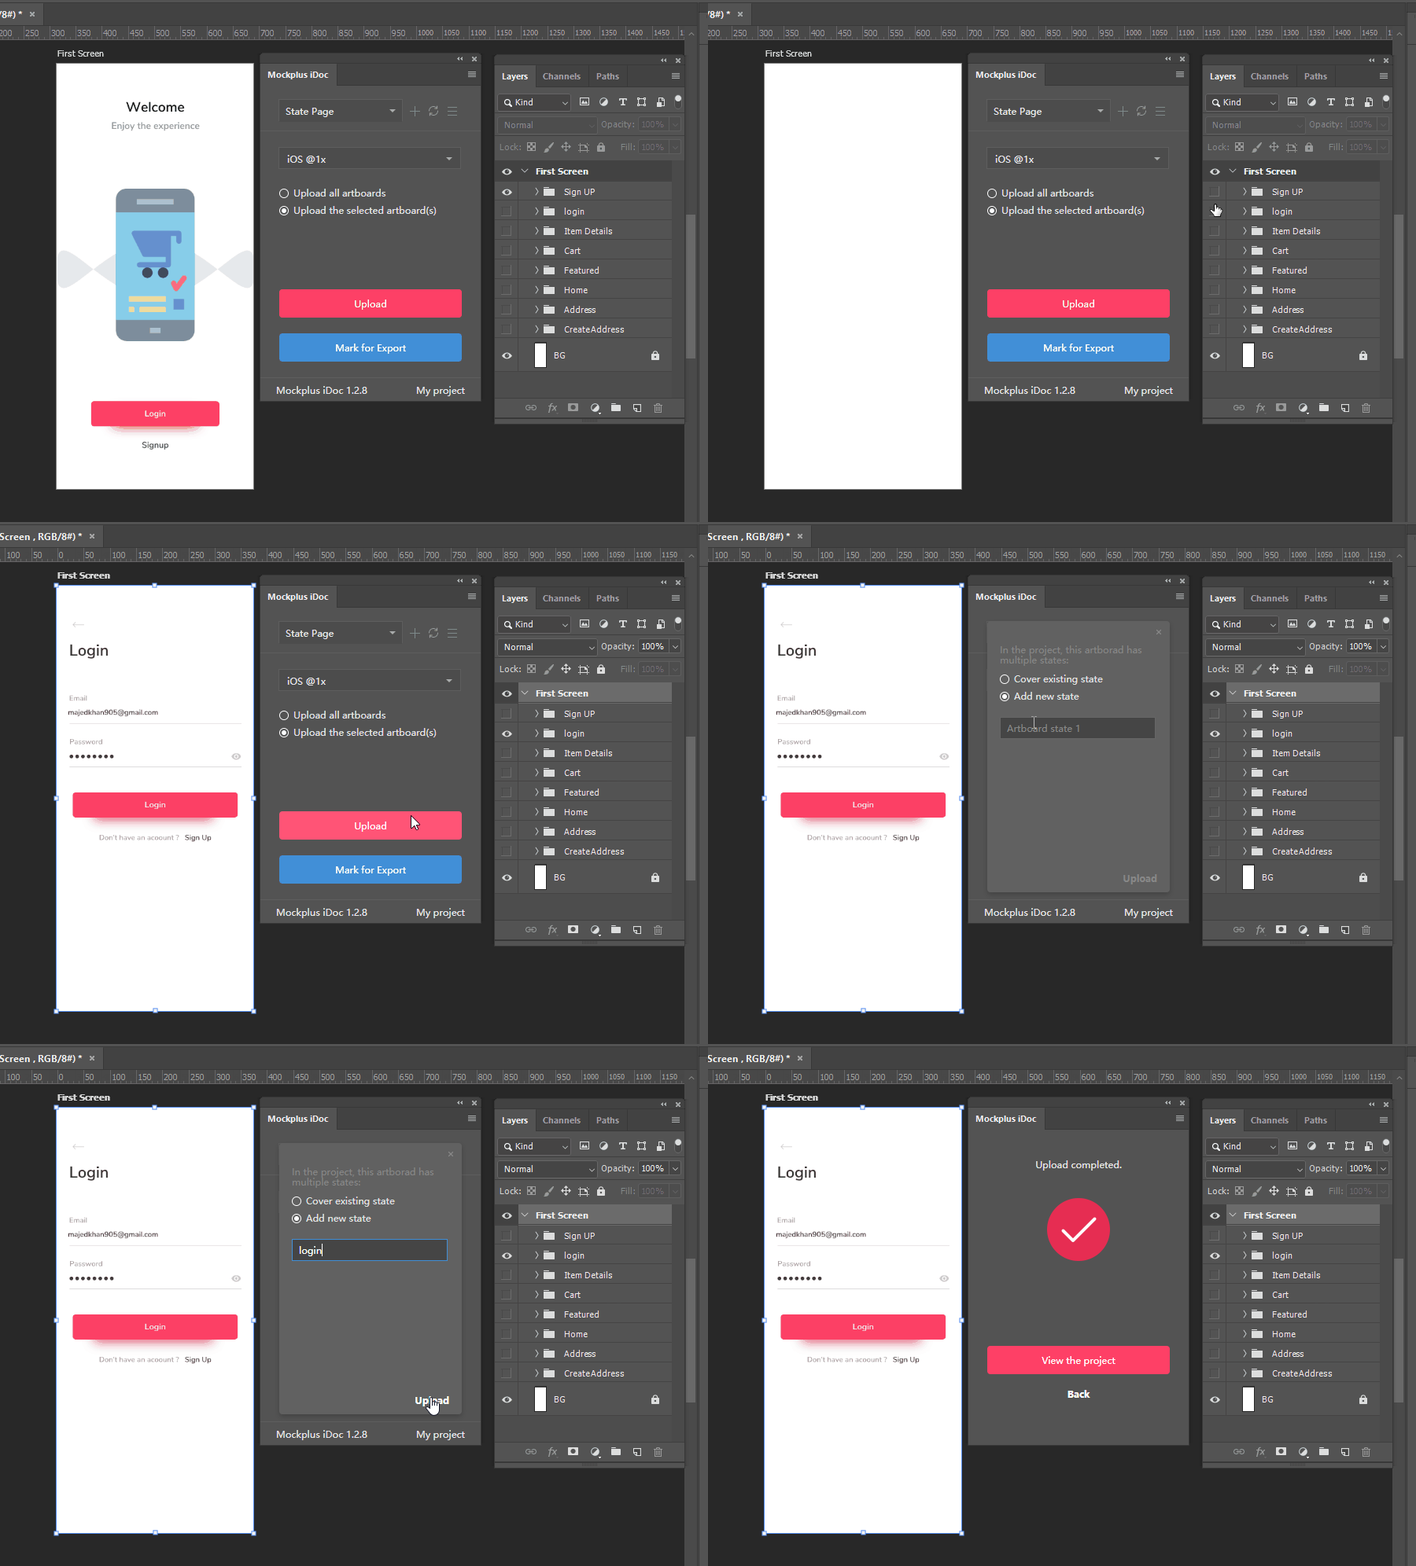
2. If you modify/edit artboard after uploading, you can upload it again by selecting “Upload the selected artboard(s)” and choosing “Add new state.”
If it is only one artboard there, select the visual relationship between it and the group. If you need to replace the existing design, select the “Cover existing stage” option, and choose the replacement.
After the uploading is completed, you can view and manage the State Page in Mockplus Cloud. Here is what you can use:
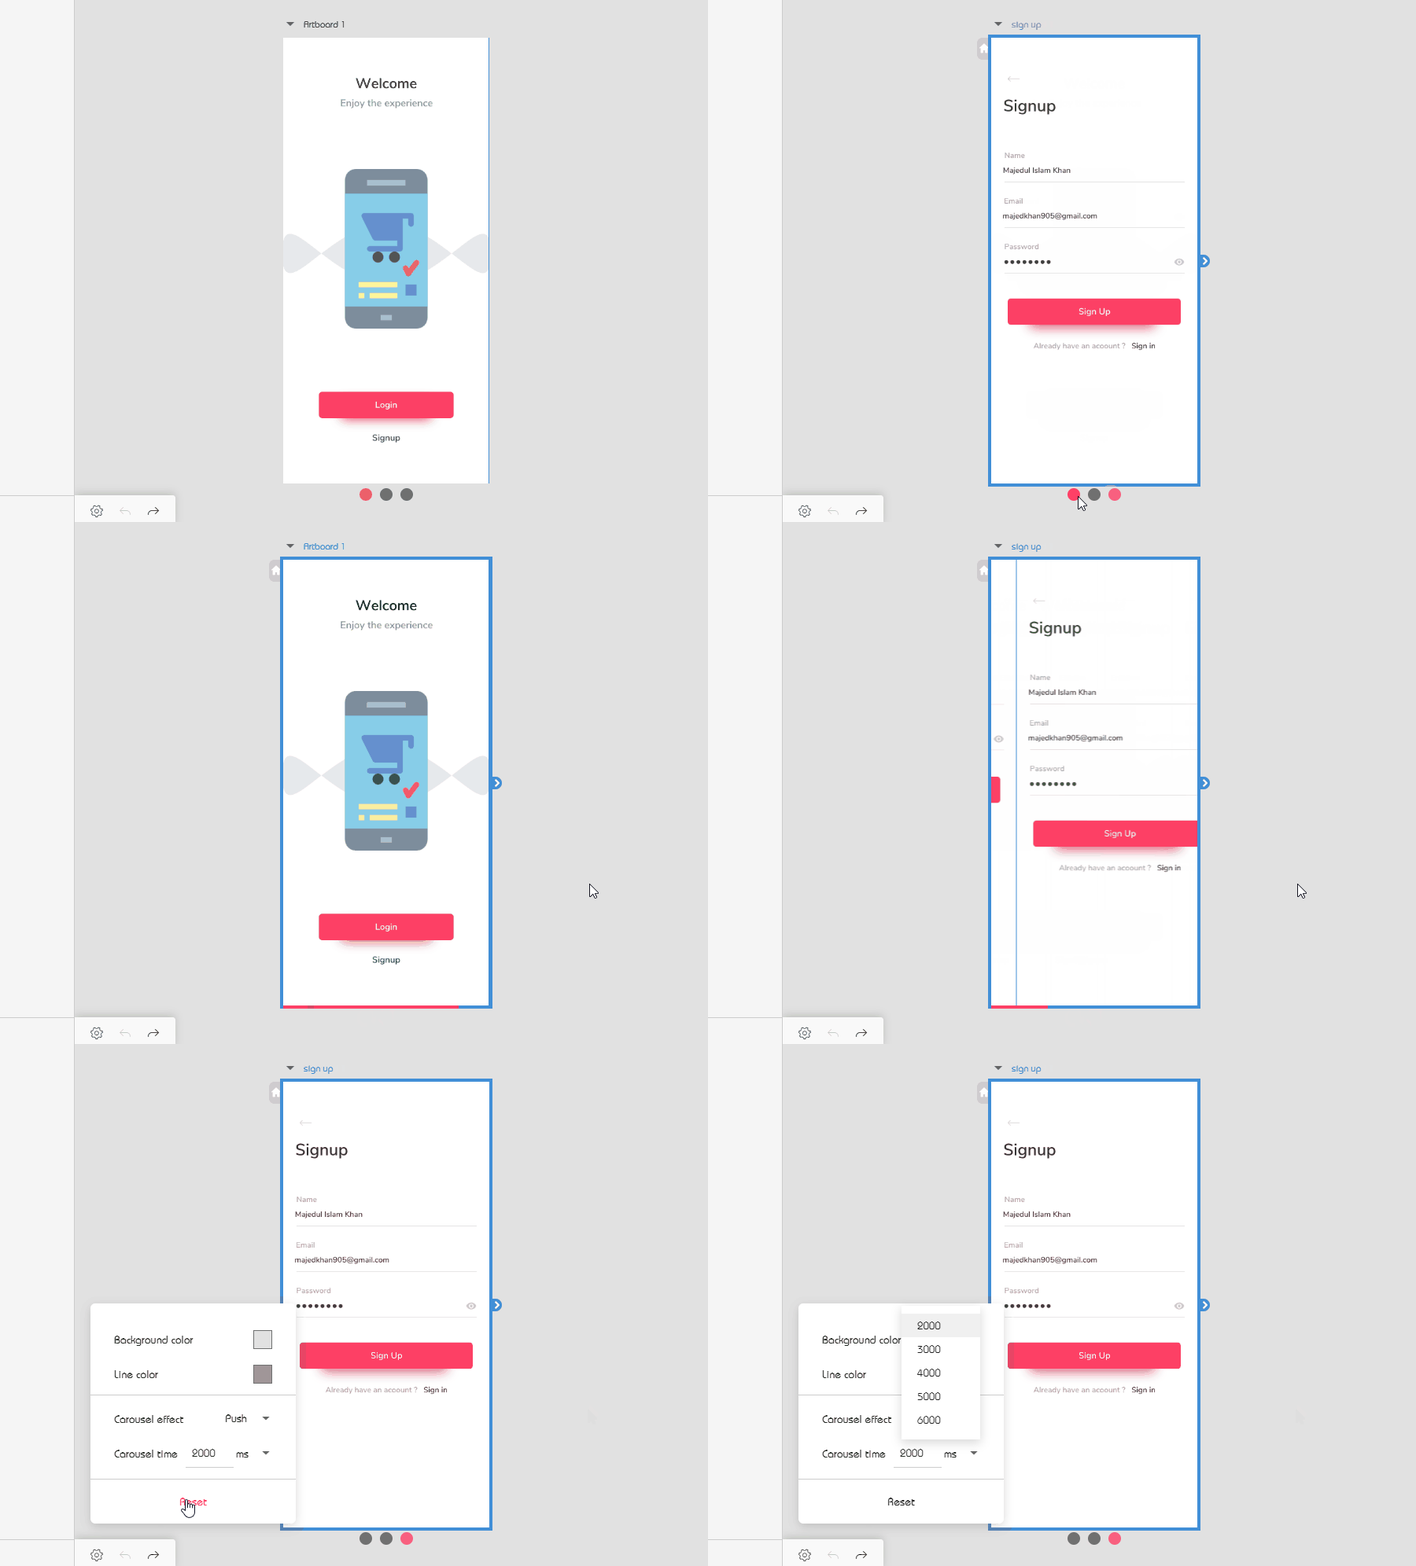
1. State Page Carousel
The State Page carousel allows changing states by click or automatically. Also, you can customize the animated effect and timing.
2. Merging and Separating State Pages
You can merge and separate State Pages.
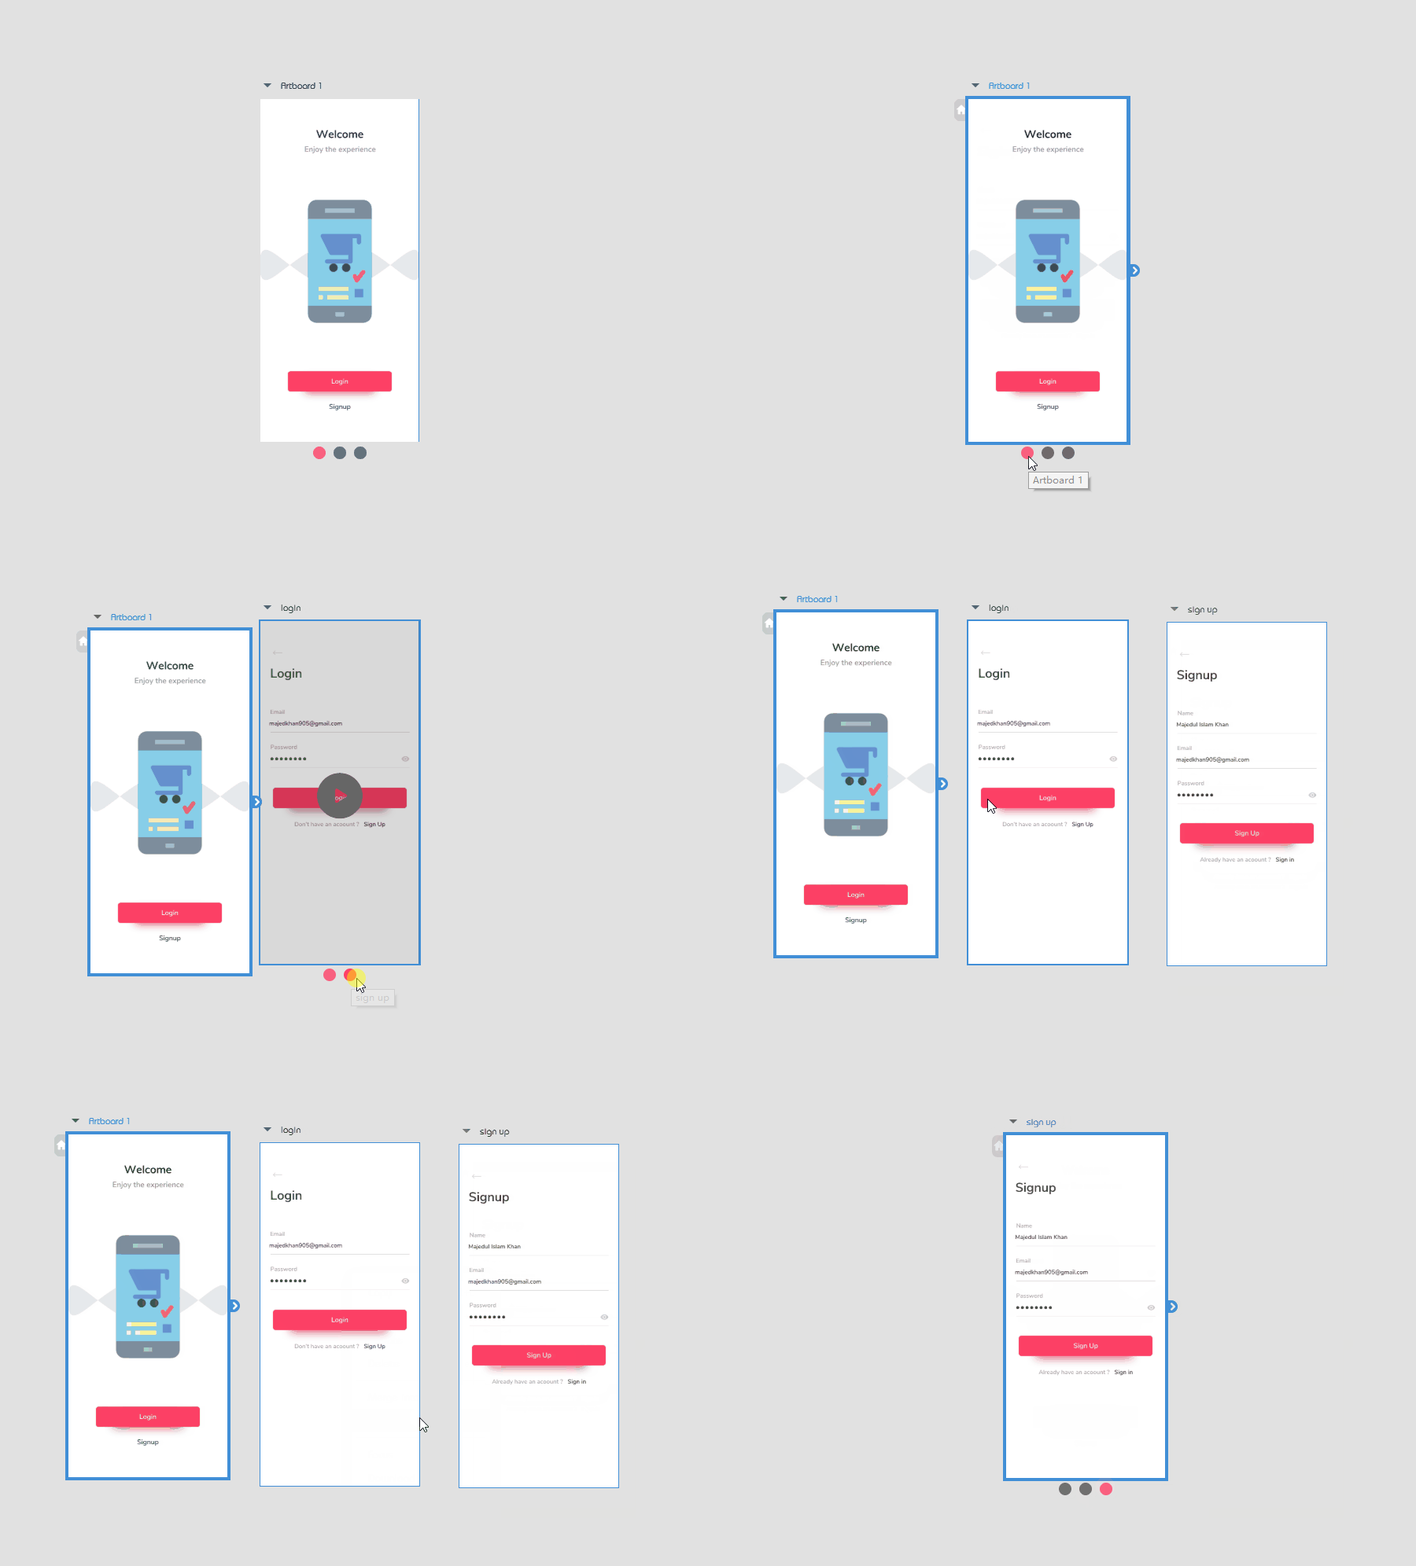
Here is a quick tutorial on how to merge and separate State Page in Mockplus Cloud: https://help.mockplus.com/p/239#2
Try Mockplus Cloud now:https://idoc.mockplus.com/


