


 Mockplus Classic

Start your 15-day free trial
To show our appreciation to designers worldwide, we grant every new user a 15-day free trial. Download and log into Mockplus Classic desktop app and your free trial will start automatically.
During this period, you can freely access all premium features.
After the free trial, your account will be automatically downgraded to the free edition, and all free features will be available forever.
If you wish to continue using premium features (such as exporting to HTML/images/demo packages, syncing component and master libraries, etc.), you will need to upgrade your account.
Sign-up
There are two ways to create a new Mockplus account:
1. Sign up in browser
Step 1 Go to Mockplus website
Step 2 Click "Get Started for free"
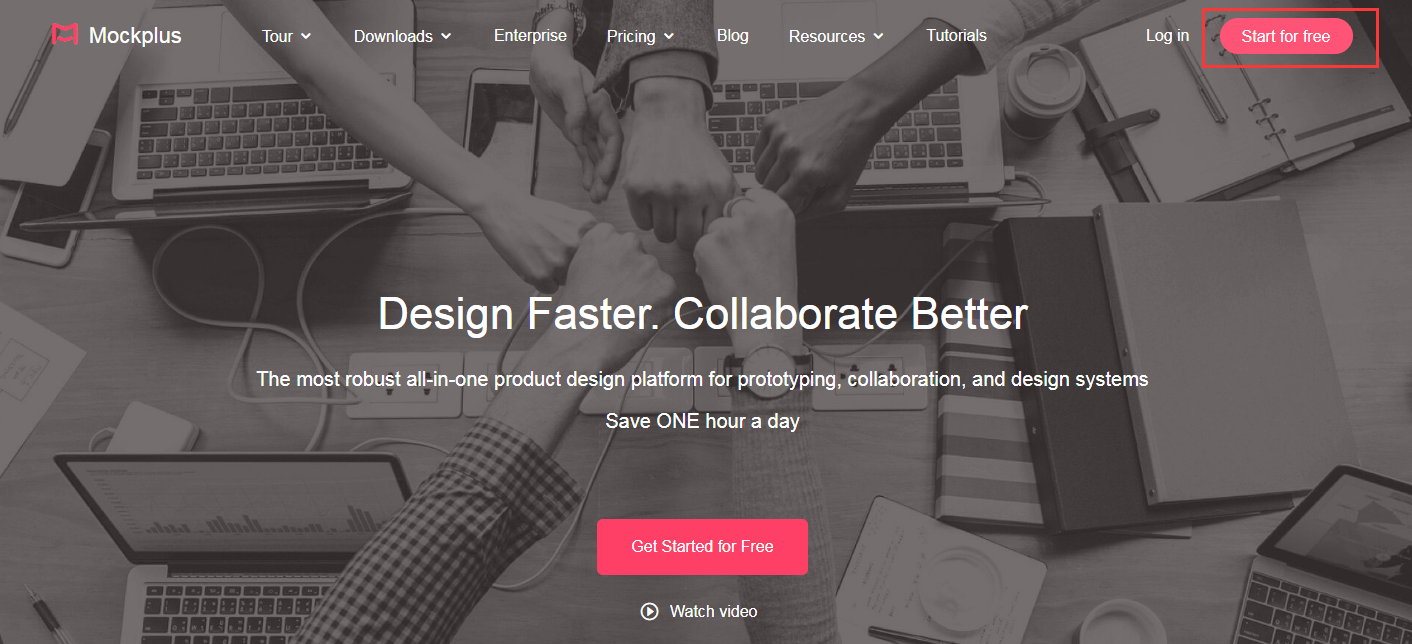
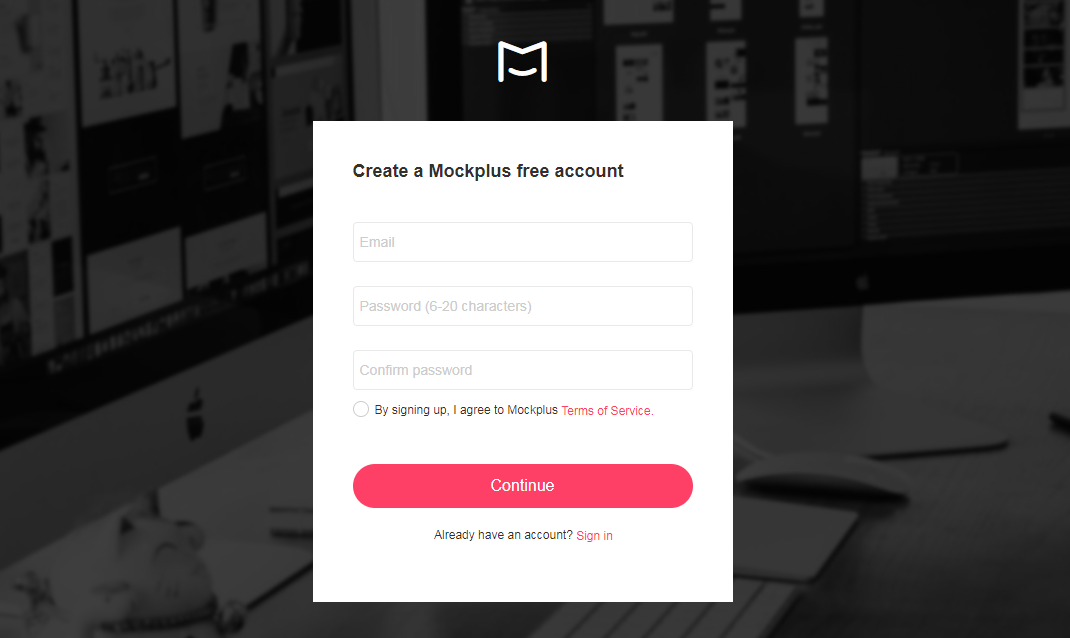
Step 3 Enter your email and password in the sign-up window to create a new account.
2. Sign up in desktop app
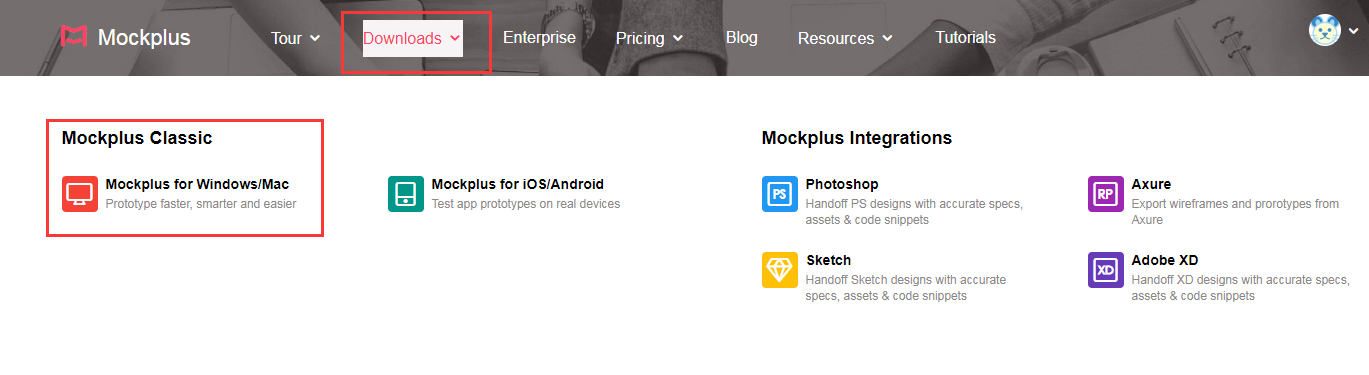
Step 1 Go to Mockplus website
Step 2 Download Mockplus Classic desktop app
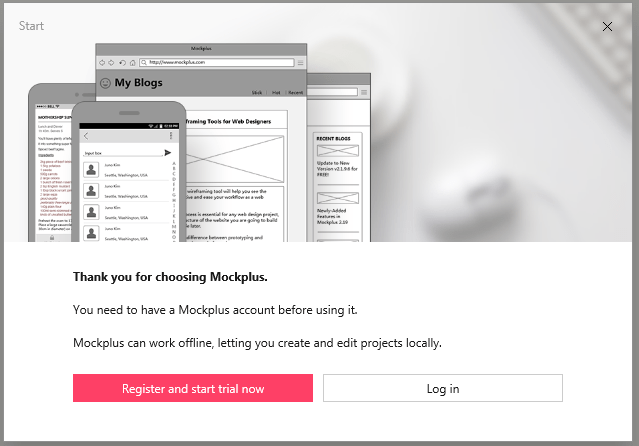
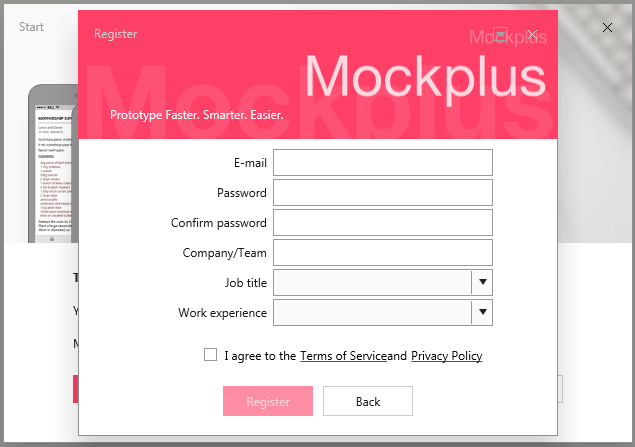
Step 3 Install and launch the desktop app on your computer. Then, click "Register and start trial now"
Step 4 Fill in your information to create a new account.
Log-in
Launch your Mockplus Classic app, and enter your email and password in the sign-in window to log into your account.

Please note:
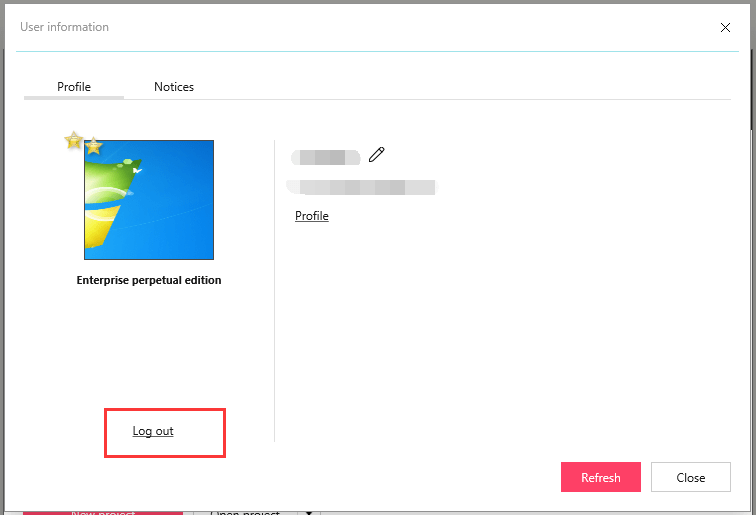
To log out, you need to click on your avatar in the upper right corner:

Press "Log out" in the appeared account window:
Account settings
Set up your account
To access your account’s settings, you need to: Click on your avatar in the upper right corner.
In the pop-up window, you can change your username and choose a new avatar. Here, you can also renew your subscription or upgrade your account to a higher edition.

Set up your Profile
Click "Profile" to edit your profile info:

Now you can see your profile page.

There are several things you can do here:
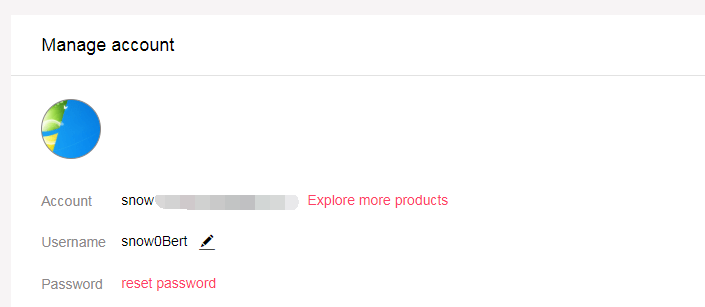
- Edit your account info: Update your username, avatar and account password.
·
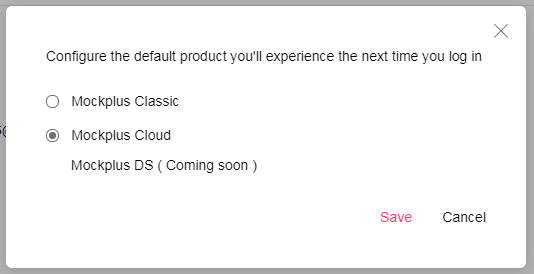
- Set a default product: Click "Explore more products" and select a default product. You will be taken to default product every time you log into Mockplus website online in the future.
·
- Check payment details: Check your payment plan, pricing info, checkout time and payment method.

- View account expiry date
Please note:
The expiration info of all your Mockplus products is displayed there. Switch the product tabs to view the details.
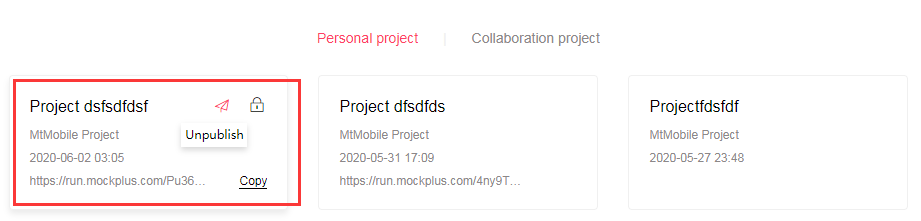
- Manage your projects: All your personal and collaboration projects are listed there, giving you a quick way to publish or unpublish them according to your needs. You can also copy the preview link to share projects with your team and protect it with a password to ensure the security of your data.
Add a team member account
When working on a project collectively, you will sometimes need to add new members to your team. Check out how to add or remove members
Upgrade your account
After the free trial, you have an option to upgrade your account and access premium features here: Pricing
After you’ve successfully completed the purchase, your account can be upgraded in two ways:
Auto upgrading
The account that you've used to log into the pricing page will be automatically upgraded after the purchase.
Launch your Mockplus Classic desktop app and log in with the upgraded account to freely access all the premium features.
License upgrading
However, when using the group buying option, you will receive a number of licenses. You will need to manually assign these licenses to your team members or colleagues to upgrade their accounts individually.
Here is a quick guide on upgrading accounts with licenses:
Step 1 Log into Mockplus website with the account that you want to upgrade.
Step 2 Go to license upgrading page:https://www.mockplus.com/user/upgrade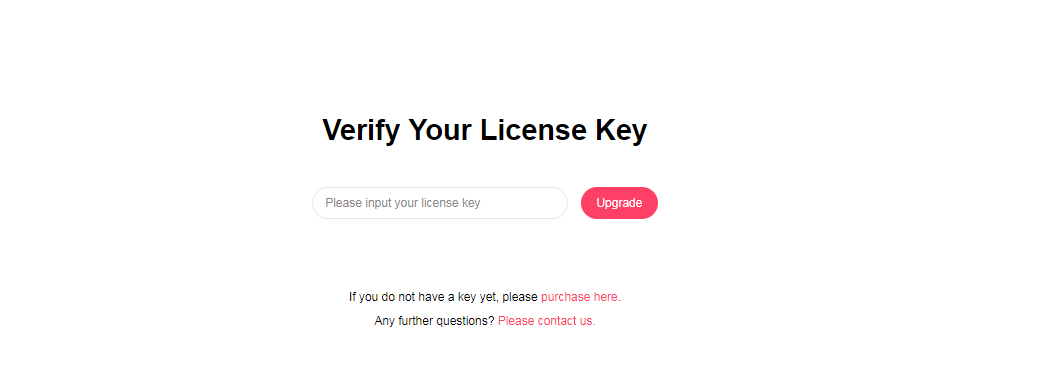
Step 3 Enter your license to upgrade the account.
Now, the account that you've used to log in has been successfully upgraded.
Please note:
Once you've done with these steps, the account that you've used to log in with will be automatically upgraded. So, before entering the license, make sure to log in with the right email account - the one that you or your partner will really use to complete design projects in the future.
Transfer accounts
To transfer an account to a different user, you need to contact us at support@mockplusapp.com and include the information below in your email:
- Reasons to transfer your account
- Purchase order number and invoice
- The original and the target accounts
We will review and process your request as soon as possible.
Please note:
This option is available only for paid accounts.
If you are using a free account and need to change the email for some reason, you can easily save all your projects on your local drive and create a new account with your new mailbox.
Account Q&A
Can I use my account together with friends or colleagues at the same time?
Unfortunately, you can’t. According to our Mockplus Classic Terms of Service, one account can only be used by a single user.
Can I use one Mockplus Classic account on different devices?
Yes. Just install Mockplus Classic desktop app on your new device and log in with the same account to continue working on your projects.
To avoid various issues with your account, we recommend having logged on one single device at a time.
Can I continue working on my project after my 15-day free trial or Pro subscription has expired? Or do I have to start over?
Even after your free trial or Pro subscription has expired, all your projects are saved and you can continue designing without any obstacles.
However, in order to access some premium features, such as exporting your designs to HTML/image/demo package, you will need to upgrade your account.
How can I turn off auto-renewal subscription after upgrading my account?
Mockplus Classic subscription is auto-renewed by default. Learn how to turn off the auto-renewal subscription.
Where can I get my paid invoice?
The paid invoice (often in PDF format) will be automatically sent to the billing delivery email (the one that you left during the purchase, check the image below) after the purchase.

Check that email to find your invoice.